
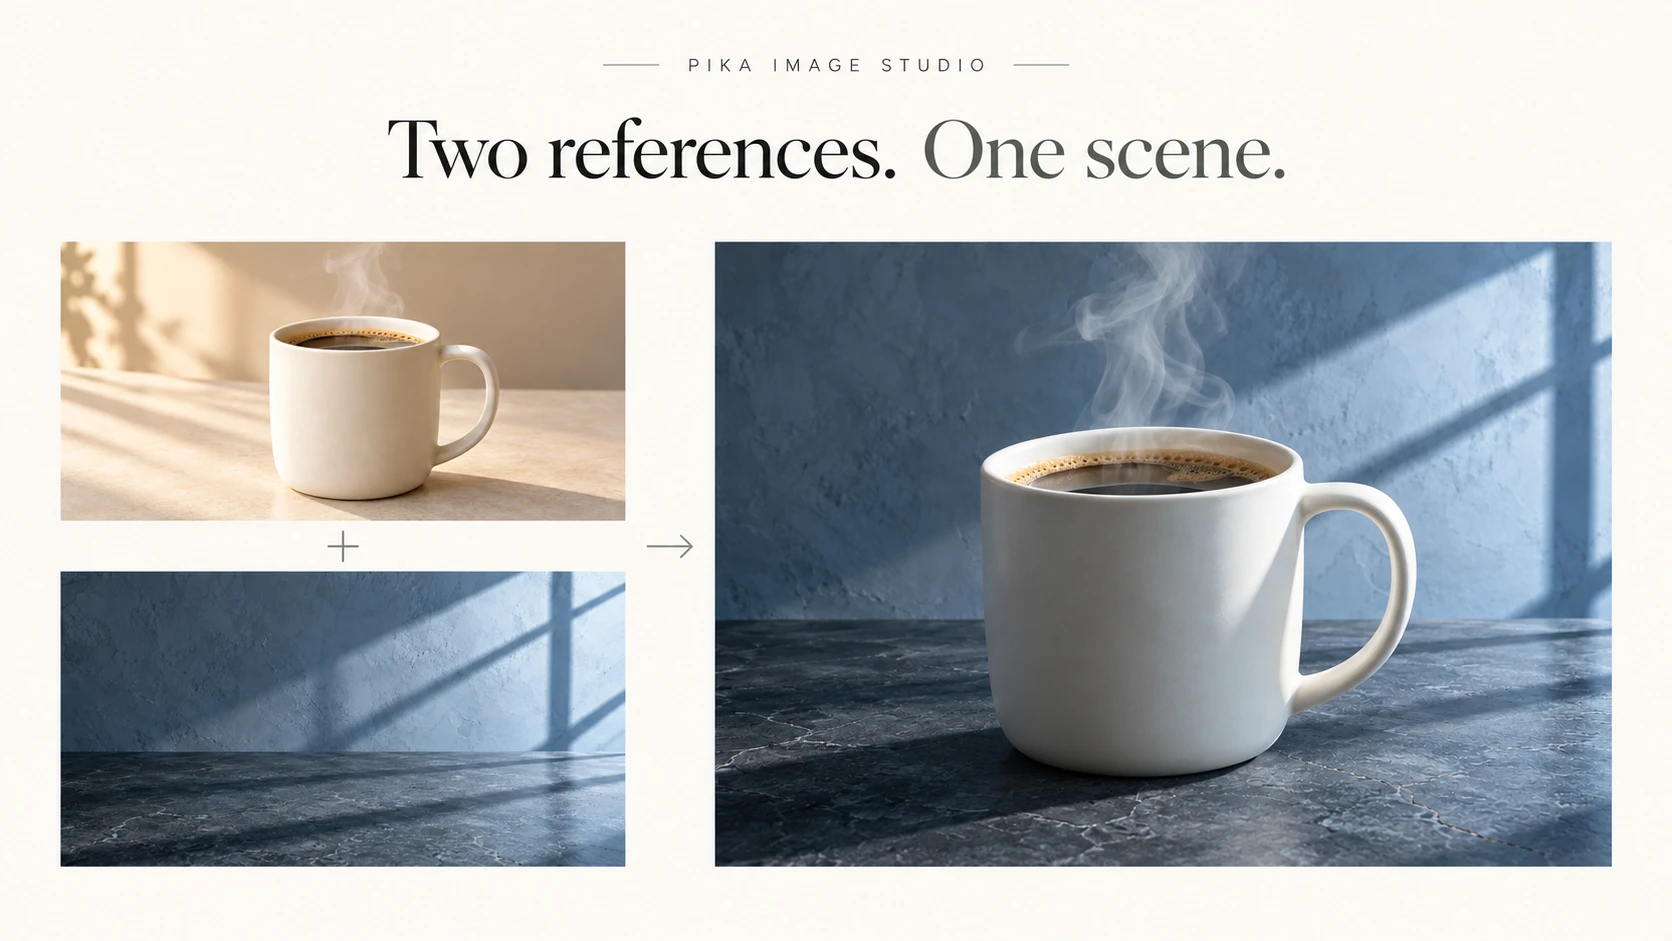
Yes, Pika Image Studio lets you attach multiple references and @mention them to explain what each should control. We tested a warm-lit mug against a cool-lit background, then changed the instructions while keeping the model, references and output settings fixed.
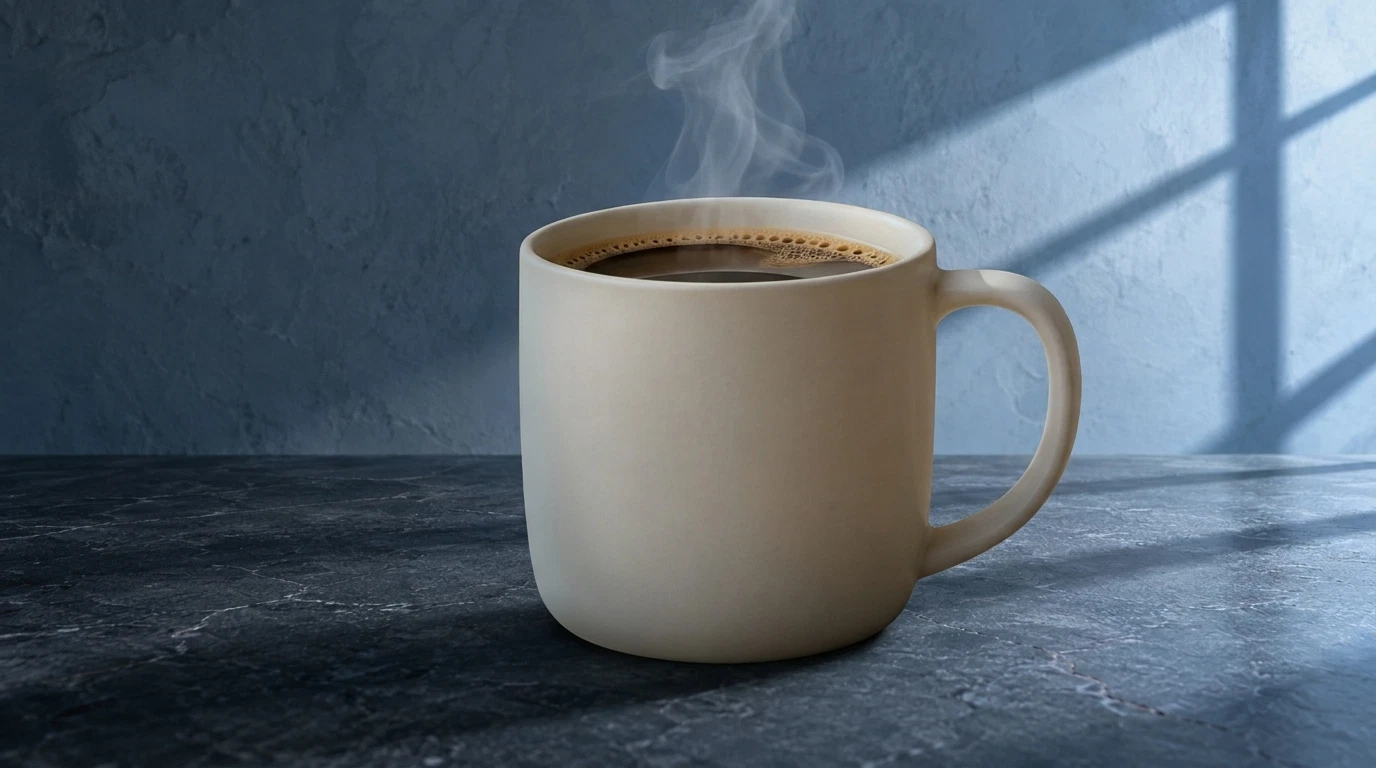
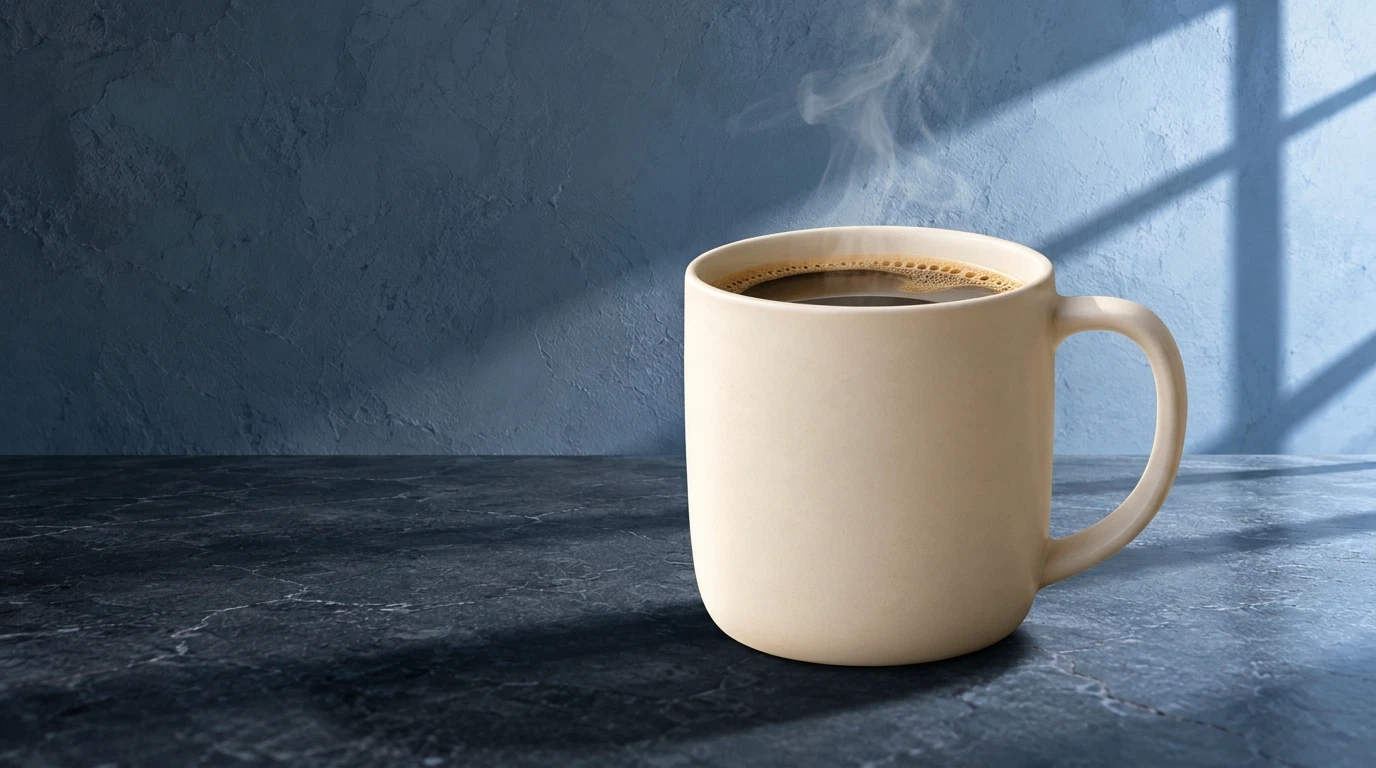
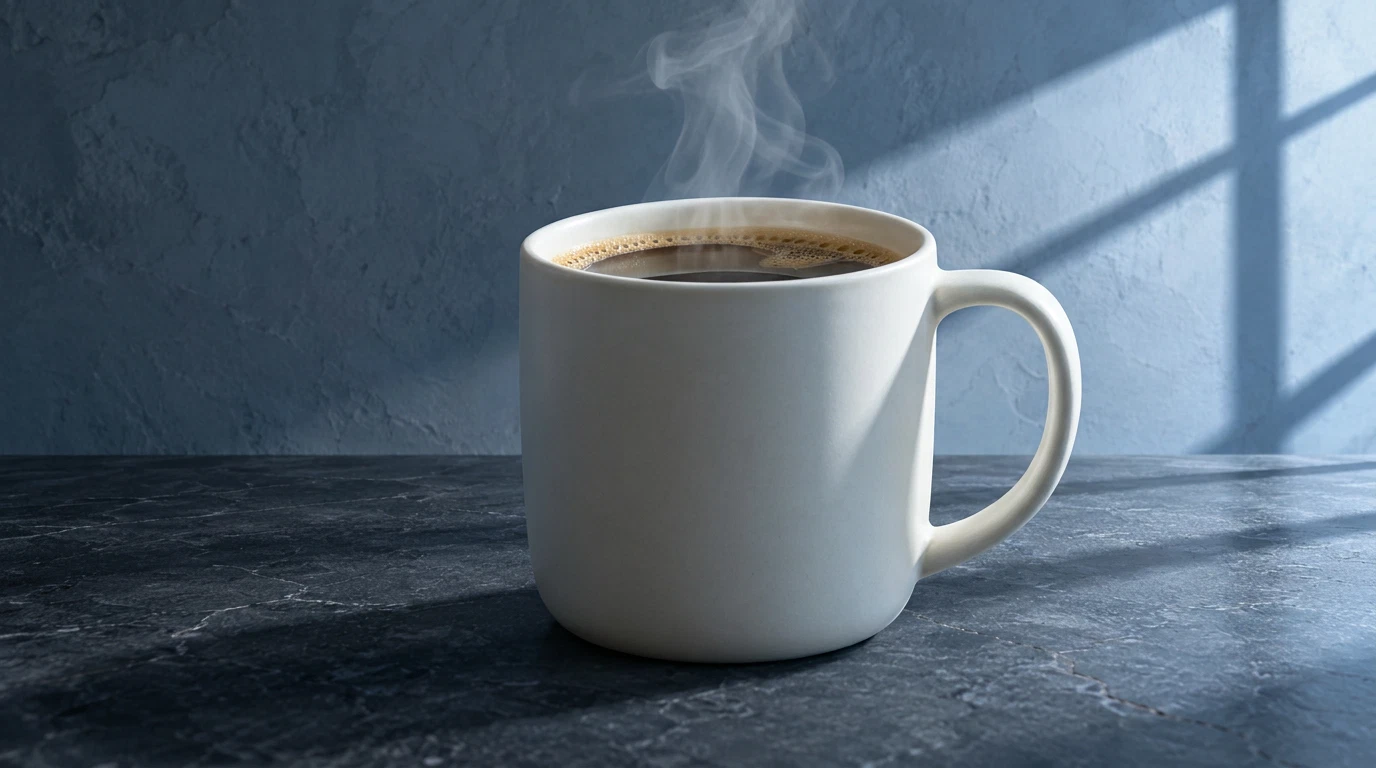
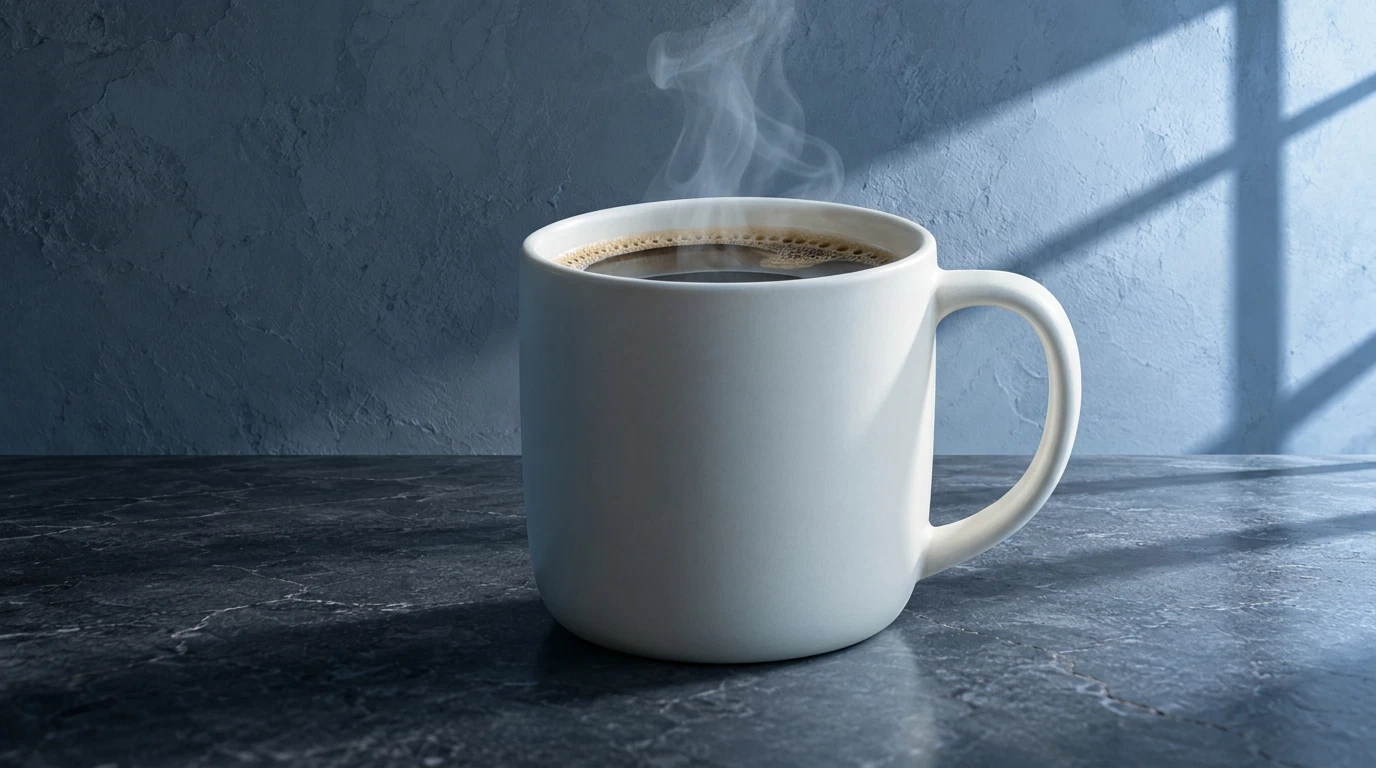
The useful difference came from naming the light direction. Assigning a subject and background helped describe the job, but did not by itself settle the lighting conflict. Below are all four real Pika results, followed by the exact steps and prompts. The four images used 17 credits in total.
Jump to the lighting prompt · See the two references · Start the walkthrough
What is Pika Image Studio?
Image Studio is Pika’s interface for generating still images from a prompt and optional reference photos. You can select an image model, set the image shape and resolution, choose a file format and request a number of generations.
It suits a product creator who wants to place an item in another setting, a designer combining a subject with a style reference, or a beginner making an image to animate later. For a change to an existing picture, our Edit Image guide explains that separate workflow.
The official Image Studio page advertises up to 16 references and explains that @mentions specify their roles. Start with the fewest images that describe your task. More attachments also create more details for the model to reconcile.
Use this guide when you want to:
- Keep a subject from one photo and use a setting from another.
- Tell Pika which image supplies the product, background or style.
- Resolve warm versus cool lighting or opposite light directions.
- Compare a prompt change before spending credits on more versions.
Prepare two references with clear jobs
Our first image contains an ivory mug, coffee and steam in warm light from the left. The second is an empty slate tabletop and blue-grey wall with cool light from the right. The opposing directions and colours give us something specific to examine.
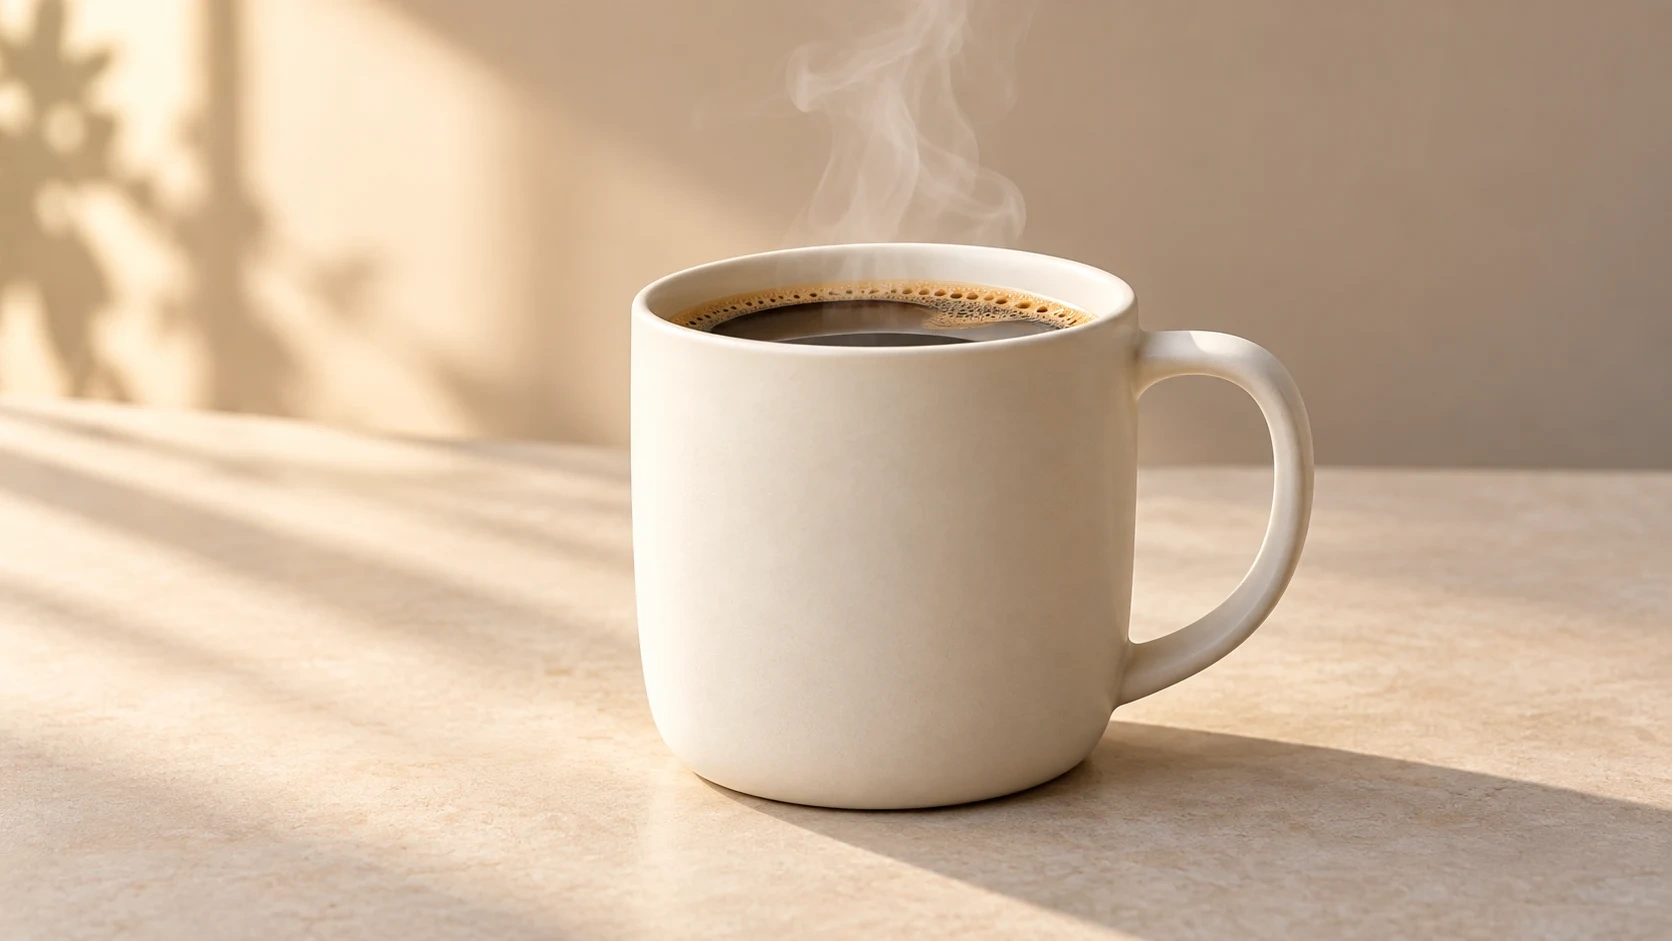
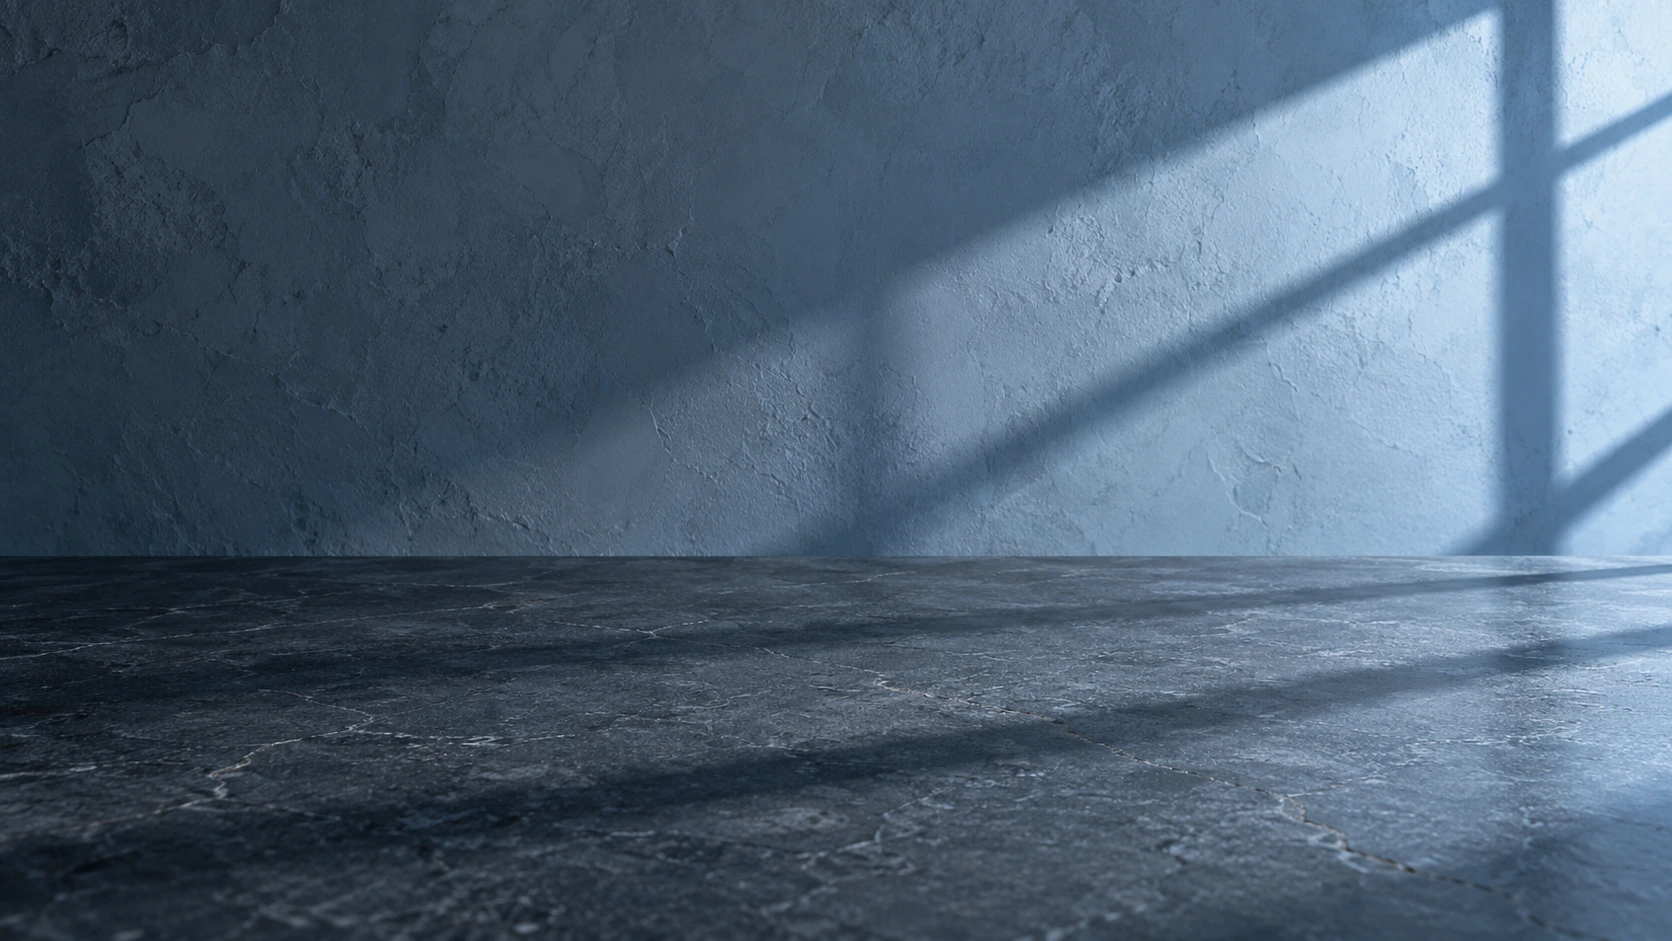
Both references are prepared AI images. We reused the mug from our image-to-video guide and created the empty setting for this comparison. The four results above were generated through Pika in the browser.
Download the mug reference · Download the background reference
Before uploading your own files:
- Use a subject photo with the whole object in frame.
- Choose a background with enough space for that object.
- Notice where the light comes from in each photo.
- Decide which photo controls the final lighting.
- Use images you have permission to upload and edit.
Step 1: Open Image Studio
From Pika’s Create page, choose Image Studio. The prompt box, References area and settings appear on the left. The app explanation appears on the right before your first generation.
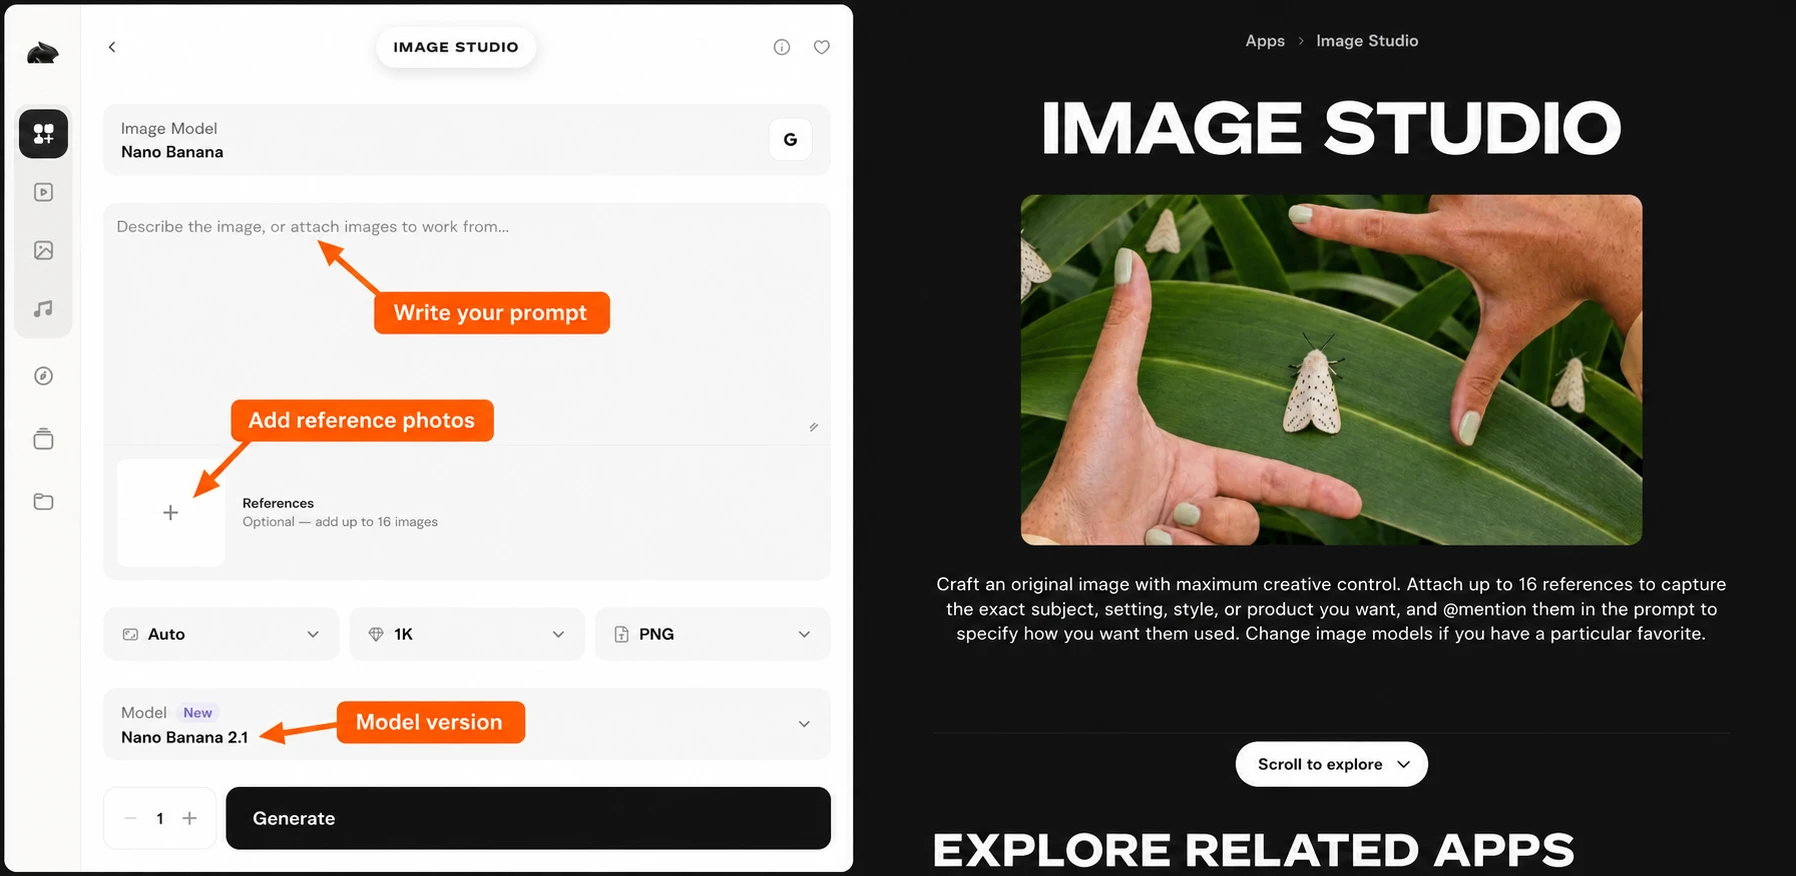
Image Studio is the app; the selected image model creates the picture. After submitting our first request, Pika opened a project labelled Nano Banana 2.1. That project kept the references and settings available for the next comparison.
Step 2: Upload and identify your references
- Select Add in the References area.
- In the asset picker, choose Upload for files on your device. Existing assets can also be selected there.
- Upload the subject first and the setting second for this example.
- Wait for both thumbnails to finish uploading.
- Confirm the mug is Image1 and the background is Image2.
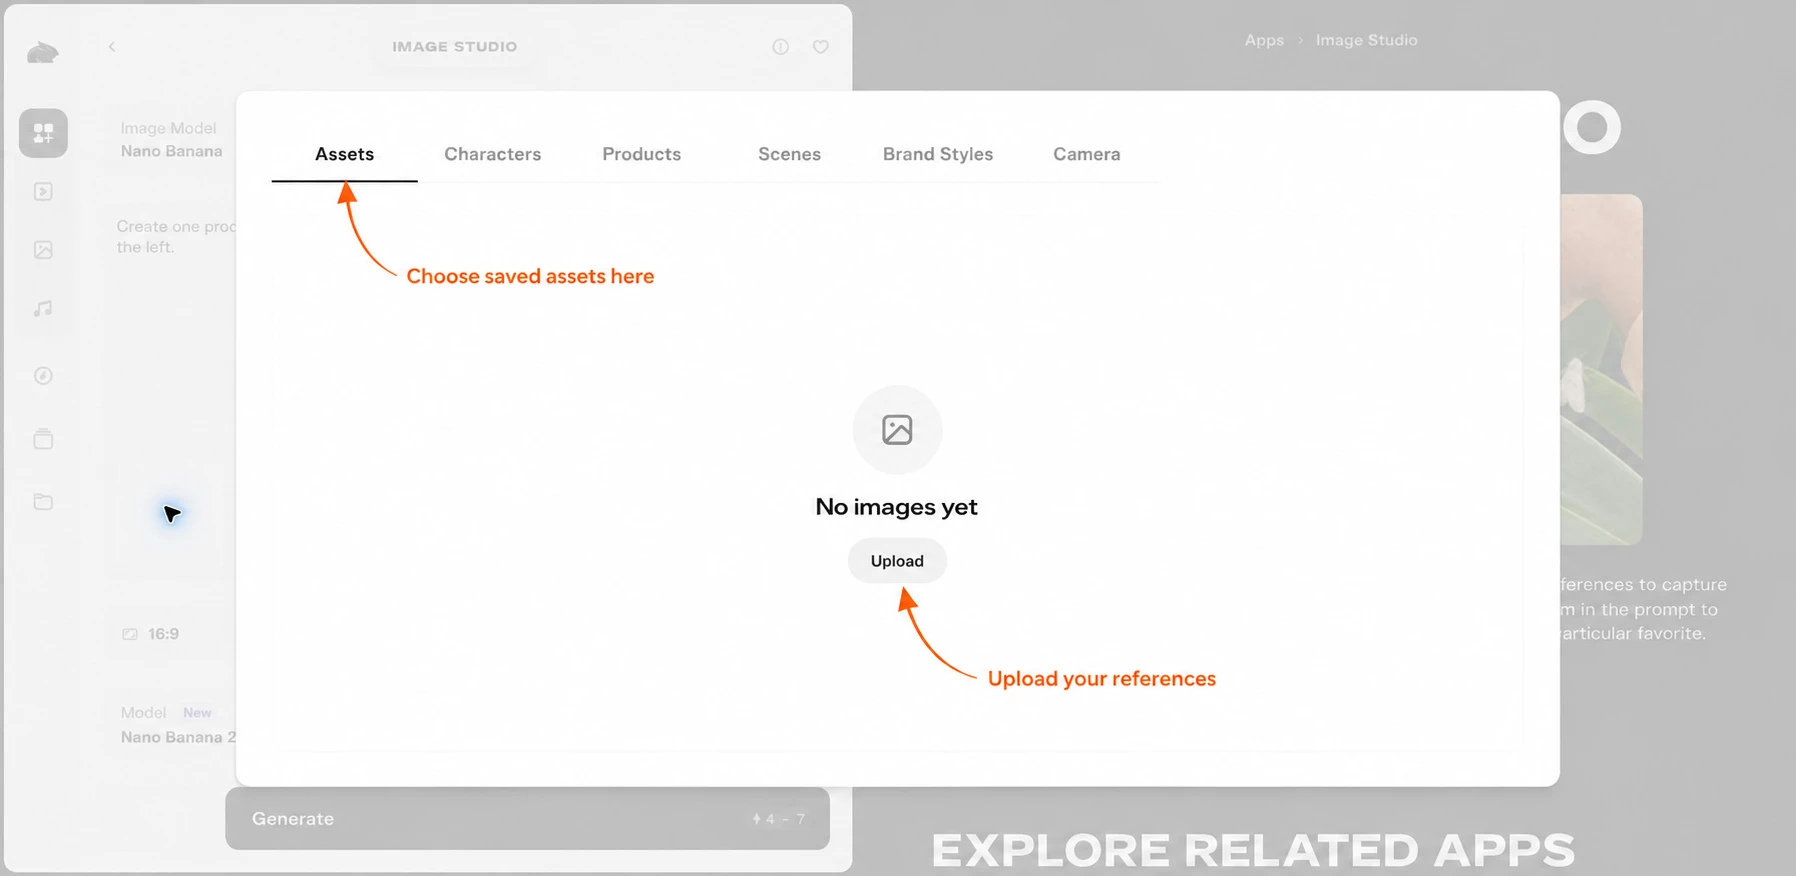
The asset picker showed Assets, Characters, Products, Scenes, Brand Styles and Camera. Those are ways to find saved material; you do not need to populate every tab to create an image.
Each attached image has a label, a remove control and a reorder handle. If you replace or reorder references, recheck their labels before sending the prompt. Our copied examples assume the mug remains Image1.
Step 3: Use @mentions to assign the subject and background
Type @ in the prompt to open the attached-reference menu, then choose the intended image. You can also click the Image1 or Image2 label on its thumbnail to insert a mention.
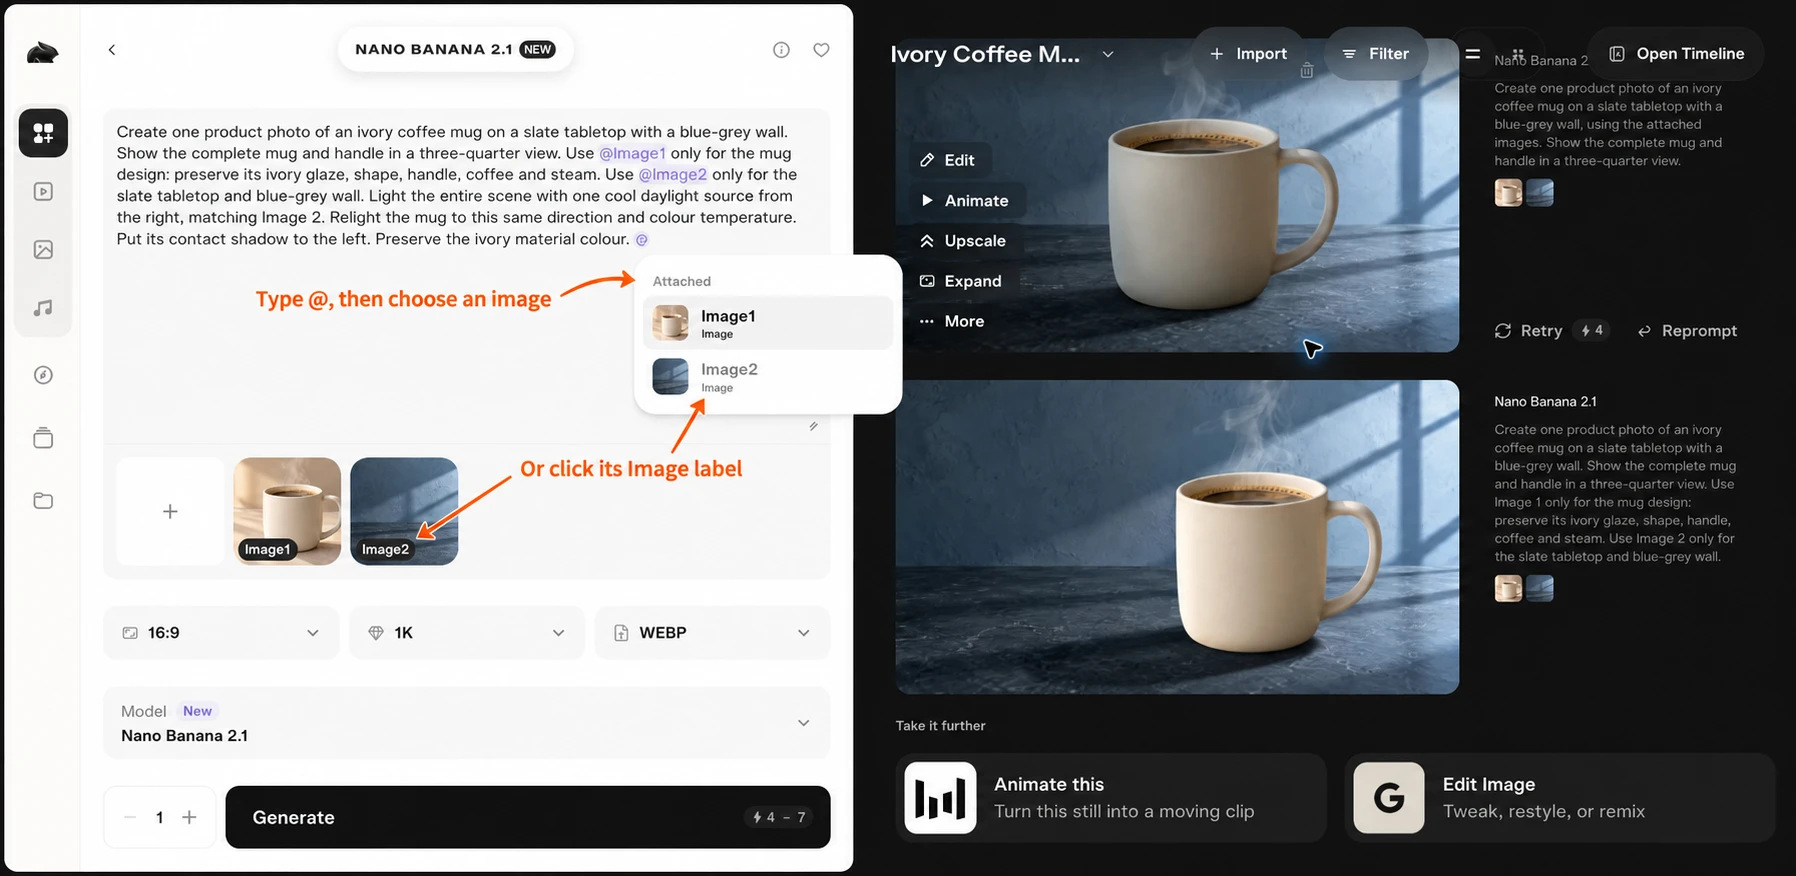
Give each reference a separate role:
- Subject: keep the object’s shape, material, colour and identifying details.
- Background: use the surface, wall, setting or composition.
- Lighting: state the direction, colour and shadow behaviour you want in the final scene.
For example, “Use Image1 for the mug and Image2 for the background” is a role assignment. “Use cool light from the right across the entire scene” is a lighting instruction. They answer different questions.
The copy buttons below copy prompt text. After pasting into Pika, check the @mentions and select the matching attached images if they remain plain text. In our project’s saved prompt, Pika displayed the selected references as “Image 1” and “Image 2.”
Step 4: Keep the model and settings consistent
We selected the Nano Banana family and Nano Banana 2.1 version for all four runs. Do not switch models halfway through a prompt comparison: that would change more than the instruction you are testing. To compare models instead, keep the prompt fixed and change only the model, as we did in our four-model image test.
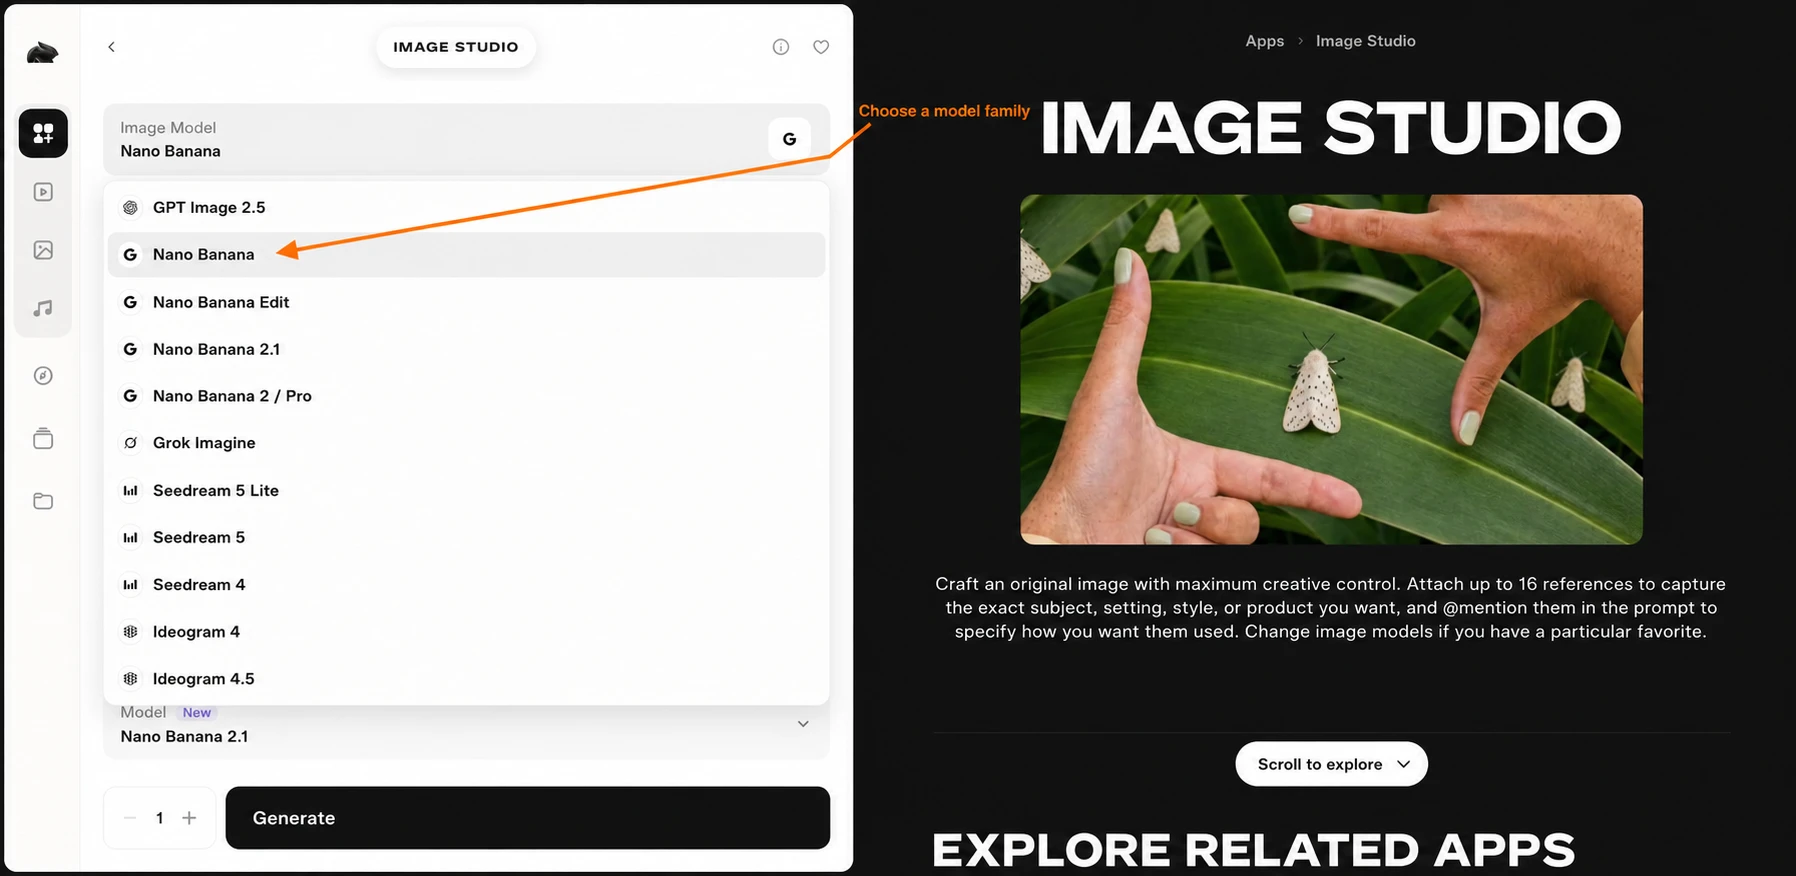
| Setting | Our selection | Why we kept it fixed |
|---|---|---|
| Model version | Nano Banana 2.1 | Compare prompts within one model |
| References | Same two files, same order | Preserve the source material |
| Aspect ratio | 16:9 | Keep the same frame shape |
| Resolution | 1K | Keep the test size consistent |
| Format | WebP | Save images ready for the guide |
| Generations | 1 per request | Review each result and its cost |
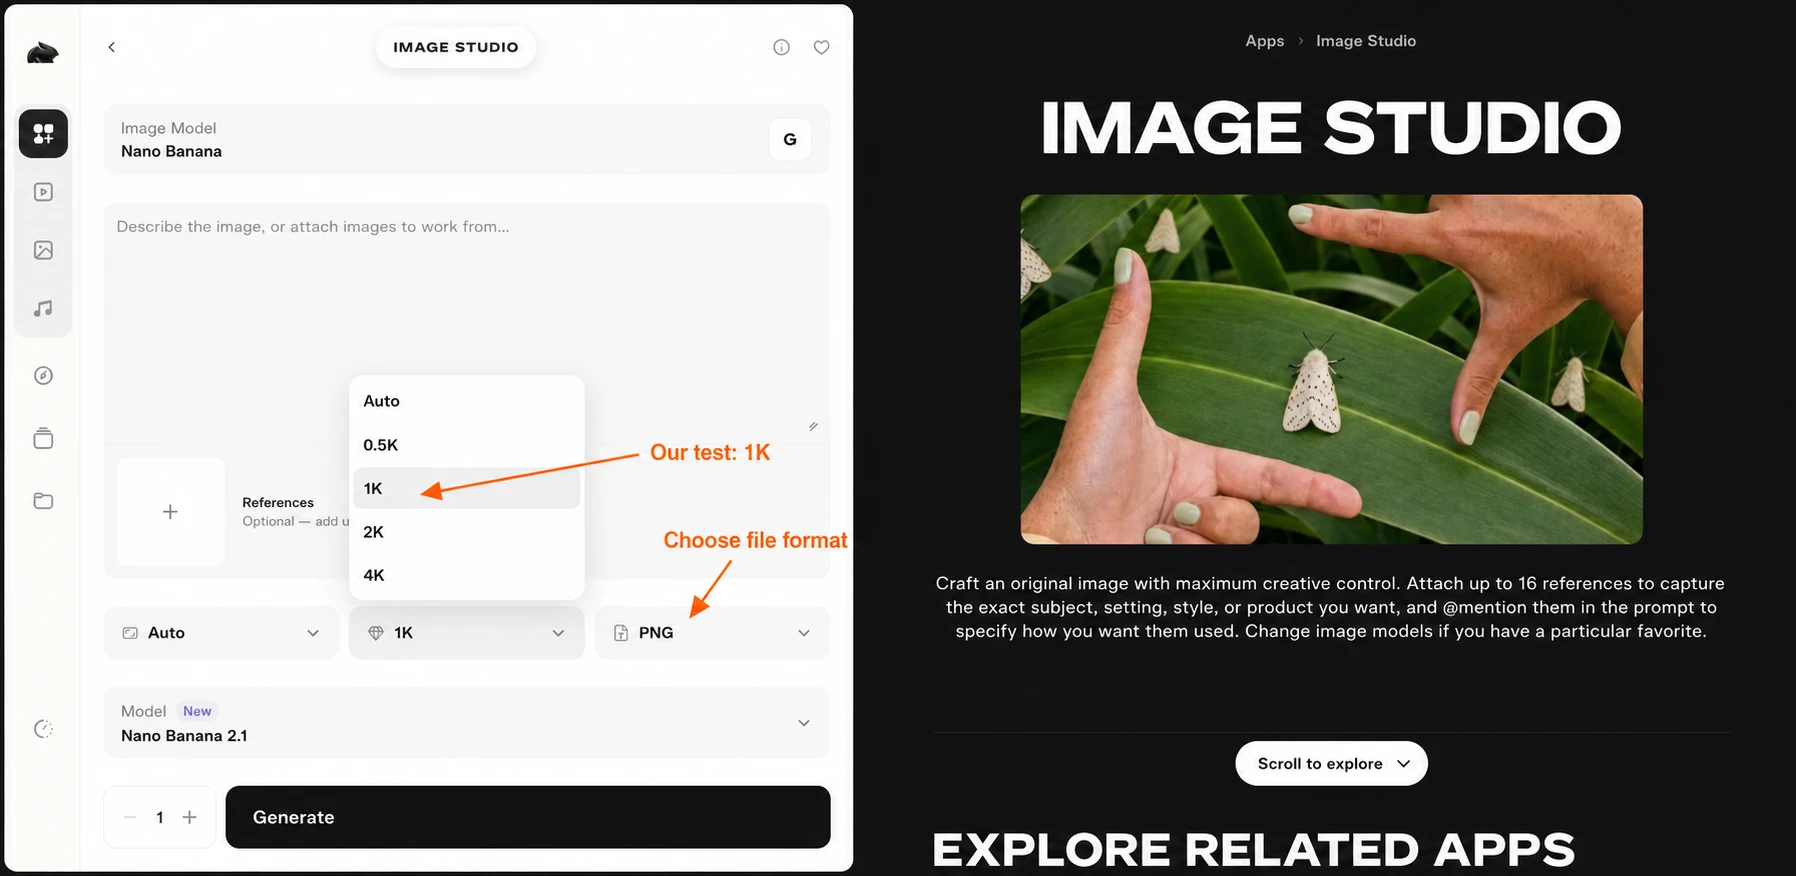
The format menu offered PNG, JPEG and WebP. The aspect-ratio menu included square, portrait and landscape choices. Pick the shape for your final placement before generating; a portrait post and a wide page banner need different compositions.
Our downloaded 16:9 results were 1376 × 768 pixels with 1K selected. Treat 1K as the model’s resolution setting, rather than assuming every image will have a 1024-pixel edge.
Step 5: Run the reference and lighting comparison
I kept the source files and settings unchanged. A used a broad instruction; B assigned reference roles and preservation details; C added a single lighting instruction; D repeated C unchanged. B therefore tests a fuller role-based brief, not the @ symbol in isolation.
Test A: Attach references without assigning roles
This is the baseline prompt. It names the scene but leaves the model to interpret the two images together.
Create one product photo of an ivory coffee mug on a slate tabletop with a blue-grey wall, using the attached images. Show the complete mug and handle in a three-quarter view.
What I see: the coffee, steam and handle are present, and the setting resembles Image2. The mug has a softer, less directional appearance than the later lighting-controlled versions. This baseline already combines the references; it is not a failed image.
Test B: Assign a job to each reference
Create one product photo of an ivory coffee mug on a slate tabletop with a blue-grey wall. Show the complete mug and handle in a three-quarter view. Use @Image1 only for the mug design: preserve its ivory glaze, shape, handle, coffee and steam. Use @Image2 only for the slate tabletop and blue-grey wall.
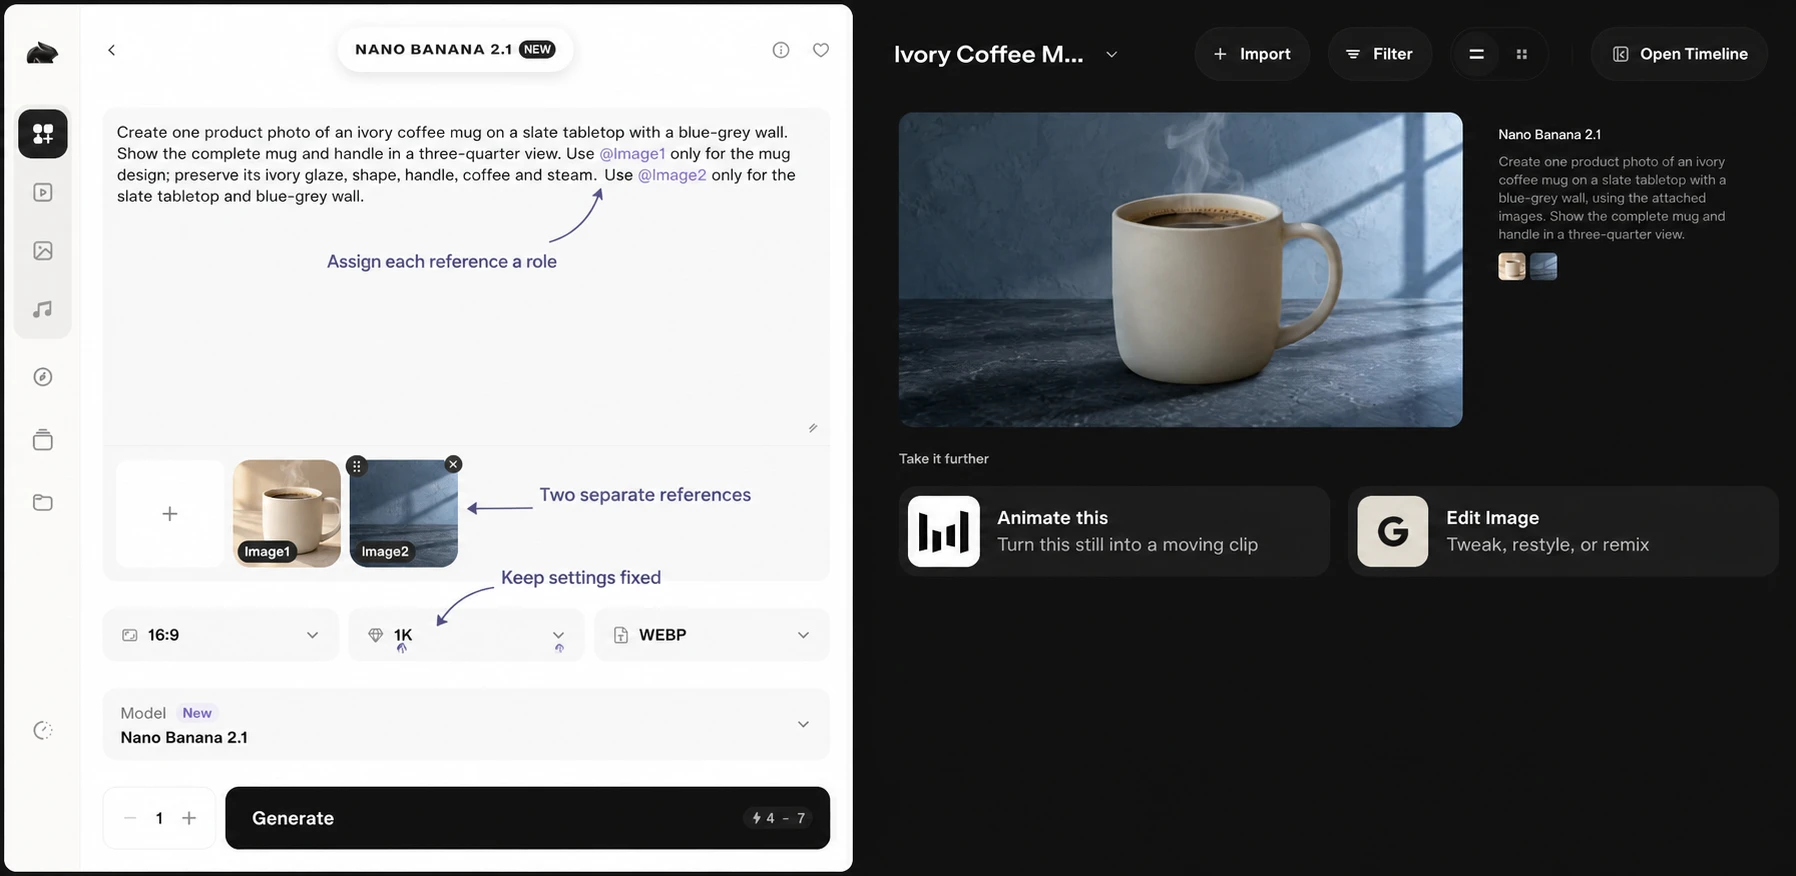
What changed: the subject and setting remain recognisable, but the bright warm mug face still contrasts with the cooler room. Reference roles clarify what to preserve; they do not, on their own, tell Pika how to reconcile the two lighting setups.
For a product listing, compare the result with the original object. The mug’s proportions and position can change even when the prompt asks to preserve its design.
Test C: Tell Pika which lighting to follow
This uses B’s prompt, then adds one direction and colour for the whole scene.
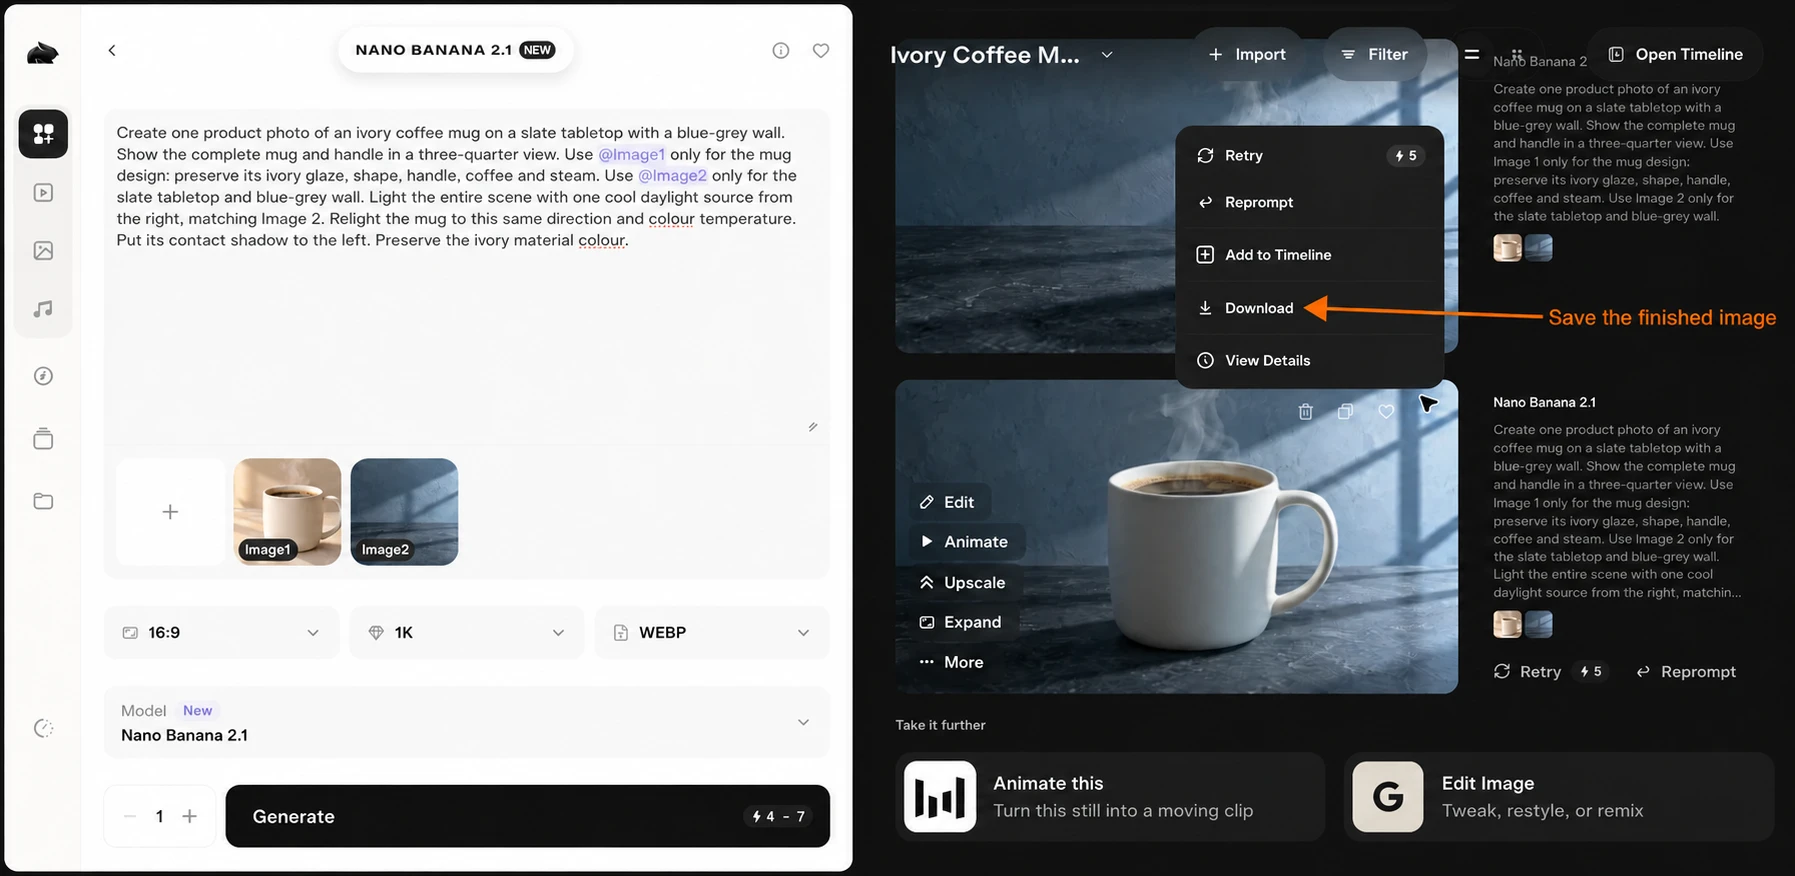
Create one product photo of an ivory coffee mug on a slate tabletop with a blue-grey wall. Show the complete mug and handle in a three-quarter view. Use @Image1 only for the mug design: preserve its ivory glaze, shape, handle, coffee and steam. Use @Image2 only for the slate tabletop and blue-grey wall. Light the entire scene with one cool daylight source from the right, matching Image 2. Relight the mug to this same direction and colour temperature. Put its contact shadow to the left. Preserve the ivory material colour.
What changed: the mug looks cooler, with a pronounced highlight on its right side and a darker left face. The shadow extends left across the table. For our intended cool-room scene, this is a clearer match than B.
What still needs review: the material appears whiter and cooler than the warm source. A lighting change also affects perceived product colour. If colour accuracy matters, compare against the physical product or an approved reference before publishing.
Test D: Repeat the same lighting prompt
We generated C’s exact prompt again with the same two references and settings. There was no new instruction and no model change.
What this tells us: the repeated image kept the main lighting pattern in this pair of runs. It was not a pixel-identical copy. A repeat can change details, so save the version you approve instead of assuming you can recreate it exactly later.
This is a four-image demonstration with one model and one reference pair, not a success-rate study. We did not compare different reference orders or other models, so these results do not establish that the first or last attachment always takes priority.
How should you handle conflicting lighting?
Choose a lighting source for the finished scene and say so explicitly. In our test, the instruction to light the whole scene from the right produced a more coherent cool-light result than assigning subject and background roles alone.
Use this checklist when two references disagree:
- Name the subject reference. State which details must stay.
- Name the setting reference. Separate the background from the product.
- Choose one light direction. For example, cool daylight from the right.
- Describe the shadow. Say where it should fall relative to the object.
- Check the material colour. Decide if the new lighting changes it too much.
- Change one instruction next. Keep the other settings stable while comparing.
| What you notice | What to clarify next |
|---|---|
| Warm product inside a cool room | Specify the final colour temperature across the whole scene |
| Highlight and shadow disagree | Specify the light direction and shadow direction together |
| Background details leak into the product | Limit each reference to its intended role |
| Product shape changes | Name the exact parts to preserve; check the next result against the source |
| Too many competing details | Remove references that do not contribute to the task |
Step 6: Review and download the finished image
Open the result’s three-dot actions menu, then choose Download. The same menu offers Retry, Reprompt, Add to Timeline and View Details. Retry is another generation and shows a credit amount; it is not the download button.
Before using a result:
- Inspect the full-size file, not just its thumbnail.
- Check the handle, rim, contact shadow and edges.
- Compare important product details with Image1.
- Save the prompt and selected model alongside the image.
- Keep the original reference files for future edits.
Pika also offered follow-up actions such as Edit Image, Animate, Upscale, Expand and Relight. Each is a separate next step. We downloaded the four stills for this guide without adding an animation or upscale.
What did the four images cost?
The Generate button displayed 4–7 credits for each request with these settings. The settled balance changes were:
| Run | Instruction | Credits used |
|---|---|---|
| A | Unassigned references | 4 |
| B | Explicit reference roles | 4 |
| C | Roles plus lighting instruction | 5 |
| D | Repeat of C | 4 |
| Total | Four images | 17 |
The account balance temporarily fell by 7 at submission, then adjusted after completion. Across all four runs it settled from 900 to 883. We recorded that observed behaviour; the interface did not explain the pricing calculation, so a longer prompt should not be treated as the proven cause of C’s different charge.
Use the current quote for your selected model, resolution, references and quantity. Our 17-credit total is a record of this test, not a fixed price for every four-image project. Our credit calculator can help plan space for revisions.
Copy a reference-role template
Replace the bracketed parts and insert your actual reference mentions in Pika. This is an adaptable template, separate from the exact test prompts above.
Create a product photo of [subject] in [setting]. Use @Image1 for the subject: preserve [shape, colour, material and important details]. Use @Image2 for [background and surface]. Light the entire scene with [light type and colour] from [direction]. Match the subject’s lighting to that direction and place its shadow [direction]. Frame the complete subject with [space needed around it].
For more controlled product styling, continue with our Product Shot walkthrough. To turn an approved still into a clip, use the image-to-video guide.
Frequently asked questions
Does Pika Image Studio support multiple references and @mentions?
Yes. The interface supports attaching multiple references and selecting them through the @ menu. We used Image1 for a mug and Image2 for a background. The Image Studio page advertises up to 16 references; check the selected model’s current controls.
Does the first reference always take priority?
Our test does not establish a fixed priority order. We kept the attachment order unchanged and described each image’s role in the prompt. Assign roles explicitly rather than assuming upload order decides every detail.
How does Image Studio handle references with different lighting?
The selected model interprets the references and prompt together. In our Nano Banana 2.1 test, explicit lighting instructions produced a stronger right-side highlight and a more consistent cool appearance. The results do not establish a universal conflict-resolution rule for every model.
Can I control the subject and background separately?
You can instruct Pika to use one reference for the subject and another for the background. That gives the model direction, but does not guarantee exact preservation. Inspect the finished subject’s shape, colour and details.
Will the same prompt give the same image again?
Not necessarily. Our repeated prompt kept the main composition and lighting pattern but changed small details. Save the approved image and its references instead of relying on a future repeat to reproduce it exactly.
How many credits should I budget for these tests?
Our four images used 17 credits in total, with a displayed estimate of 4–7 per request. Check your current quote before generating, especially after changing models, resolution or quantity.