

Checked in Pika on 6 October 2026. We used one product photo and submitted one Pika 2.5 generation. The request completed and charged 20 credits. This guide follows the updated site, including its dedicated Pika 2.5 app.
You will make a short coffee-mug clip: steam moves above the coffee and the camera moves closer. Start with a small change so you can spot problems before spending credits on another attempt.
Before you start
You need a Pika account with enough credits and a photo you own or have permission to upload. We used a Starter subscription for this example. The live Generate button is the cost check for your account; the example below is not a promise of a fixed price.
| Setting | Our example |
|---|---|
| Model | Pika 2.5 |
| Input | One uploaded product image |
| Duration | 5 seconds |
| Quality selected | 720p |
| Aspect ratio in Video Studio | Auto |
| Generated audio | Off |
| Generations | 1 |
| Charged credits | 20 |
Do not add unrelated image, video or audio references to Video Studio. A source photo belongs in the image input or Start Frame slot. These controls serve a different purpose from a multi-reference upload.
1. Find the Pika 2.5 workflow
Open Pika Create. The left sidebar gives you Create, Discover, Library, Projects and Jobs. The account control sits at the bottom.
Create combines several studios. Video Studio makes clips; Image Studio handles still images; Speech Studio handles speech; Music Studio handles music. Smart Match can choose an app from your request or attachments. Always check the chosen app and model before submitting.
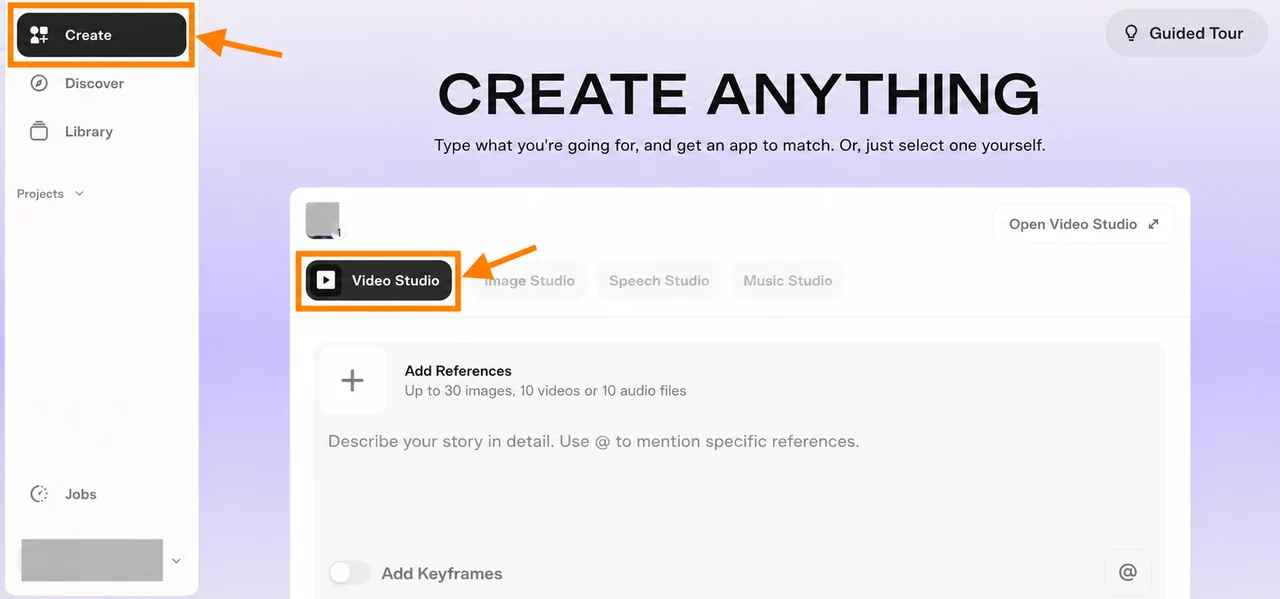
Scroll to Pika Models and choose Pika 2.5, or open the Pika 2.5 app directly. This is the shorter workflow for one product photo. The page initially says Text to Video; attaching your image changes it to Image to Video.
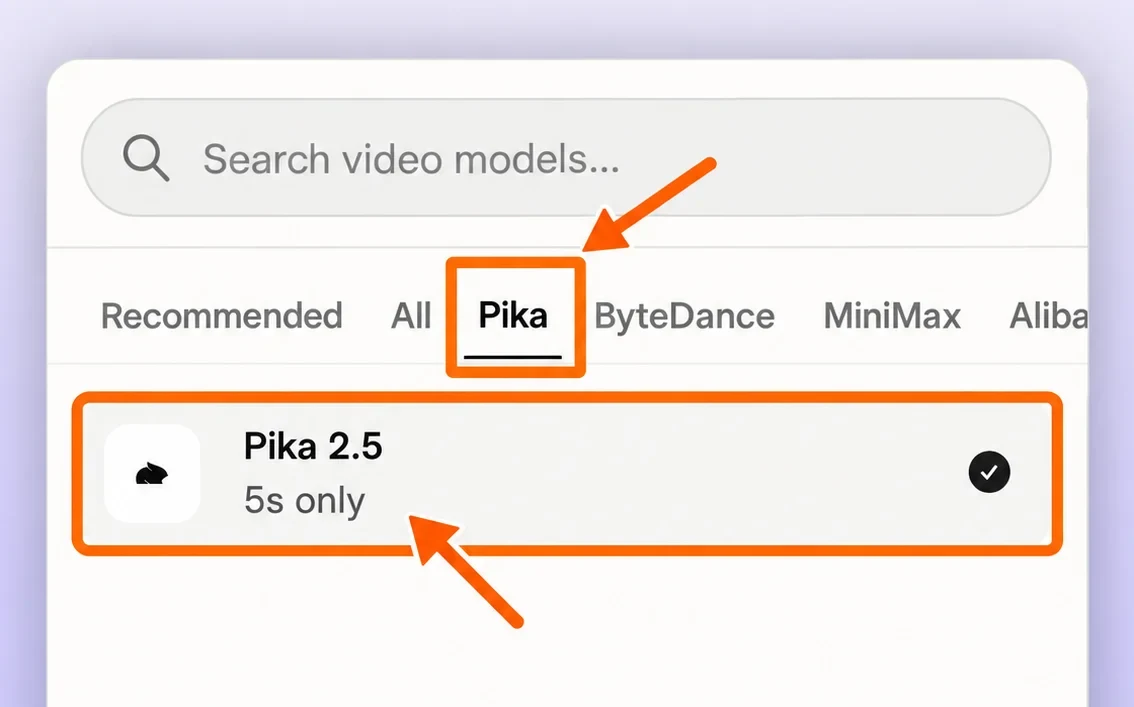
If you stay inside Video Studio, open Model, choose the Pika group and select Pika 2.5. A model from another provider can appear in the same menu, so the studio name alone does not identify the generator.
2. Upload a clear product photo
Use one sharp photo with the whole product in view. Leave space around its edges. A plain background makes it easier to notice changes to the handle, rim and outline. Small labels and detailed packaging need more careful checking.
We created this unbranded coffee-mug image for the example. You can download the source image to follow the same steps.

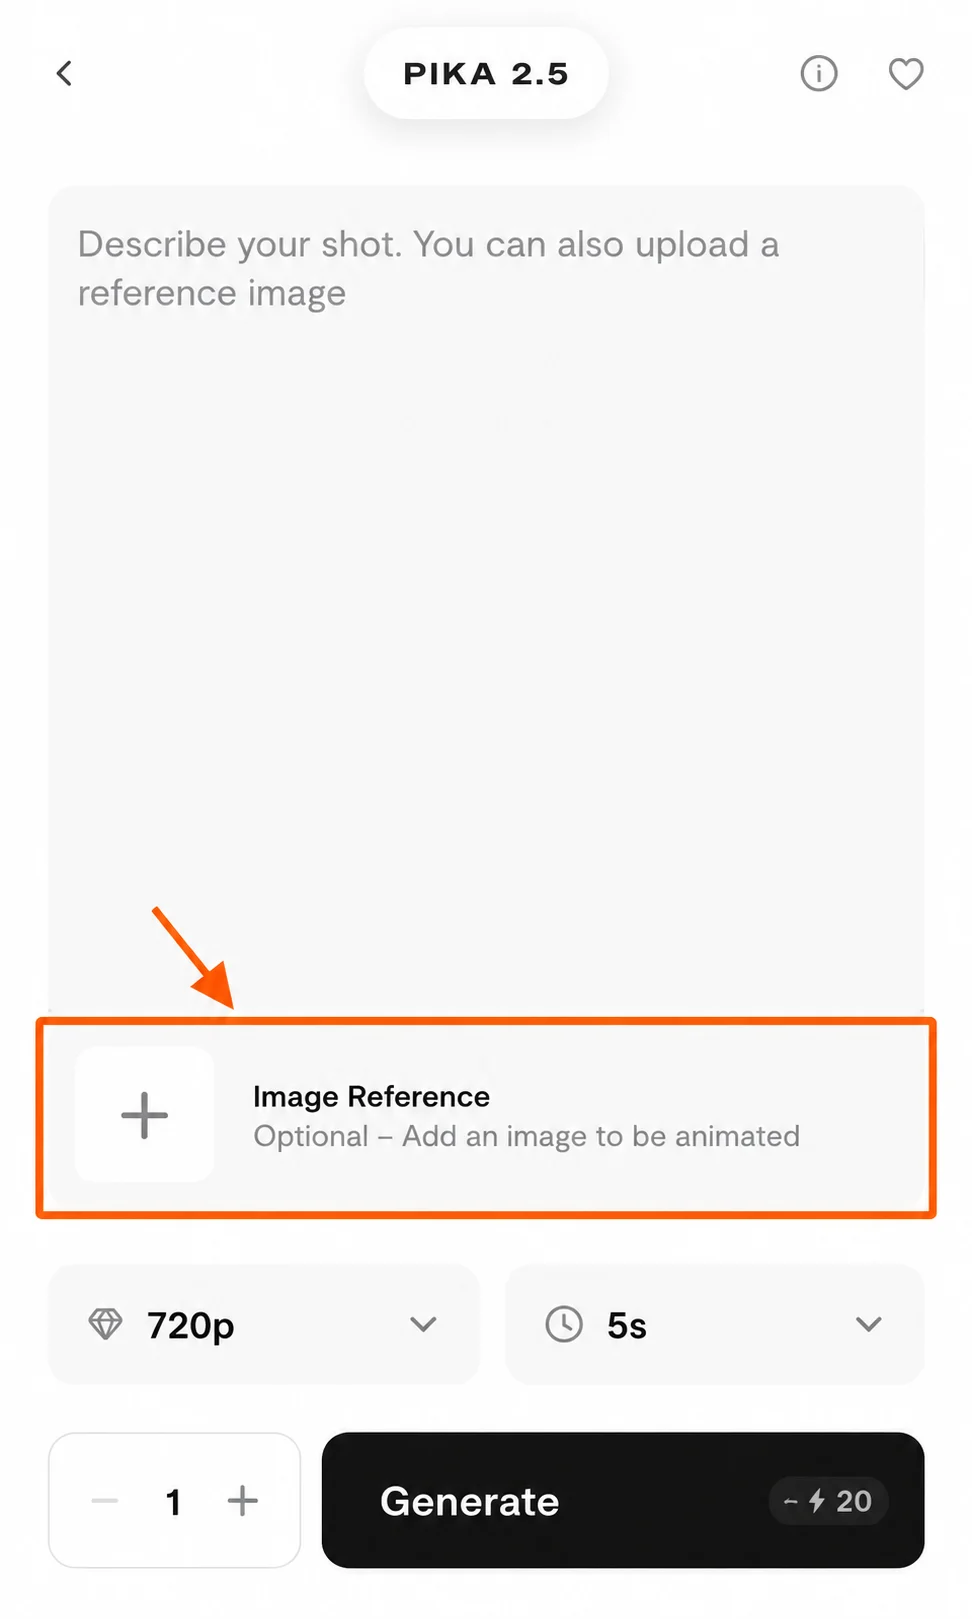
In the dedicated Pika 2.5 app, click the + button inside Image Reference. Its accessible label is Add. The larger attachment area also has an Add source image label, but the + button opened the picker in our test.
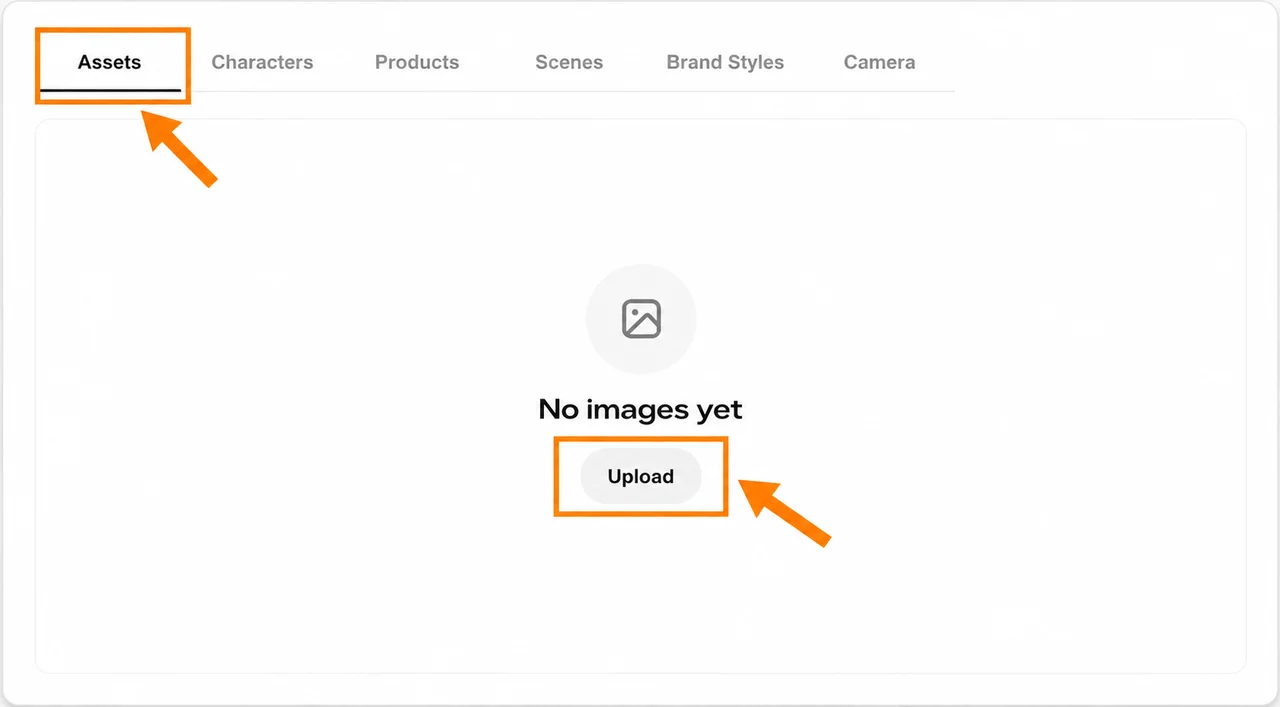
Select Assets, click Upload and choose your photo. Wait for the upload progress to finish. If you choose an existing asset instead, confirm it with Use Selection when that button appears. Check that the thumbnail is the product you intended to animate.
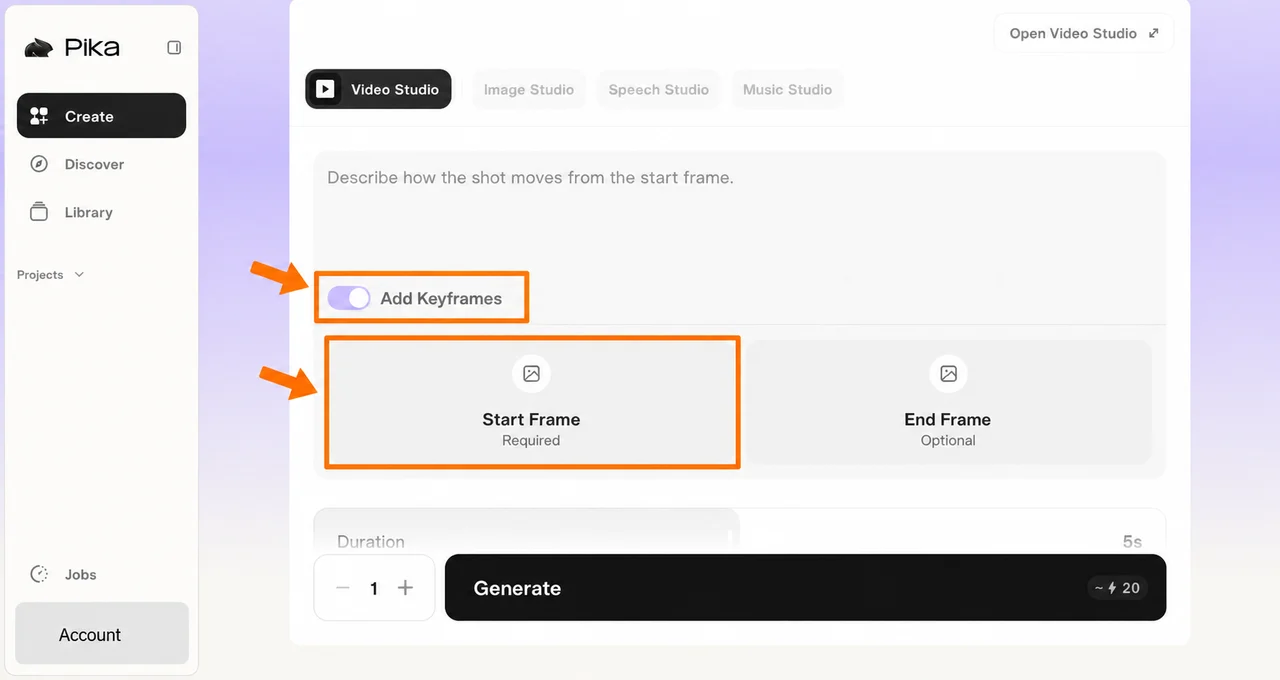
Using the Create-page studio instead? Turn on Add Keyframes, click Start Frame and upload the photo there. Start Frame is required; End Frame is optional. Leave End Frame empty for this first attempt. This alternate workflow is useful if you are already working in Video Studio.
3. Describe one small movement
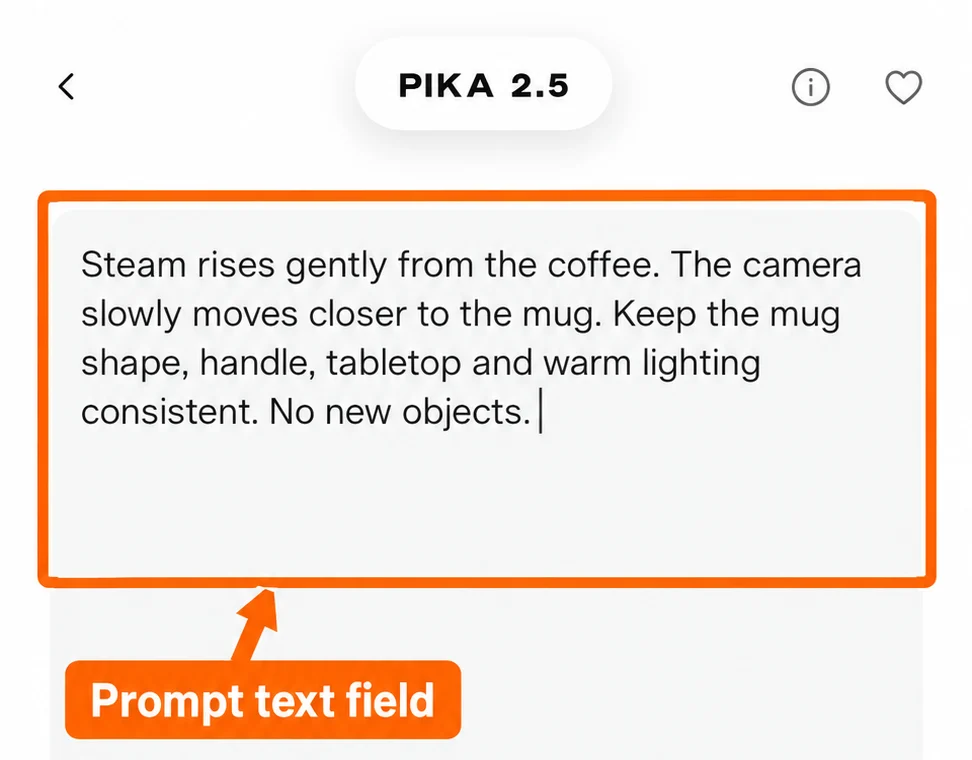
The photo supplies the product and scene. Use the prompt to describe what should move and what should stay consistent. We entered:
Steam rises gently from the coffee. The camera slowly moves closer to the mug. Keep the mug shape, handle, tabletop and warm lighting consistent. No new objects.
For a shoe or bottle, replace the steam instruction with a gentle camera move. Avoid asking for a full rotation on your first try: the model would need to invent parts of the product that the photo does not show.
4. Check duration, quality and credits
Choose 5s, 720p and 1 generation. We saw 720p and 1080p in the dedicated Pika 2.5 quality menu. Other studios can display more choices; that does not mean Pika 2.5 supports all of them.
In Video Studio, keep Aspect Ratio: Auto and Audio: Off. Our session warned that Pika 2.5 does not support 9:16 or generated audio. The dedicated app does not show separate aspect-ratio and audio controls. Use a source photo shaped for your intended output and inspect the completed crop.
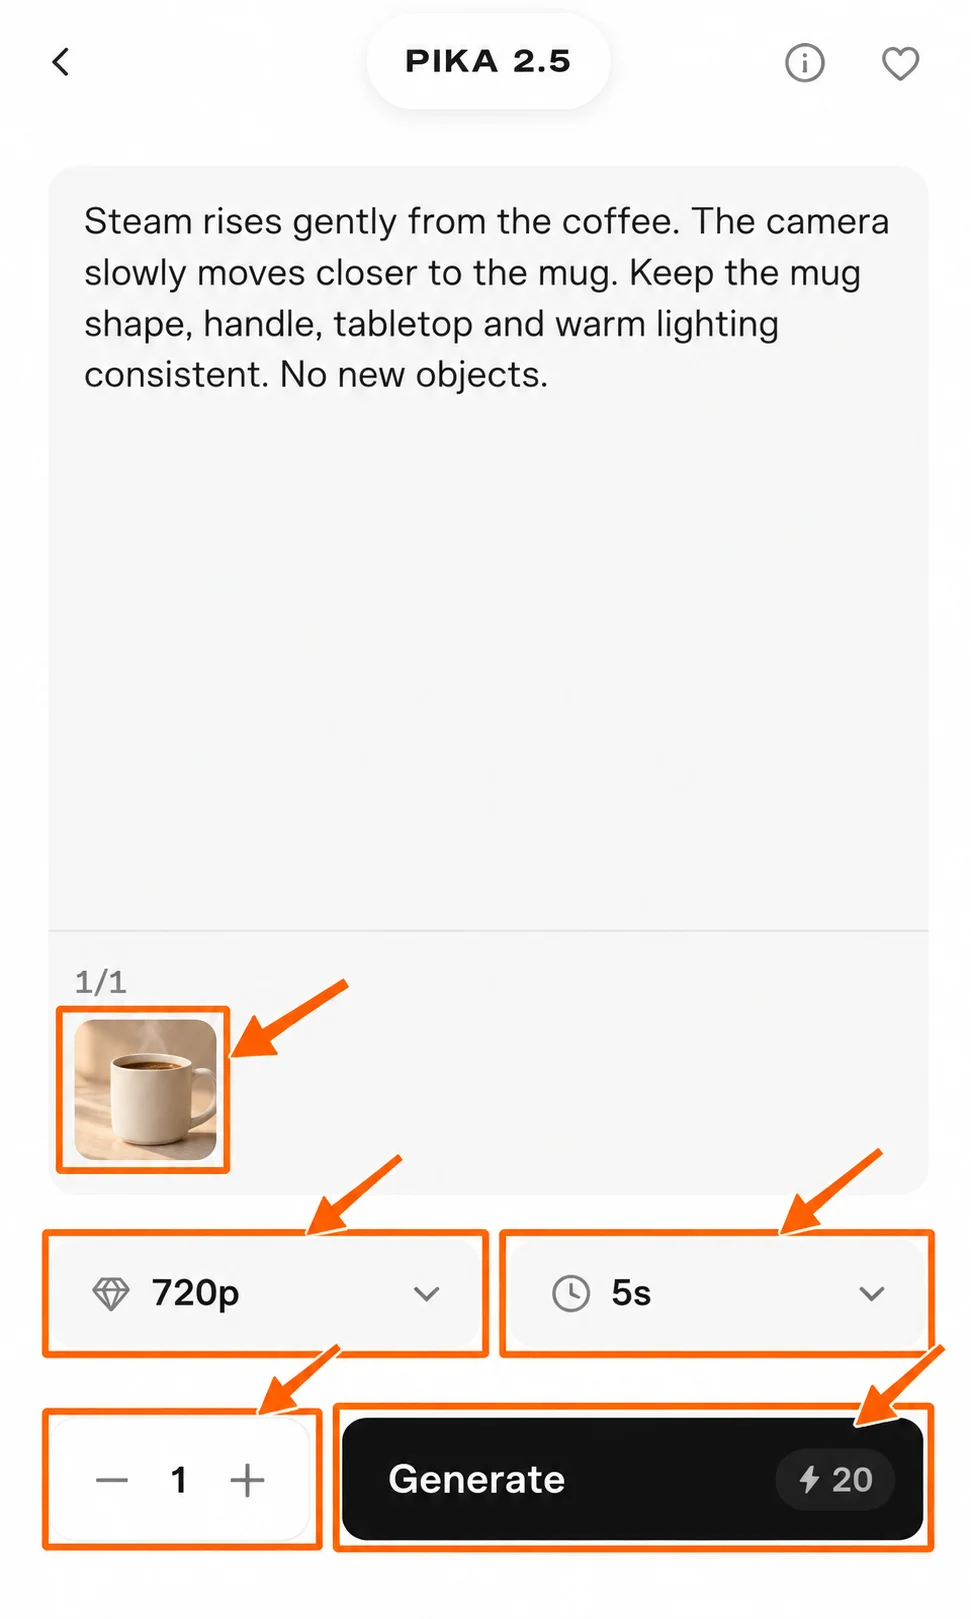
Read the credit amount beside Generate after the upload finishes. Our amount was 20. Keep the count at one to limit the cost of this first test. Only press Generate once.
5. Wait for the project to finish
After submission, Pika opened a project called Gentle Steam Mug Closeup. Its card displayed Generating… with a Cancel control. You can check Jobs for In Progress, Complete or Failed entries and reopen the linked project.
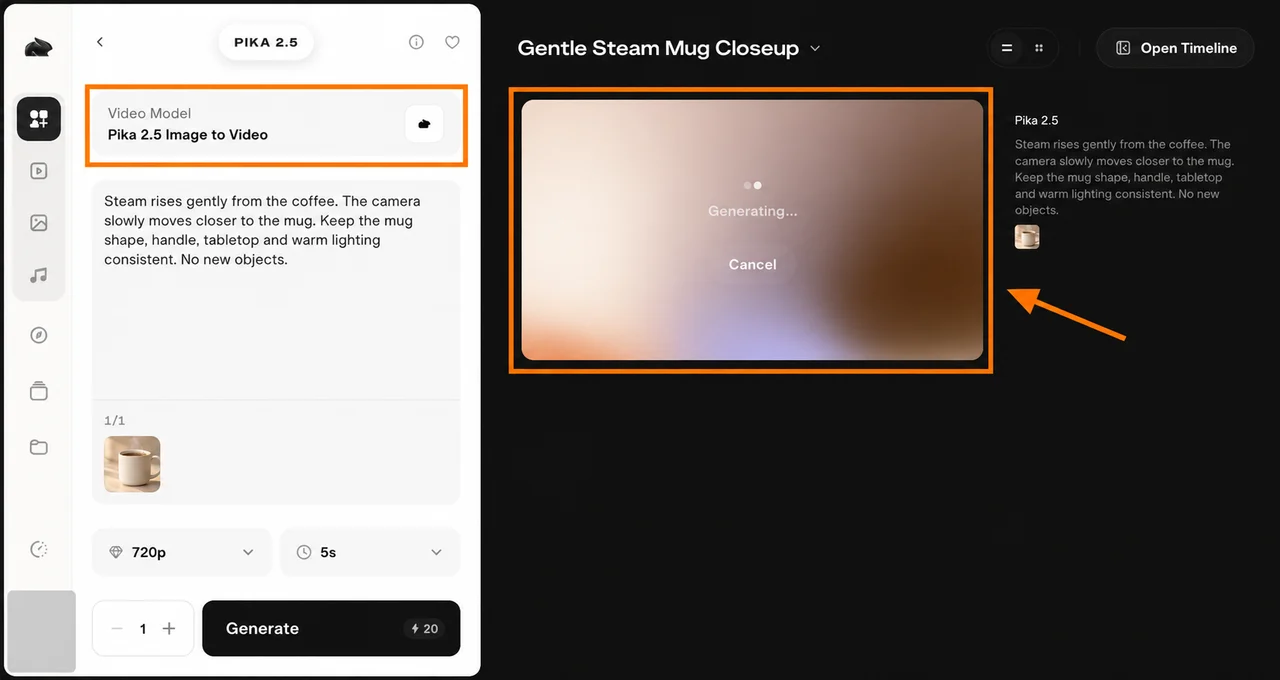
Do not submit another request just because processing takes time. Check the job status first. Retry is another paid attempt; it is not a refresh button.
6. Review and download the result
Open the completed item from Jobs or your project. Play the full clip and inspect its last frame. Check that the mug’s handle stays attached, its rim keeps its shape, the coffee stays inside and the camera movement matches your request.
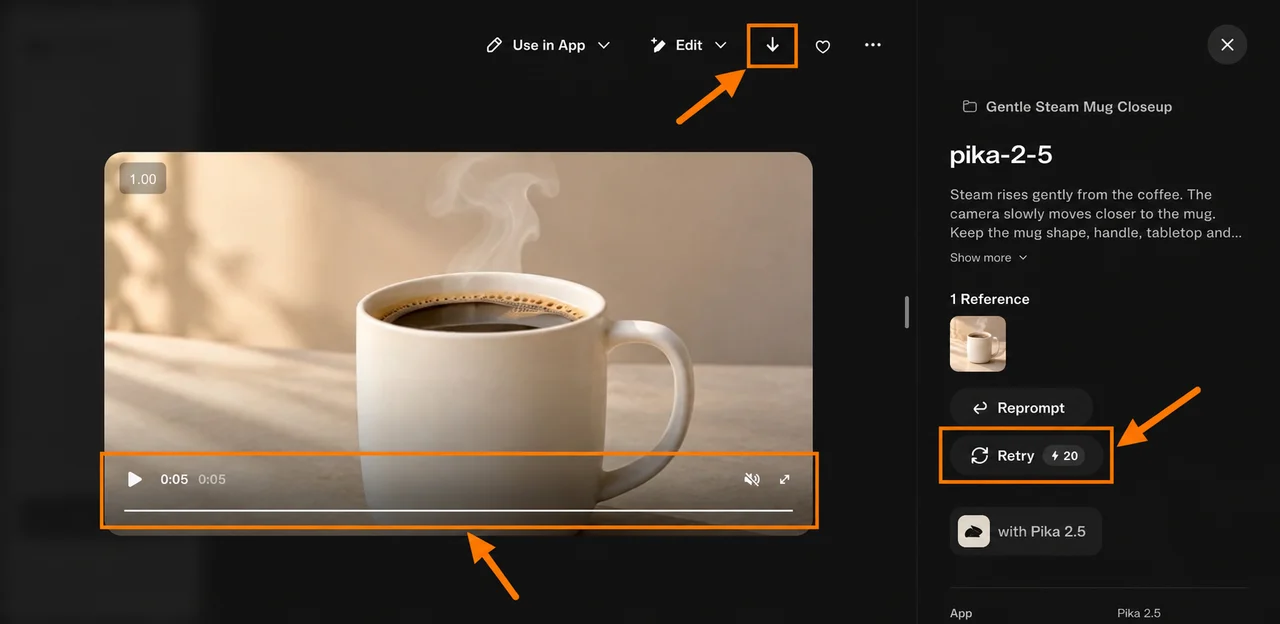
The completed item reported one run and a 0:05 duration. We have verified that generation completed, but this screenshot alone is not a frame-by-frame quality assessment. The final clip can be added here after downloading and reviewing it.
Use the Download down-arrow above the player to save the file. The details panel also offers Copy prompt, Reprompt, Retry, Use in App and Edit. Check the current credit estimate before actions that create another output.
Where the other sections fit
| Section | When to use it |
|---|---|
| Create | Start a request or browse apps and models. Featured Apps includes Video Studio, Product Shot, Relight Media and Camera Director. |
| Discover | Browse Featured, Video, Image and Favorites. Search examples and inspect the model used before choosing Remix. |
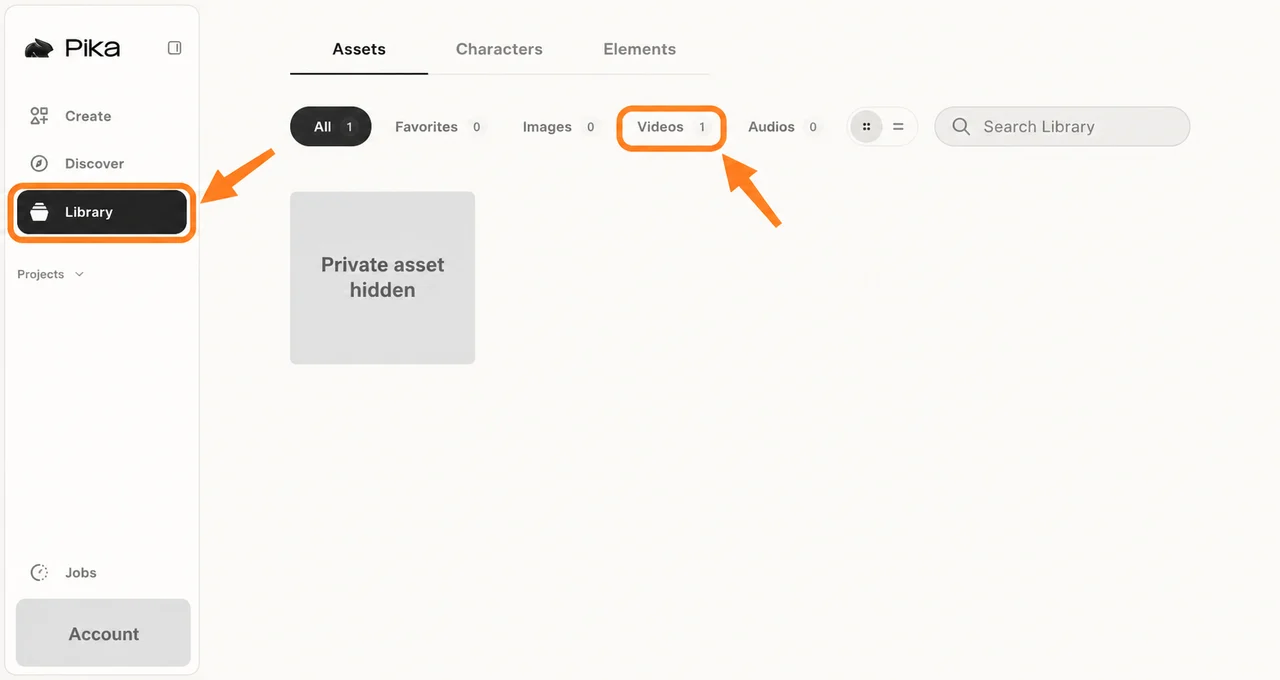
| Library | Find assets with the Images, Videos and other filters; search or switch between grid and project views. |
| Projects | Reopen a working project and its shots. The completed request created a project automatically. |
| Jobs | Check processing and open Complete or Failed entries. |
| Account menu | Find credit balance, Account, Subscription and Help. Check plan permissions before using a clip for business. |
On Create, Featured Models includes generators from several providers, while Pika Models lists Pika’s own apps. Community Templates links into Discover. These are browsing options; none is required for the single-photo task above.
Common questions
Why does the Pika 2.5 page say Text to Video?
That is its initial mode without an image. In our test, uploading the source photo changed the heading to Pika 2.5 Image to Video. Confirm the photo thumbnail before submitting.
Can I use 10 seconds?
This tutorial uses 5 seconds. The interface displayed a 5-second-only note before an image was added, and a 5-or-10-second note after keyframes were enabled. Pika’s dedicated app description also mentions 10 seconds for photo input. Availability depends on the input mode; check the current duration menu rather than assuming one limit applies to every workflow.
Why is there no sound?
Pika 2.5 does not generate audio in this workflow. Add sound later in an editor or a separate audio app after you have a clip worth keeping.
Why does the product change shape?
Try less camera movement and a clearer source photo. Change one instruction at a time. Check the result before buying another attempt, and use the credit calculator to account for retries.
Can I use the result for a product advertisement?
Check your current subscription terms, the rights to your source photo and any rights attached to the product. This tutorial documents the generation steps; it does not confirm commercial permission for every account or asset.