
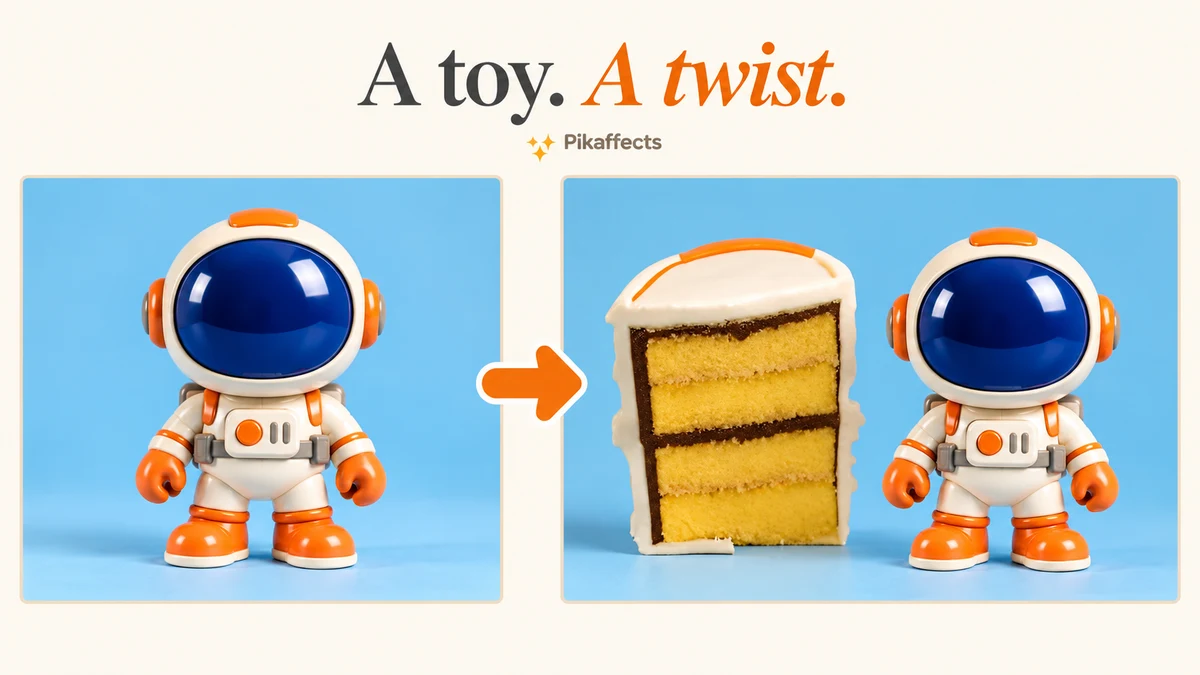
I used one fictional orange robot toy to test three Pikaffects: Squish it, Cake-ify it and Melt it. We changed the effect while keeping the photo and generation count the same.
The three requests cost 5 credits each, or 15 credits in total. Here are the actual downloaded clips, followed by the photo, settings and steps for each. Interface checked 9 October 2026.
Watch the three takes
Use the player controls to compare the beginning and ending. The effect name describes the request, not a guarantee that every object will transform in the same way.
What are Pikaffects?
Pikaffects turns a photo into a short clip using a selected effect. You choose an effect card instead of writing a motion prompt in the checked form.
I would try it for a playful creator post, a toy reveal or a short transition idea. For a product demo that must preserve its shape and behaviour, start with ordinary image-to-video and specify restrained motion.
| Your goal | Start with | Why |
|---|---|---|
| A comic compression idea | Squish it | Tests deformation around a single subject |
| A surprise object transformation | Cake-ify it | Tests the cake effect on the source |
| A material-change transition | Melt it | Tests a melting treatment |
| Exact product details and controlled movement | Image-to-video | You can describe the movement you want |
Step 1: prepare and attach one photo
I generated this fictional toy with an uncluttered background, a fully visible subject and some room around it. It has no brand logo or text to preserve.

- Open Pikaffects.
- Press Upload a photo, or drop an image into the upload area.
- Choose a local file or a saved image in the library chooser.
- Check Photo 1 / 1 and the attached thumbnail.
Use Browse Library to choose a saved asset. The attachment’s remove control clears the current photo so you can replace it. A plain background and a single clear subject make it easier to judge what the effect changed.
Step 2: find and select an effect
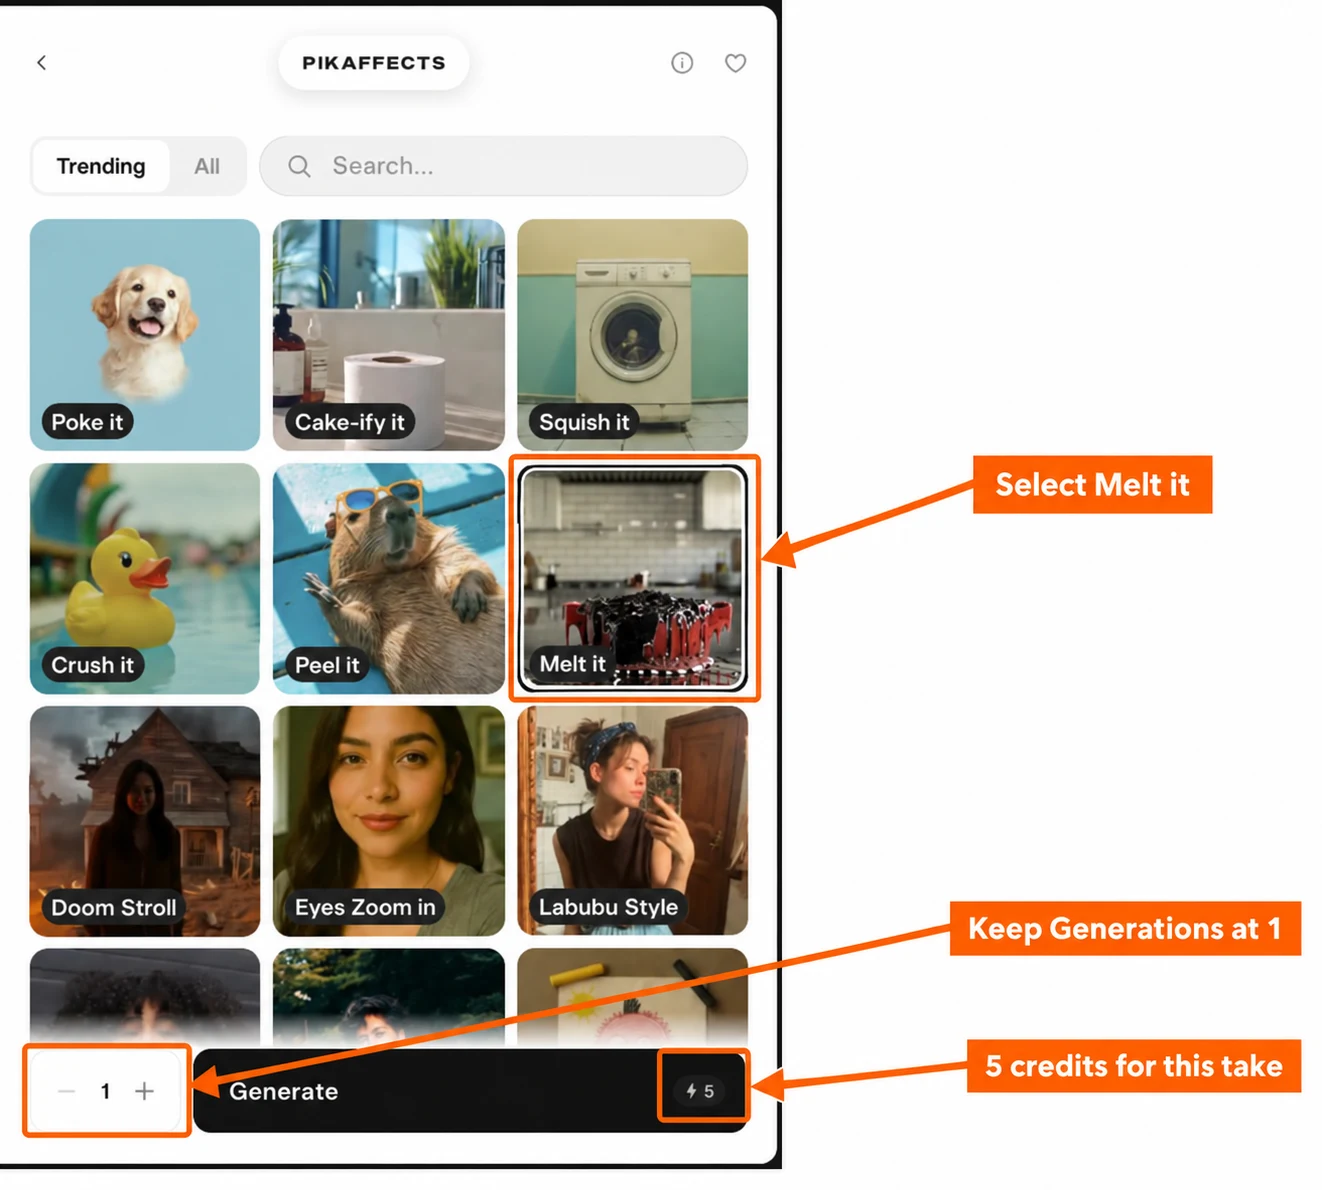
Trending shows a shorter selection. All opens the broader list. Enter an effect name in Search effects, select the matching card and check its border. Clear the search to browse again.
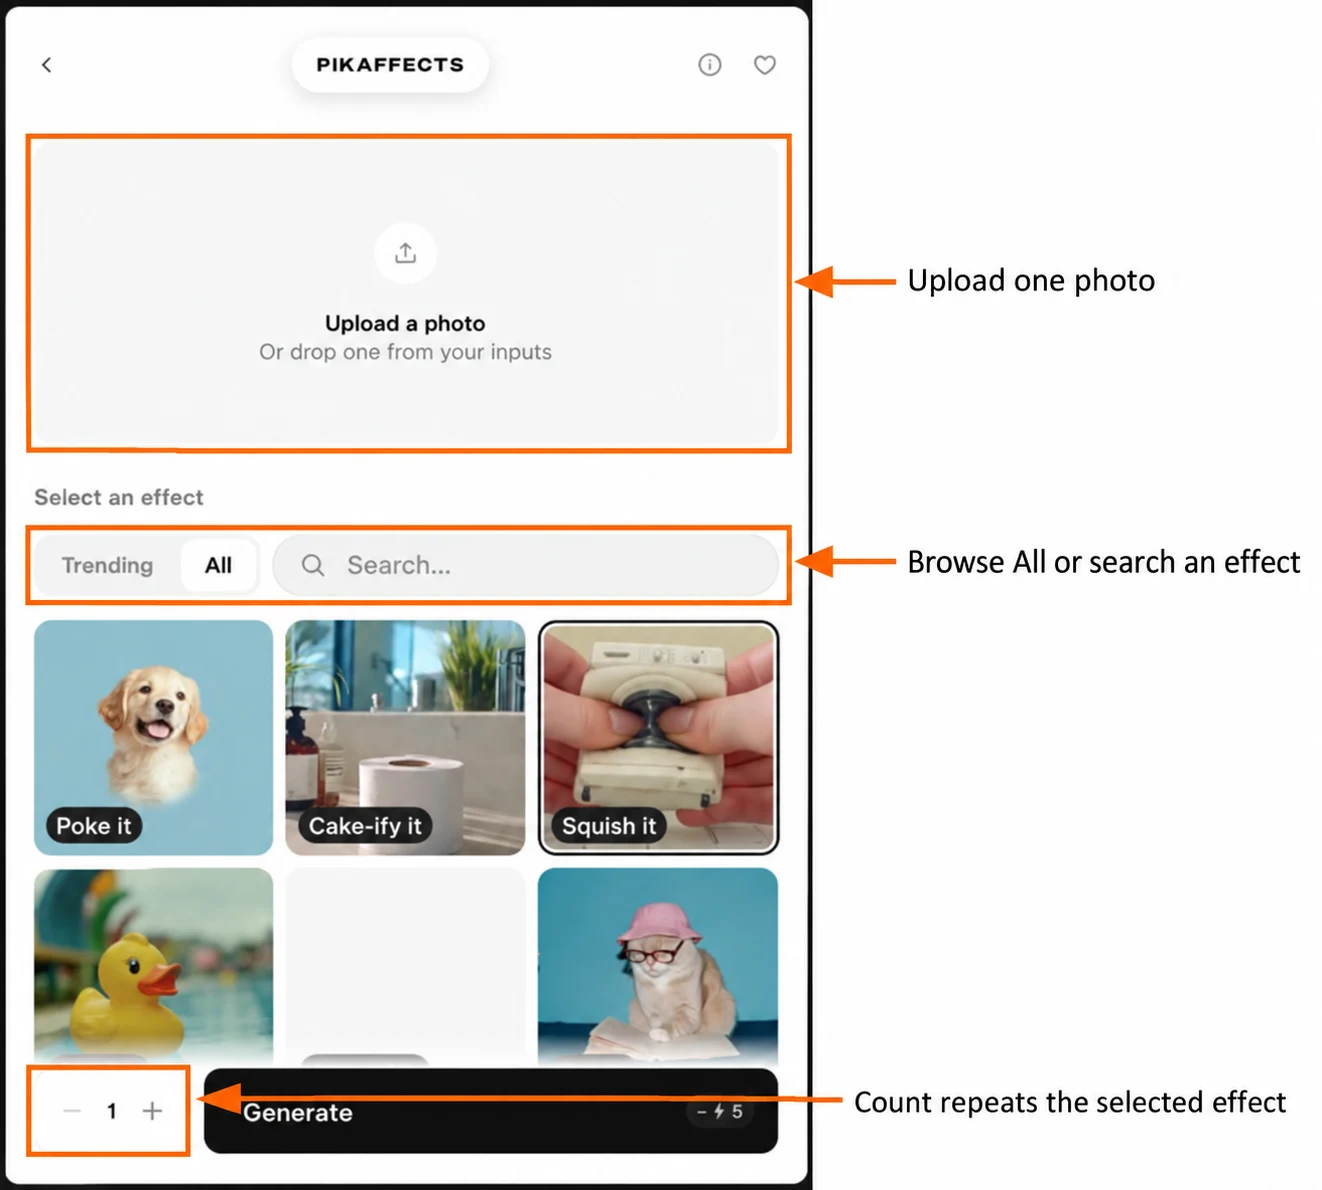
The checked Trending list included Poke it, Cake-ify it, Squish it, Crush it, Peel it, Melt it, Doom Stroll, Eyes Zoom in, Labubu Style, Love Bomb, Magic Polaroid and Make it Real. All also included transformations such as Inflate it, Dissolve it, Balloonify, Crumble it and Yarn Charm.
I keep the test to one effect at a time. Cards are alternatives, not a stack of transformations applied together.
Step 3A: make the Squish it take
- Keep the robot photo attached.
- Search Squish and select Squish it.
- Set Generations to 1.
- Check the 5-credit badge and press Generate.
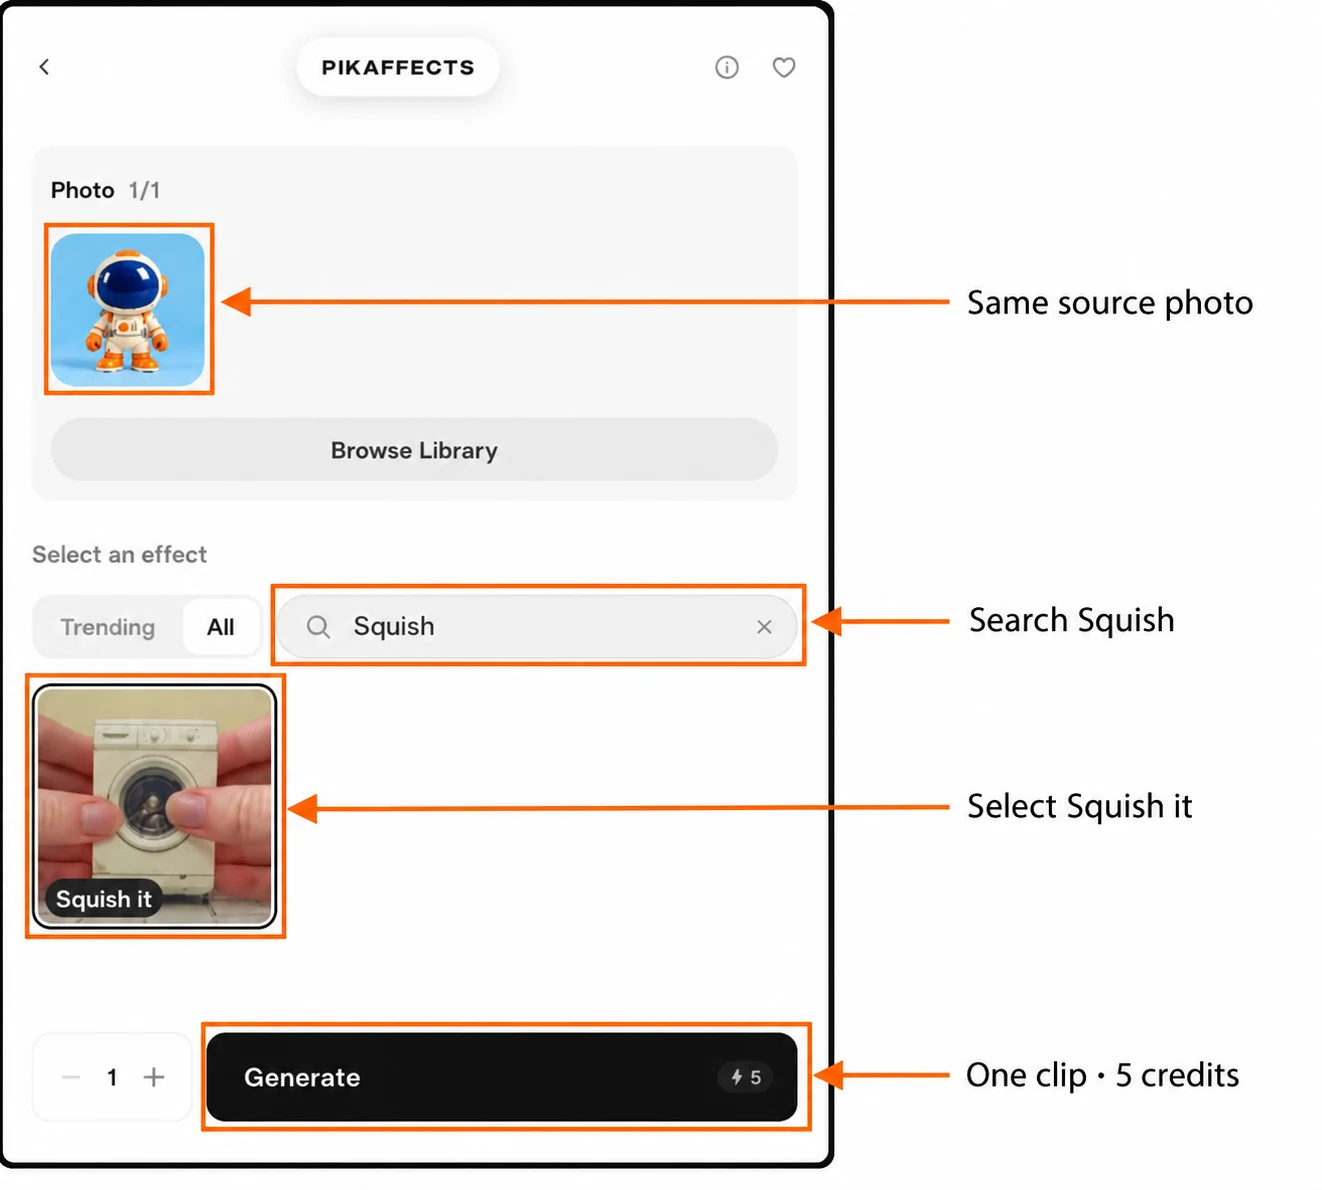
In our take, the toy bounces, lifts its feet and briefly compresses; the background also shifts toward grey. It does not reproduce the washing-machine preview with visible squeezing hands. I would keep this as a playful motion take and inspect the action before using the effect name in a caption.
Step 3B: make the Cake-ify it take
Keep the original photo attached. Clear the search if needed, select Cake-ify it, leave Generations at 1 and check the 5-credit estimate before generating.
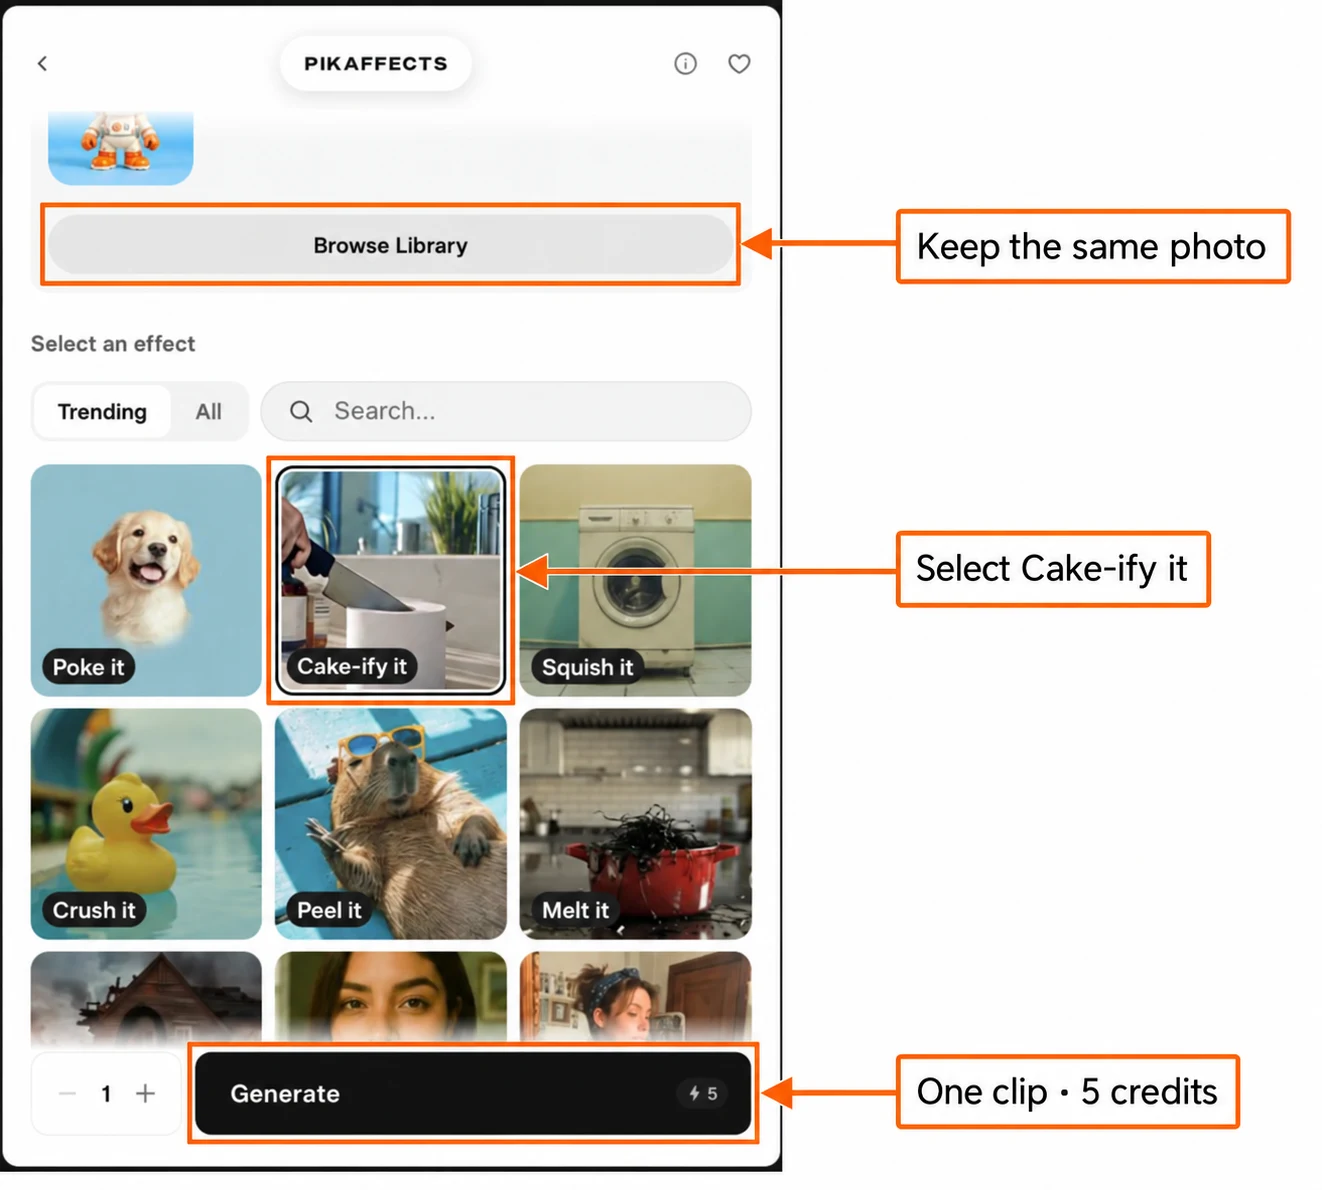
In our take, a knife moves past the toy and a tall cake slice appears beside it. The toy remains visible and largely intact. I would use this for a surprise reveal, but I would not describe it as a complete toy-to-cake transformation.
Step 3C: make the Melt it take
Keep the same source, select Melt it and request one generation. I checked the 5-credit badge again before pressing Generate.
In our take, the helmet opens into a hollow shell and the body folds down into a low pile. It changes the toy much more than the other two takes. I would use this for a transformation ending, and keep the original photo on screen first so viewers understand the change.
Step 4: count, cost and settings
| Effect | Source | Generations | Estimate | Charged |
|---|---|---|---|---|
| Squish it | Robot toy | 1 | 5 credits | 5 credits |
| Cake-ify it | Same robot toy | 1 | 5 credits | 5 credits |
| Melt it | Same robot toy | 1 | 5 credits | 5 credits |
| Total | One reused photo | 3 separate requests | 15 credits | 15 credits |
The plus and minus controls change the number of takes of the selected effect. Count 3 does not choose three different effects. We made three separate requests at count 1.
For these three choices, the checked form had no editable prompt, duration, quality, aspect-ratio, audio or model selector. The downloaded clips are five seconds long. We did not choose Pika 2.5 in this app; the result details identify Pikaffects.
Step 5: review, download and decide
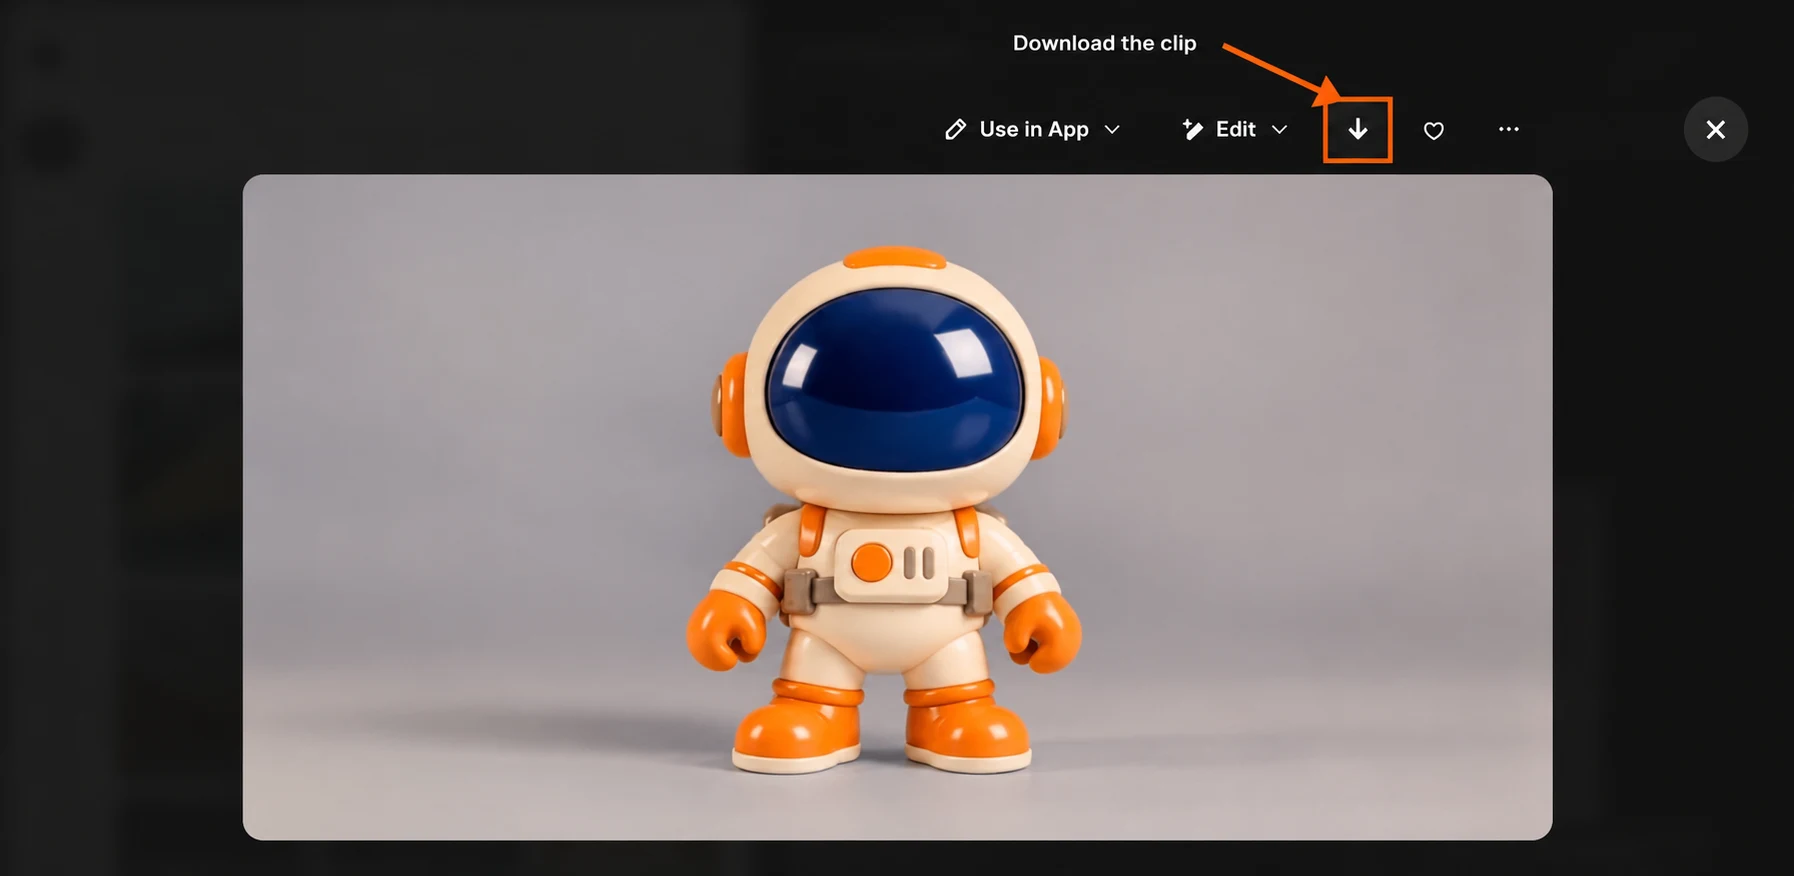
Open the finished clip’s detail view and press Download pikaffects. Play the whole clip before publishing: check the first frame, transformation, ending, background and sound. Do not judge a motion effect from a single poster frame.
Reprompt lets you revisit the setup. Retry requests another paid take. Project tools such as Upscale, Extend, Relight and Soundtrack start separate edits and can add cost.
I would publish the take that makes the intended joke or transition clear without confusing the product. If the subject changes too much, change the source or use a motion prompt in Pika image-to-video. A different photo can produce a different effect, so begin with one take before increasing the count.