
Pika H3 Flex creates video and sound from text, first and last frames, or a mixture of image, video and audio references. The practical workflow is simple: choose the right input, make a short draft, check the result, and finish the take you want to keep.
This guide follows that process in the Pika web app. You can copy our prompts, download the sample photo, watch three generated drafts, compare a 2K finish, and download separate audio tracks. Each example has a specific job, so you can learn one control at a time.
Our examples use a coffee mug because its shape, handle, color and camera framing are easy to compare. They demonstrate these particular attempts. They do not establish performance across every subject, language or style.
Start here: choose the task you want to finish
| Your starting point | Choose | What to supply |
|---|---|---|
| An idea written in words | Omni Reference, without attachments | A scene, action, camera and sound brief |
| A photo you want to animate | Frames | First frame plus a motion prompt |
| A planned beginning and ending | Frames | First frame, optional last frame, and a transition |
| A product, person, setting or performance reference | Omni Reference | Relevant files, with a role for each |
| An existing clip you want to change | Omni Reference | Source video plus a specific editing instruction |
| A draft whose composition already works | The draft’s Render control | A finishing resolution and its quoted cost |
For your first attempt, use one output, five seconds, 768p and Draft Mode. Start with a single subject and one action. This makes mistakes easier to diagnose before you spend time preparing a longer scene.
If your task is only animating a photo, you can begin at the Frames tutorial below. If you need an automated workflow, read the API and ComfyUI section after completing a browser example.
What Pika H3 Flex does—and how it differs from Pika 2.5
H3 Flex is a Pika model post-trained on MiniMax H3. It combines picture and sound generation, supports multiple reference types, and provides a draft-to-finish workflow. Pika 2.5 remains a separate model with its own settings and apps; choosing H3 Flex does not automatically change an existing Pika 2.5 project.
The official H3 Flex specifications describe native 480p and 768p generation, with 1080p, 2K and 4K produced through an integrated upscale stage. A 4K selection therefore does not mean every stage operates at native 4K.
The web form offers durations from 3 to 15 seconds, in whole-second selections. The downloaded examples here are 5.175 seconds even though we selected five seconds. The model works on a frame grid, so inspect the file rather than assuming an exact duration.
Our four downloaded video files contain 24 fps video and a 32 kHz audio track. The three drafts are 1344×768. The 2K finish is 2560×1440. These measured dimensions are more useful for an editing timeline than a quality label alone.
Pika advertises faster-than-real-time model processing in many configurations. Its qualification matters: the speed figure concerns model processing, not guaranteed time from clicking Generate to receiving a download. Uploading, queueing, audio separation and finishing can add time.
Step 1: open the correct H3 Flex app
Find the app from Pika Home
Open Pika Home, click Search apps, and type Pika H3 Flex. Choose the result under Open. The search interface also offers a filter option; selecting the actual app result takes you directly to its controls.
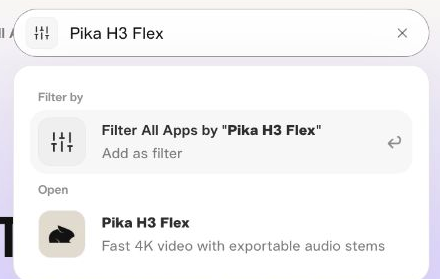
You can also use the direct H3 Flex app link. Check the heading before preparing a prompt. Pika hosts several models, and similar-looking forms can have different costs, reference rules and audio options.
Understand the two input tabs
Omni Reference handles text-only creation and reference-guided work. Leave its attachment area empty for text-to-video. Add references when you want a supplied product, setting, movement or voice to guide the output.
Frames gives you a required first-frame slot and an optional last-frame slot. Use it when the opening composition is already decided. The prompt should describe what happens after that image, rather than asking the model to invent a different scene.
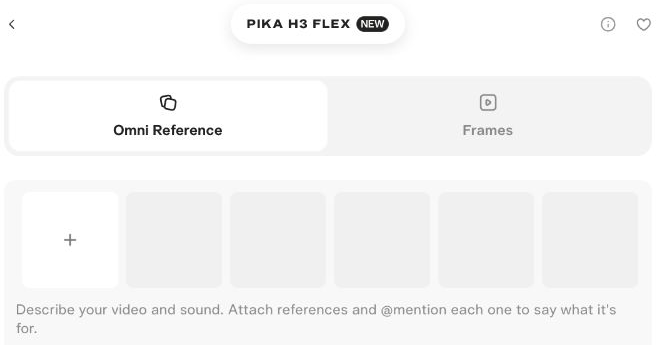
Keep those roles separate. A reference image tells the model what to borrow; a first frame establishes how the clip begins. If your product must start in a particular position, Frames is the clearer starting point.
Step 2: check your free allowance and credit estimate
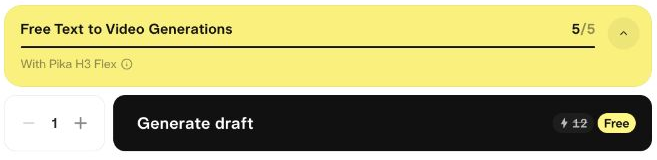
Expand the yellow daily-generation panel before submitting. In our account, it showed separate allowances for Text to Video, Image to Video and Reference to Video. Using one category did not consume the other two categories in these tests.
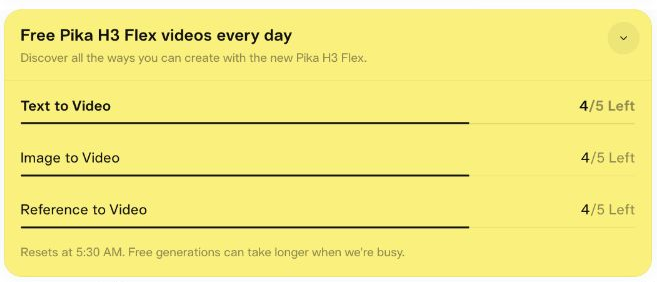
The launch offer is temporary. Pika’s announcement describes 15 daily generations for eligible Creator and Fancy subscribers through November 15, 2026. That is not a permanent promise of 15 free generations for every account.
Check the button after your inputs finish uploading and the estimate settles. An early “about” price can change. In our text example, the settled button showed Free beside a crossed-out 12-credit amount; the resulting asset recorded zero tokens.
Use the button’s final quote for the actual configuration. A free draft does not automatically make its finishing pass free. Our successful 2K finish charged 23 credits even though the source draft used a free allowance.
Step 3: make your first text-to-video clip
Write a brief that can fit into five seconds
Choose Omni Reference, leave the attachments empty, and enter a scene with one clear action. Describe the subject and setting first, then movement, camera behavior and the ending. Put sound and music on separate lines.
Here is the exact prompt for our first example:
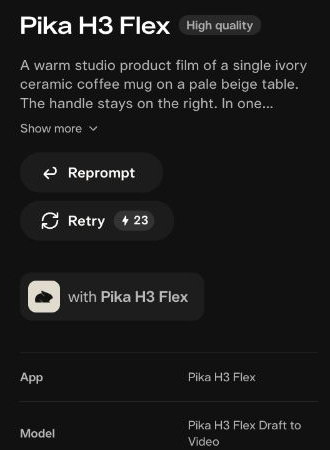
A warm studio product film of a single ivory ceramic coffee mug on a pale beige table. The handle stays on the right. In one continuous shot, the camera slowly moves closer while delicate steam curls upward. The mug stays still and fully inside the frame. Soft window light comes from the left. End with a gentle hold.
Sound: quiet room ambience and a soft ceramic tap at the beginning.
Music: a quiet, simple piano phrase.
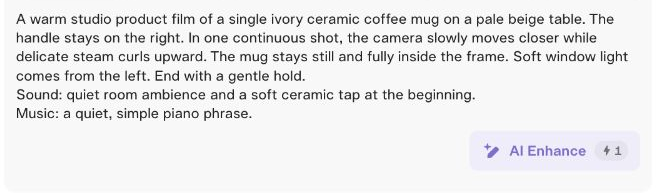
This brief provides a subject, location, direction, lighting and stopping point. You can replace the mug with a candle, a shoe or another simple product. Keep the first attempt free of extra hands, scene changes and several competing camera moves.
Choose the aspect ratio
Open Aspect Ratio. Select 16:9 for a horizontal video, 9:16 for a vertical short, or 1:1 for a square composition. Choose before generating so the model can frame the subject for its destination.
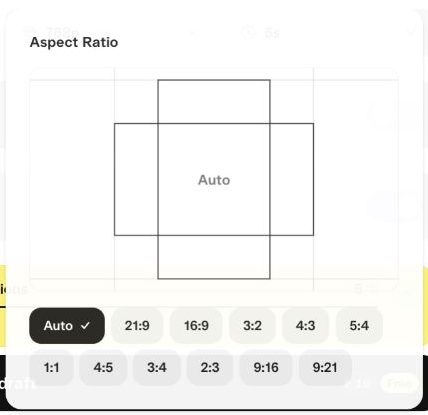
The menu also includes 21:9, 3:2, 4:3, 5:4, 4:5, 3:4, 2:3 and 9:21. A very wide or tall format needs a matching composition brief. For a vertical product clip, ask for the whole item with room above and below it.
Set resolution and duration
Open Resolution and choose 768p for this exercise. Keep Draft Mode on. Use 480p when a rough composition check is enough; choose higher finishing resolutions after the scene behaves the way you want.
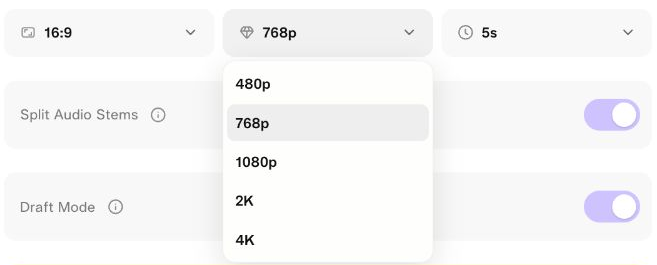
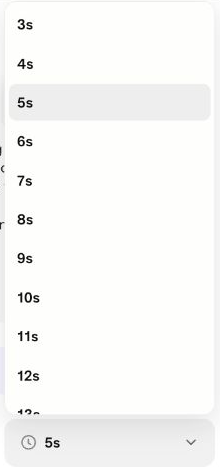
Open Duration and select 5s. A longer duration gives an action more time, but it also changes the estimate. Adding seconds is most useful when the subject needs time to complete a movement, rather than when the prompt is unclear.
Decide if you need separate audio tracks
Turn on Split Audio Stems if you want Dialogue, Music and Effect files alongside the video. Leave it off when the mixed soundtrack is enough for a quick idea check. We enabled it for the text example so you can inspect the resulting files.
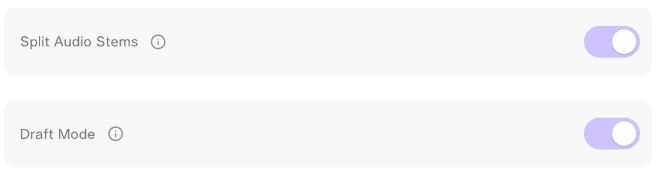
Stems are separate sound components, not three alternative soundtracks. The Effect track can contain ambience and small physical sounds. A Dialogue file can still be created for a prompt without speech, so inspect its contents before treating it as useful dialogue.
Generate one draft and review it
Set Generations to 1, confirm the final cost or Free label, and click Generate draft once. Wait for the result in the project. Avoid submitting again merely because the page takes time to change.
In the sampled frames, the generated mug stays fully visible, its handle remains on the right, and the steam changes. The camera approach is subtle. If your brief requires a stronger approach, revise only the camera sentence and compare the next take against this one.
The model also supplied background details beyond the simple table description. Text-only creation leaves those choices open. Use a first frame when the room, product outline or background arrangement needs tighter control.
Step 4: animate a product photo with Frames
Prepare and attach the first frame
Use a clear image with the entire subject visible. Leave space around the edges for movement. A tightly cropped handle, shoe tip or bottle cap gives the model less room to preserve the object during a camera move.
For this exercise, download our mug source photo. Switch to Frames, then click Choose first frame.

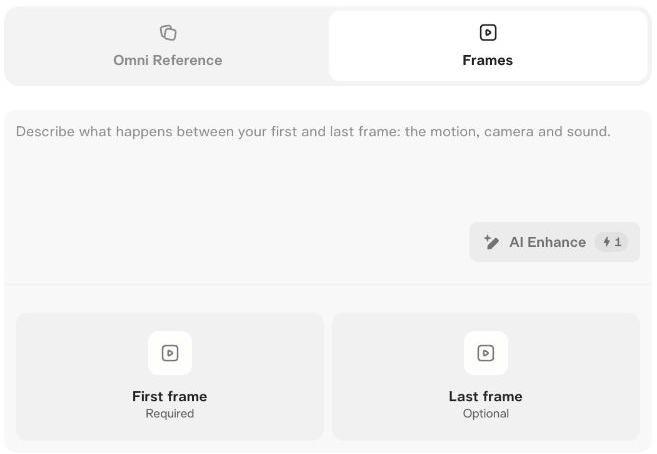
Choose Upload, select the image, and wait for its preview to appear. The picker accepts PNG, JPG and WebP. Our initial WebP upload failed; a PNG conversion of the same image uploaded successfully. This is a useful recovery option, not evidence that all WebP files fail.
If an upload shows an error, remove the failed attachment before adding another copy. Check that the new preview has replaced the error and that the price has settled before generating.
Describe movement rather than rebuilding the photo
Keep the first frame, leave the last frame empty, and use this exact motion prompt:
Begin with the supplied first frame. Steam rises gently from the coffee. The camera makes a slow, short push-in and stops before the mug touches the edges. Keep the ivory mug, handle on the right, dark coffee, beige tabletop and warm light consistent. The mug remains still.
Sound: quiet room ambience.
Music: no music.
Set 16:9, 768p, five seconds and one generation. Keep Draft Mode on. We left Split Audio Stems off for this attempt. Check that the allowance now says Image to Video, then generate.
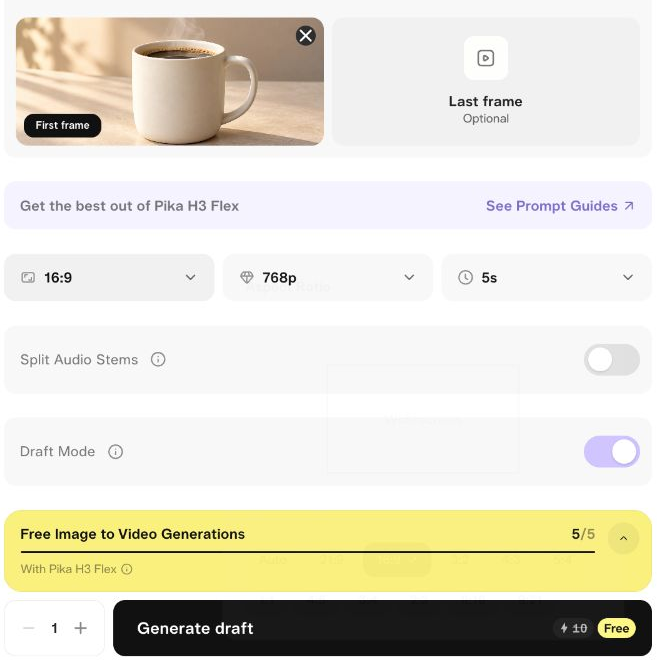
The sampled output retains the original mug, tabletop and warm setting. Steam changes, and the mug becomes slightly larger in the frame. Compare the handle, rim and shadow at the beginning and end before deciding the shot is ready for a product page.
This workflow is a useful next step after our first-photo animation guide. The source image does most of the appearance work, while your H3 Flex prompt directs motion and sound.
Add a last frame when the ending matters
Use Choose last frame when you have a specific ending image. Prepare both images with a similar subject, lighting and aspect ratio. A small change in position or camera distance is a clearer transition than two unrelated scenes.
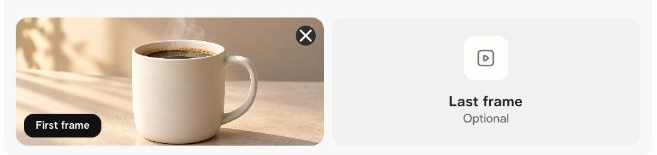
Describe one continuous action connecting the two images: “Begin on the first frame, move slowly closer as steam rises, then settle into the last-frame composition.” Keep the path plausible within the selected duration.
A last frame guides the destination; it does not guarantee every intermediate detail. Inspect the middle of the clip for shape changes. For a longer sequence, plan separate shots and cuts rather than forcing several transformations into one transition.
Step 5: use Omni Reference for controlled edits
Give every attachment a job
Switch to Omni Reference and click the Add button inside the reference area. The media picker accepts images, video and audio. Upload only the files needed for this attempt.
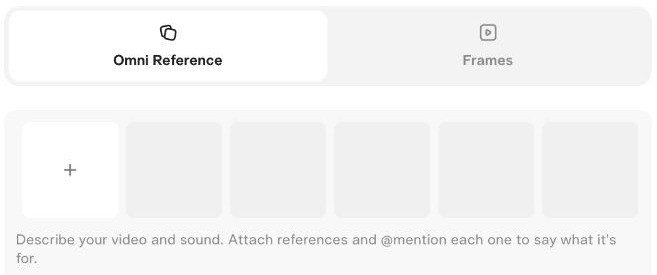
The model’s published limit is 12 assets total, with category ceilings of nine images, three videos and three audio clips. Those ceilings do not add up to an allowance of 15. The picker’s general upload wording can be broader than the model’s actual input limits.
For video and audio, the published limits are 2–15 seconds per clip and no more than 15 seconds combined per type. Reference mode needs at least one image or video; an audio file alone is not a complete reference request.
Write the role of each file explicitly. For example, use @Image1 for the product appearance, @Image2 for the room, and @Video1 for movement only. Start with one or two references. More files can introduce competing instructions as easily as they add useful detail.
Recolor an existing clip
We uploaded the text-generated mug video and asked for one change: make the mug green. The rest of the prompt names the details that should remain stable.
Edit @Video1. Change only the ceramic mug color from ivory to deep forest green. Preserve the rounded mug shape, handle on the right, coffee, rising steam, tabletop, warm window lighting and the original slow camera approach. Keep the same composition and timing.
Sound: keep the quiet room atmosphere.
Music: a quiet, simple piano phrase.
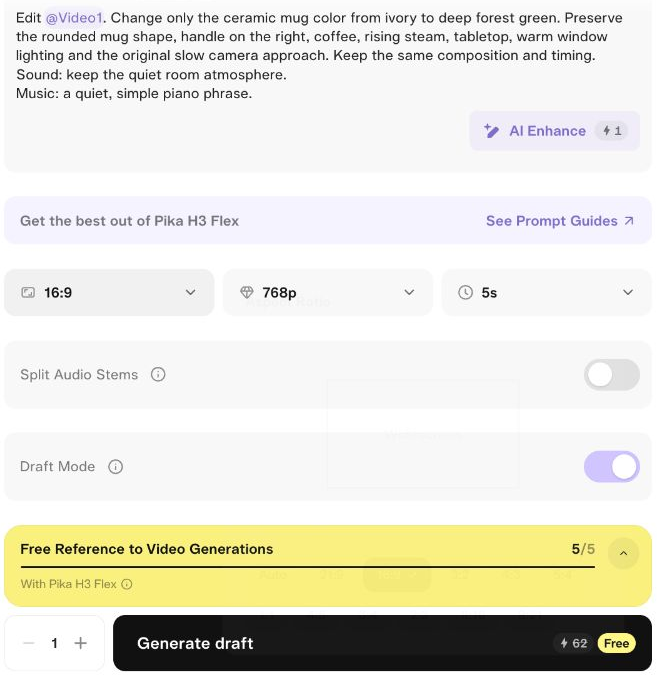
The attachment receives a Video1 label. Use its mention button or type the corresponding reference name in the prompt. Check that it refers to the intended file, especially after removing or rearranging attachments.
We selected 768p, five seconds, 16:9, Draft Mode and one output. The settled reference estimate was 62 credits, but the daily reference allowance made this attempt free.
The sampled output changes the mug to dark green while retaining the recognizable scene and right-side handle. This is a useful example of a focused edit. It does not establish exact preservation of every pixel, movement or sound.
For a more complex edit, first prove the simplest change works. Replacing a color, changing an outfit and rebuilding a background in one prompt makes it harder to identify which instruction caused a problem.
Combine image, motion and audio references carefully
A reusable reference brief can be short: “Keep the product from @Image1, use @Image2 only for the setting, and borrow the slow camera movement from @Video1.” Then describe the action and ending in plain language.
For an audio reference, explain its role: voice identity, rhythm, atmosphere or a sound texture. If it supplies a voice, write the new spoken line explicitly. Use recordings you have permission to use.
Reference labels communicate intent; they are not rigid editing masks. A motion clip can influence the background or subject as well as movement. Review those details, and simplify the reference set if the result borrows too much.
Step 6: download the video and separate audio stems
Open the finished asset
Click the generated video to open its details. The panel identifies the model, resolution, duration and cost, and provides Reprompt, Retry and download controls. Use the top download arrow to save the video.
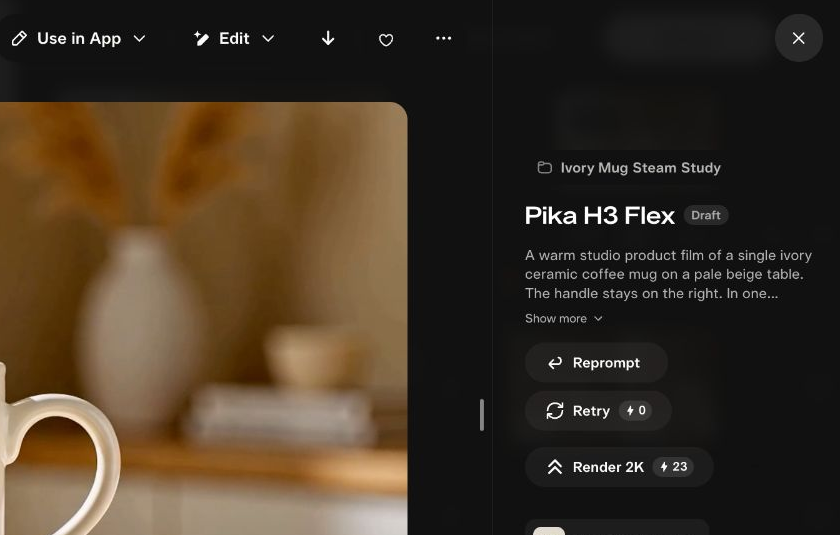
Reprompt lets you revise the instructions. Retry requests another generation and can consume credits or an allowance. Download retrieves the existing result; it should not be confused with either creation action.
Keep filenames descriptive: mug-text-draft, mug-photo-draft and mug-green-edit are easier to compare than several files called output. Save the prompt and settings alongside each clip.
Open each audio asset separately
When Split Audio Stems is enabled, the project contains Dialogue, Music and Effect assets. Open the track you need and use its download arrow. The screenshot below shows the Music asset rather than the video preview.
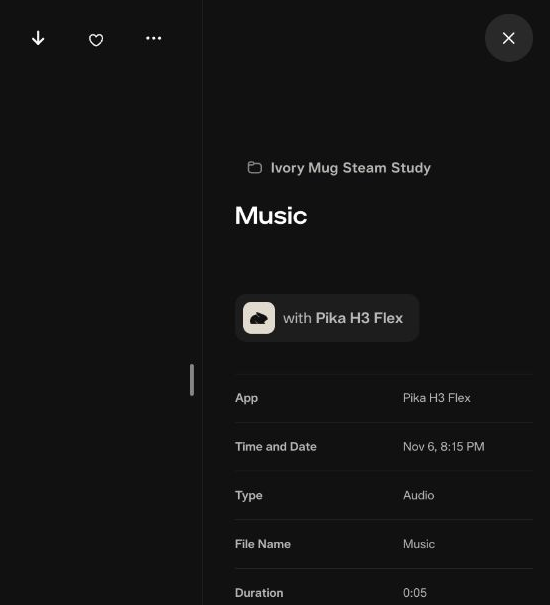
Download the files from our example: Music WAV, Effect WAV, and Dialogue WAV. These are the generated files, including the Dialogue track from a prompt that did not request speech.
Place the stems at the same starting point in your editor. Keep a copy of the mixed video for comparison. If you use separate stems, mute the video’s original mixed audio to avoid hearing the same sounds twice.
Listen to each track alone, then together. Turn down music that competes with speech, trim unwanted tails, and check the final mix on headphones and a phone speaker. A track label does not guarantee perfectly isolated sound.
Step 7: finish a keeper at 1080p, 2K or 4K
Choose the take before choosing the resolution
Open the draft you want to keep. Find the Full quality resolution menu beside its Render button. The available finishing choices are 1080p, 2K and 4K.
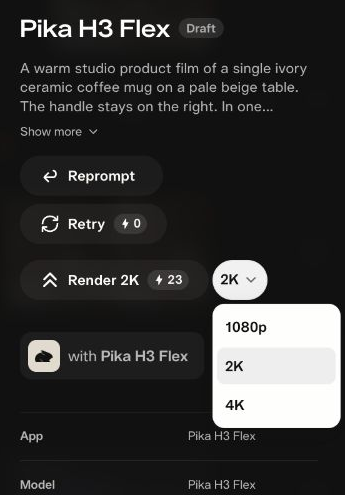
Pick the destination resolution, wait for the quote, and read it before submitting. Our five-second text draft with stems quoted 20 credits for 1080p and 23 for 2K. The draft itself had been free, so its finishing price was not zero.
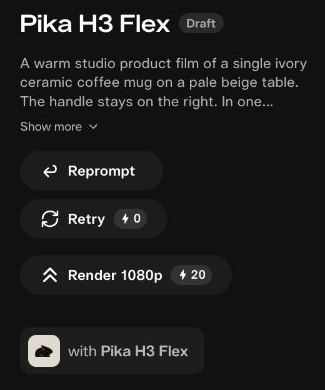
Do not finish a take with the wrong camera direction or a distorted product. A larger output gives you more pixels, but it is not a substitute for correcting the underlying shot.
Check the actual finished file
Our 1080p finishing attempt failed and the service returned its 20 credits. A subsequent 2K finish succeeded, producing a 2560×1440 file and recording 23 tokens in the result details.
The sampled draft and 2K frames show the same recognizable take and scene. Check the full clip after downloading, including the beginning, ending and audio. Confirm the dimensions in your editor before placing it in a fixed-resolution project.
Keep the draft until the finished file is safely downloaded and reviewed. If finishing fails, inspect the job status and refund before trying again. A temporary success-looking label is less useful than the final asset or completed job record.
Credit costs: calculate the route, not just the duration
H3 Flex has different rates for text/image/keyframe generation and reference-to-video. Video references can add billable input seconds as well as output seconds. A five-second edit therefore may cost more than a five-second clip created from text.
The following are published launch rates per output second for Pika Create. They are planning figures, not a substitute for the settled quote on your account. Check Pika’s pricing table for current launch and regular rates.
| Resolution | Text, image and keyframe | Reference-to-video |
|---|---|---|
| 480p | 1 credit/second | 3 credits/second |
| 768p | 2 credits/second | 6 credits/second |
| 1080p | 3.5 credits/second | 7.5 credits/second |
| 2K | 4 credits/second | 8 credits/second |
| 4K | 8 credits/second | 10 credits/second |
For a simple five-second 768p request without stems, the published launch calculation is 5 × 2 = 10 credits. Our photo draft displayed that 10-credit amount before the free allowance was applied. In a later same-prompt test against six other video models, an H3 Flex draft charged 10 credits, the lowest of the group.
For a five-second video reference and five seconds of output at the published 768p reference rate, the planning calculation is (5 + 5) × 6 = 60 credits. Our actual source file was slightly longer than five seconds, and the app displayed 62. Use the app quote for the final amount.
Image and audio reference files do not add the video-input-duration charge, but a reference-mode generation still uses the reference route’s rate. “Free reference inputs” does not mean “free reference generation.”
Pika lists an additional stems rate of 0.1 credits per second. Our five-second text request with stems displayed 12 credits, so do not assume a hand calculation will exactly match the app’s rounding or billable configuration.
| Our operation | Settled quote | Actual account effect |
|---|---|---|
| Text draft, 768p, stems on | Free; 12-credit amount shown | 0 credits |
| Photo draft, 768p | Free; 10-credit amount shown | 0 credits |
| Video-reference color edit, 768p | Free; 62-credit amount shown | 0 credits |
| Text draft finished at 1080p | 20 credits | Failed; 20 returned |
| Text draft finished at 2K | 23 credits | 23 credits charged |
Total net spending for these examples was 23 credits. Promotional eligibility made the drafts free; a different account or a later date may produce a different total.
Write stronger prompts without making them longer
Use a repeatable prompt structure
Start with subject and setting → action → camera → ending → sound → music. Add reference roles at the beginning when attachments matter. This gives each sentence a clear purpose. The published prompt limit is 8,000 characters; a concise brief leaves more room to identify the important action. The model/API also supports a seed, but use only controls your chosen interface exposes.
“Make a cinematic product video” leaves many choices open. “An ivory mug stays still on a beige table; steam rises; the camera moves a little closer and stops with the whole handle visible” defines something you can check in the result.
Use the official prompting guide for model-specific direction. Its useful advice includes writing events in playback order, naming camera speed and distance, and separating the sound brief from the music brief.
Give the camera a destination
Name both the movement and where it stops. Try “slow push-in from a full-product view to a close product view, keeping the handle inside the frame.” This is more actionable than stacking “cinematic, dramatic, professional” into the prompt.
A push-in changes the camera position. A zoom changes the lens framing. An orbit moves around the subject. Choose the movement that serves the shot, then keep the subject’s action simple while learning it.
Write dialogue and narration differently
For on-screen dialogue, identify the speaker and place the exact words in quotation marks: “The shop owner looks at the cup and says warmly, ‘Your morning starts here.’” Keep the line short enough for the duration.
For narration, specify an off-screen voiceover and describe what the on-screen subject does. If a person should remain silent, say their lips remain closed. This helps separate a narrator from a speaking character.
Keep scene instructions in English as the vendor recommends, while writing spoken lines in the language you want heard. Check pronunciation, timing and speaker assignment in the result before using it publicly.
Plan multi-shot clips as timed beats
Write numbered shots and a start time for each cut. For example: [Shot 1] 0–3s: full product on the table. [Shot 2] at 00:03: close-up of steam. [Shot 3] at 00:06: return to the full product and hold.
Use an eight- or ten-second setting for that plan. Each shot should introduce a useful change in information. For a small change in distance, a continuous camera move can be simpler than another cut.
Treat timestamps as direction, then inspect the actual cuts. For exact timing, trim the result in an editor. This is a practice prompt structure, not an additional tested output from our mug examples.
Troubleshooting: change the smallest thing that can fix it
| Problem | What to check | Practical next action |
|---|---|---|
| Source image fails to upload | Error badge and completed preview | Remove the failed attachment; try a clean PNG or JPG |
| Generate stays unavailable | Required frame, upload progress, prompt and quote | Finish the missing input and wait for the settled button |
| Reference request costs much more | Input mode and attached video duration | Shorten the reference clip or use a still when motion is unnecessary |
| Product shape changes | Source crop and number of requested actions | Use a clearer first frame and one movement |
| Camera move is too weak | Direction, distance and stopping point | Rewrite only the camera sentence |
| Background changes during an edit | Competing references and broad instructions | Name the details to preserve and request one change |
| Voice comes from the wrong person | Speaker identification and narration wording | Identify the speaker or explicitly request off-screen narration |
| Music competes with speech | Mixed audio and separate Music stem | Lower the Music stem in your editor |
| Higher-resolution render fails | Final job status and returned credits | Save the draft, check the failure, then make one considered retry |
| Download seems to do nothing | Browser download list or a blocked download window | Check for the file before clicking repeatedly |
Use the photo preparation checklist before uploading a first frame. Keep a small comparison record: prompt, input files, settings, quoted cost, actual charge and the reason you accepted or rejected the result. That turns repeated attempts into useful experiments.
When a job fails, save its ID and the error message. Check the account balance before assuming credits are lost. For a broader diagnosis, use our Pika generation-error guide.
API, open weights and ComfyUI: choose your next route
Use the web app when you want to make and inspect individual clips. Use the Pika H3 Flex API when your application needs repeatable submissions, job tracking and file handling. Its model family separates text, image, reference and draft-finishing operations, plus audio stems and prompt rewriting.
For an API project, first reproduce one browser example. Save its prompt and input files, choose the matching endpoint, set duration and resolution explicitly, and record the returned job identifier. Download completed outputs and handle failures before building a batch workflow. Keep API keys on your server.
The official model card distinguishes local open-weight generation from Pika-hosted additions. Local inference provides native 480p/768p output with mixed audio; the hosted route adds finishing and other services. Do not assume a local installation reproduces the hosted system’s speed or every export option.
For ComfyUI, use the official H3 Flex workflows. Select the text, reference, or first-and-last-frame template. Download the matching H3 base files and Flex adapter, preserve the template’s six-step schedule, and begin with its example before changing settings.
ComfyUI’s instructions specifically warn against stacking another acceleration adapter onto that published six-step workflow. Read the release instructions for any alternative community workflow rather than mixing settings from unrelated tutorials. Check the model license and hardware requirements before planning a local production setup.
These are alternative routes beyond this browser tutorial. The downloadable results above were made in Pika Create. Our API Club guide explains the account and workflow distinction in more detail.
Frequently asked questions
Is Pika H3 Flex free?
Some eligible accounts receive promotional daily generations. Check your account’s allowance and the final Generate button. The launch offer described here ends November 15, 2026; finishing, prompt enhancement or other actions may still carry charges.
Can H3 Flex generate audio with the video?
Yes. The model generates a soundtrack with the picture. Enable Split Audio Stems if you also want separate Dialogue, Music and Effect files. Review those tracks before using them in a finished edit.
Is H3 Flex 4K native?
The hosted high-resolution workflow generates at a lower native resolution and applies an integrated upscale stage. Select 4K for a 4K delivery requirement, while judging the actual output rather than assuming the label fixes motion or detail errors.
Can I use a voice recording without an image or video?
Reference mode requires at least one image or video. Add the relevant picture or clip, then explain the audio reference’s role. A standalone text-to-speech task belongs in a speech workflow instead.
Does a free draft make finishing free?
No. Our source draft was free, while the successful 2K finishing pass cost 23 credits. Read the Render quote separately from the Generate quote.
What should I make first?
Start with the five-second text example, then animate the supplied photo. Compare what the image controls, make one focused reference edit, and finish only the take that meets your brief. You will have a repeatable workflow and real files to judge at every stage.