
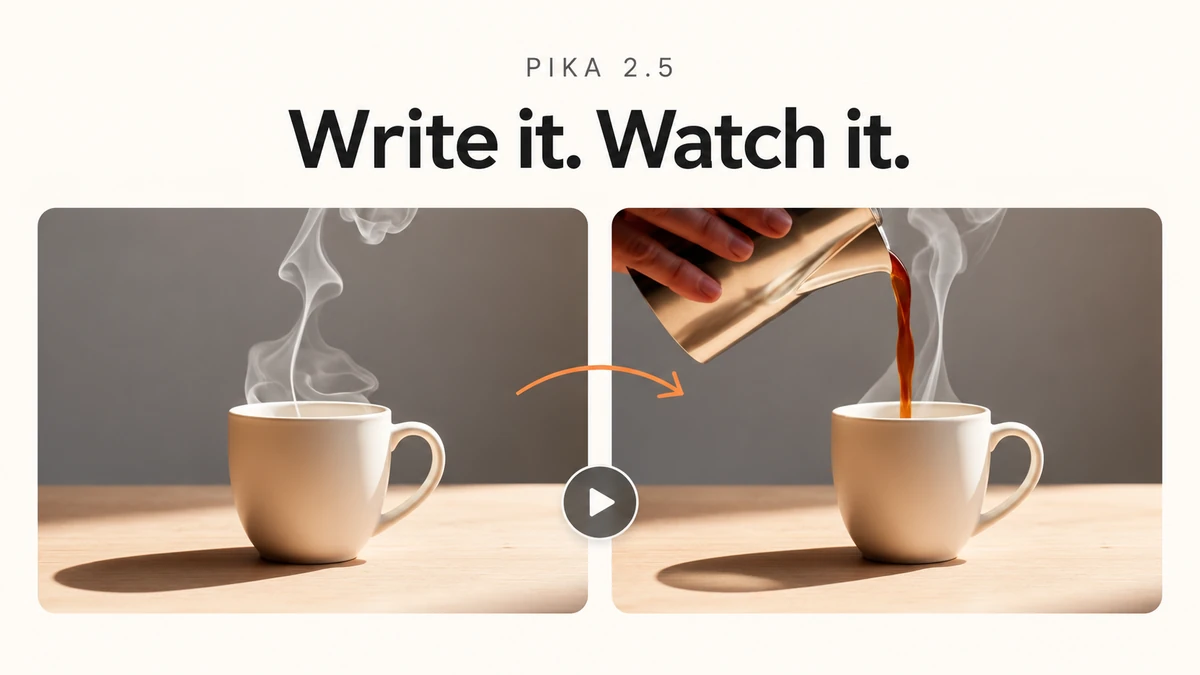
I used the dedicated Pika 2.5 app to create a new five-second product clip from text. We asked for an ivory mug with rising steam, selected 1080p, and requested one video.
The clip cost 45 credits. Watch it first: it begins with the requested mug, then adds a hand pouring coffee that I had excluded from the prompt. That makes it a useful example of what to check before using a generated product shot. Interface checked 9 October 2026.
Watch the clip, then choose your workflow
The steam and soft studio light are present. The extra pouring action is the main mismatch. I would not use it for a brief requiring an untouched, isolated mug. Watch the whole clip before judging it from its opening frame.
Download this MP4 to follow the Soundtrack setup. The second guide attaches this silent clip and explains the audio settings.
What is Pika 2.5?
Pika 2.5 creates video from a written shot or a starting photo. Pika also offers an ordered-frame workflow through Pikaframes. The checked Pika 2.5 FAQ says its renders are silent; our downloaded clip has no audio stream.
I would use a prompt-only clip for a new scene when exact product identity is flexible. I would start from an image when the subject and framing already matter. Use ordered frames when you need a particular start and end.
| Your starting point | Workflow | What the prompt should do |
|---|---|---|
| An idea, without a photo | Text to Video | Describe subject, scene, action and camera |
| One finished photo | Image to Video | Describe the motion and what should stay |
| Two or more planned stills | Pikaframes | Describe the transition between ordered images |
| A finished silent clip | Pika Soundtrack | Describe the sound; keep video creation separate |
For a product listing, a starting photo gives the model more concrete information. It still needs a full-clip check for shape, labels, colour and unwanted actions. See our text-to-video versus image-to-video comparison.
Step 1: open the dedicated app and write one shot
- Open Pika 2.5.
- For text-to-video, leave Image Reference empty.
- Write the scene in Prompt: one subject, one action, a simple setting and a camera direction.
- Choose resolution, duration and the number of generations before submitting.
Our exact product prompt:
A single matte ivory ceramic coffee mug stands on a pale oak table, with its handle on the right. Soft morning light from the left, plain warm grey studio background. Thin steam slowly curls upward from the mug. The camera makes a very slow straight push-in during the five-second shot. The mug stays upright and still. No people, no hands, no pouring, no writing, no logos.
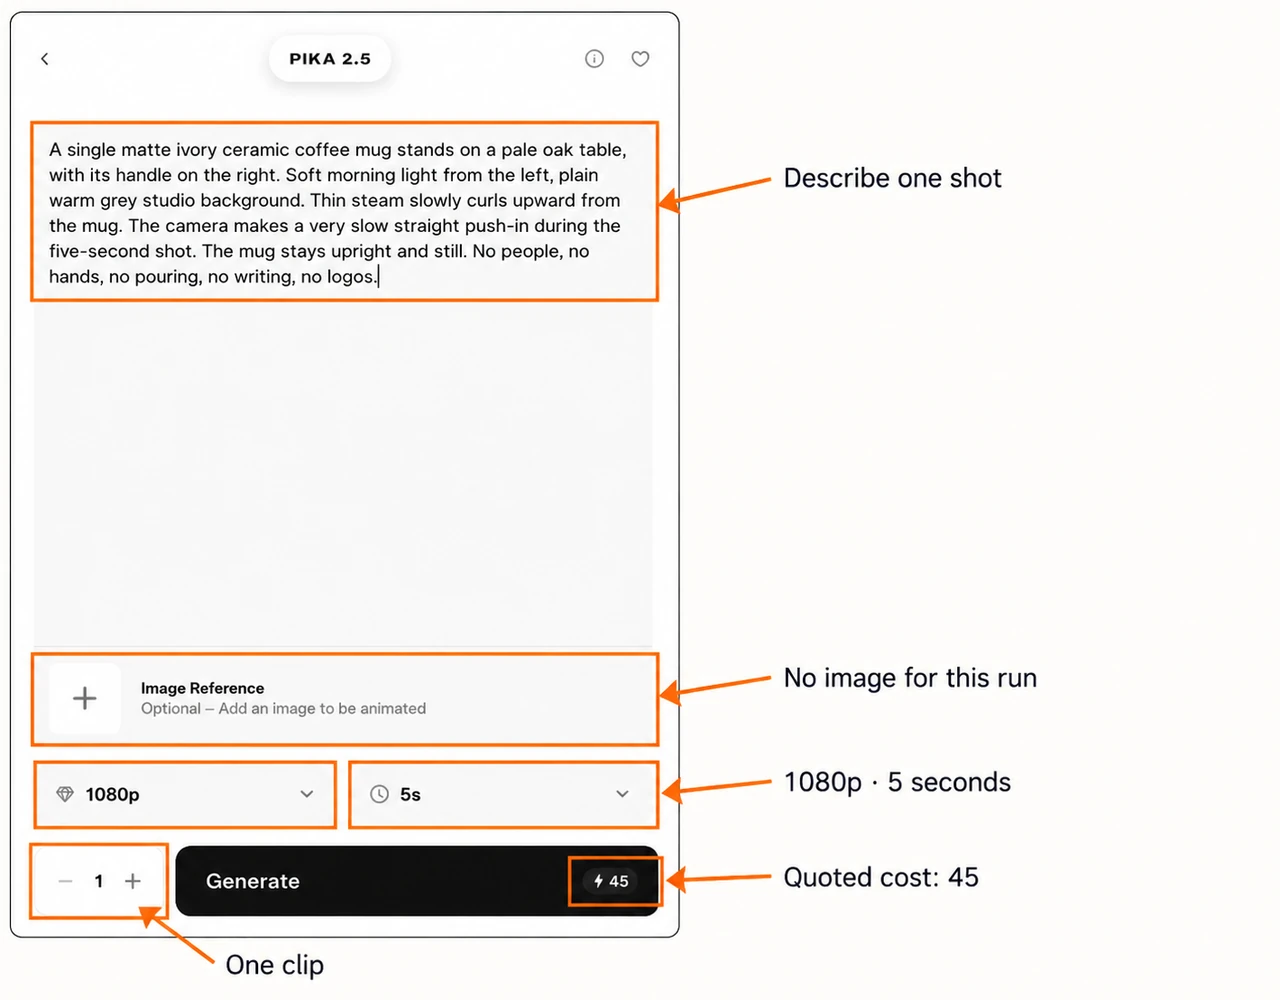
A prompt is a request, not a guarantee. Our exclusions did not prevent a pouring hand. For the next iteration, I would start from a clean product photo and describe only the steam movement, rather than spend on another prompt-only version without changing the approach.
Step 2: choose resolution, duration and count
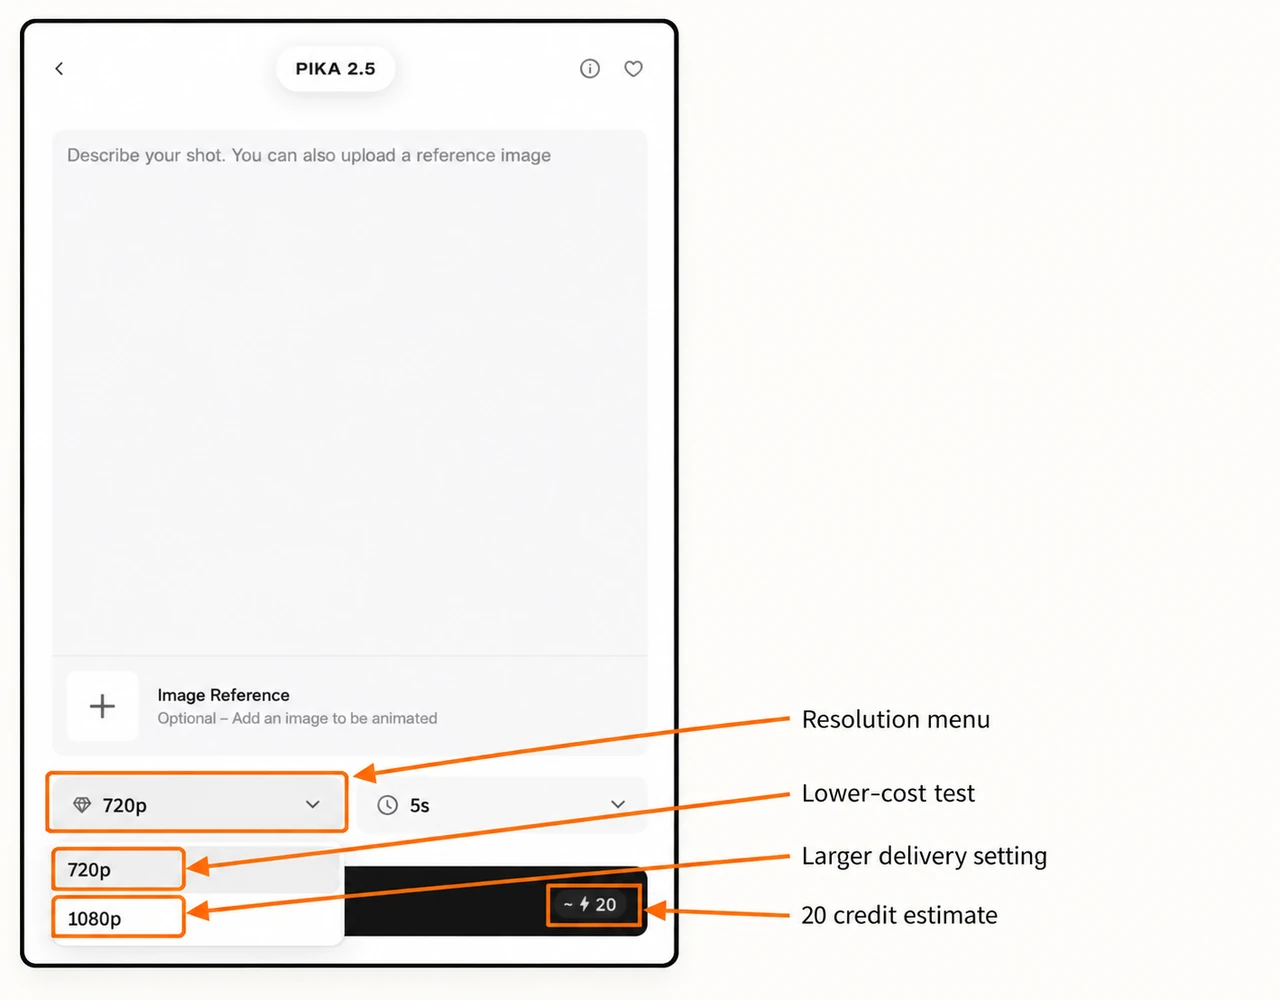
| Setting | What we observed | Our choice |
|---|---|---|
| Resolution | 720p or 1080p | 1080p |
| Prompt-only duration | 5s | 5s |
| Image workflow duration | 5s and 10s in the current menu | Keep 5s for a first clip |
| Generations | Plus and minus controls; default 1 | 1 |
| Prompt-only quote at 720p, 5s, one clip | About 20 credits | Inspected, not submitted |
| Prompt-only quote at 1080p, 5s, one clip | 45 credits | Submitted and charged 45 |
I would try 720p when testing a new idea and choose 1080p when the brief and source are ready. Our returned file was 1900 × 1092; the selected 1080p label is not a promise of a fixed 1920 × 1080 file.
The checked dedicated form had no separate aspect-ratio, audio, seed or negative-prompt control. Put direction in the available Prompt box. Do not copy settings from another model into this form.
Step 3: generate once and review the whole clip
Click Generate after the quote has settled. Open the finished asset from the project and play it from start to end.
| Requested | What this clip shows | My decision |
|---|---|---|
| Ivory mug on an oak table | Present | Useful starting scene |
| Rising steam and soft side light | Present | Fits the mood |
| No hands or pouring | A hand and pouring vessel appear later | Does not meet that part of the brief |
| A five-second silent clip | 5.03 seconds, no audio stream | Ready for a separate sound workflow |
Check the mug handle, rim, shadows and camera movement across the entire clip. If the scene is wrong, revise the source or action before retrying. Retry is another paid generation; downloading the existing result is the way to keep that file.
Step 4: download the video
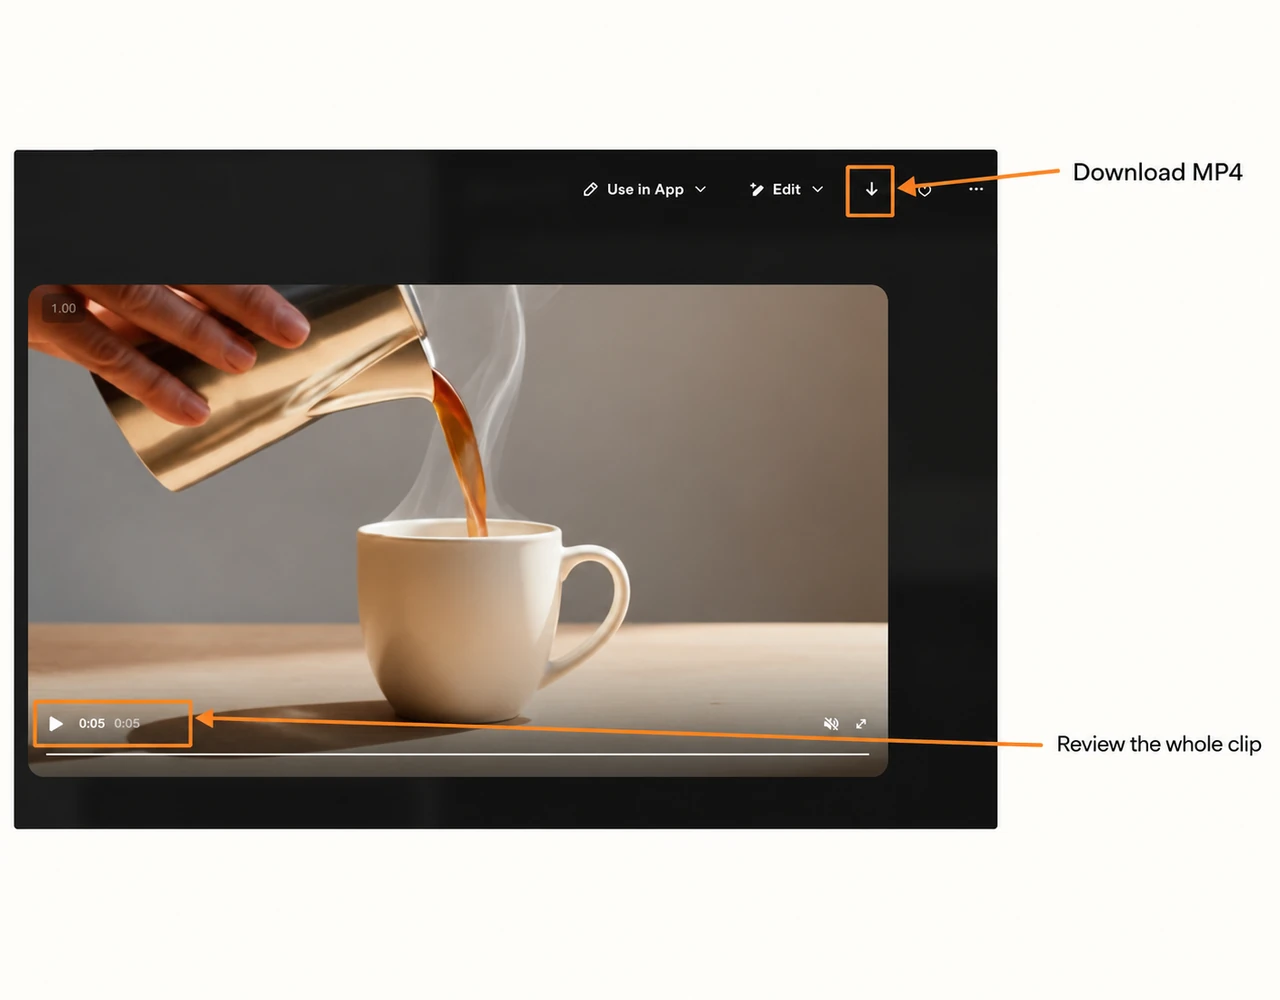
Our file is H.264 MP4, about 0.84 MB, with 5.03 seconds of video and no audio. The completed asset recorded 45 credits, matching the quote. We generated one new clip for this guide.
Use one photo instead of a prompt-only scene
- On the dedicated app, click the plus in Image Reference.
- Upload a device file, or select a saved image and confirm Use Selection.
- Confirm the thumbnail and 1 / 1 count.
- Describe a small action, then recheck resolution, duration and the quote.
- Use the thumbnail’s remove control to return to prompt-only generation.
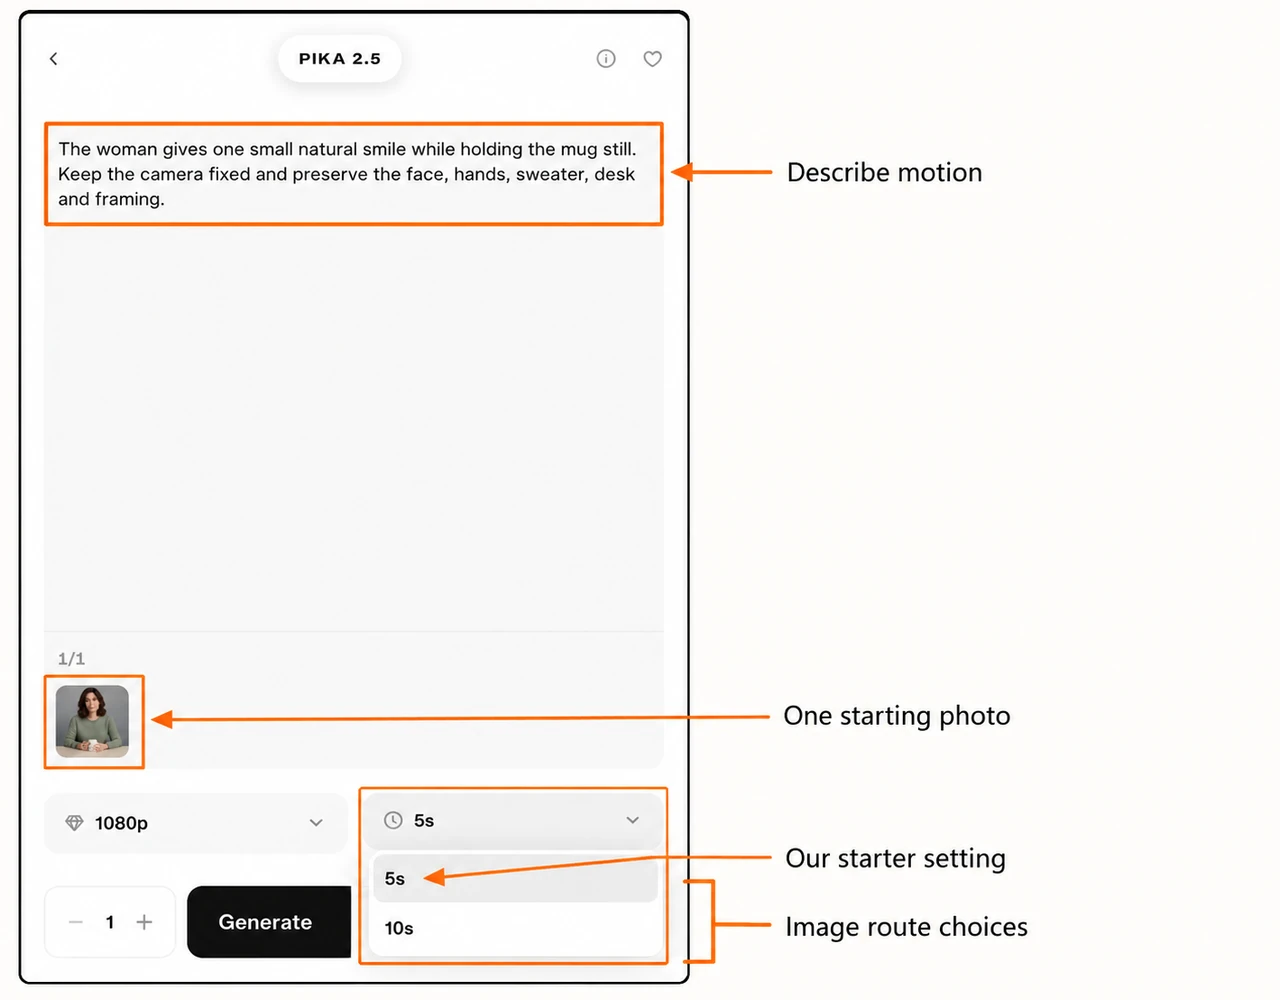
For the attached portrait, I prepared this motion direction:
The woman gives one small natural smile while holding the mug still. Keep the camera fixed and preserve the face, hands, sweater, desk and framing.
This is a prepared example instruction. The new video shown above uses the product prompt, not this portrait. For a complete tested photo workflow, follow our image-to-video guide.
Use Pikaframes for a planned start and end
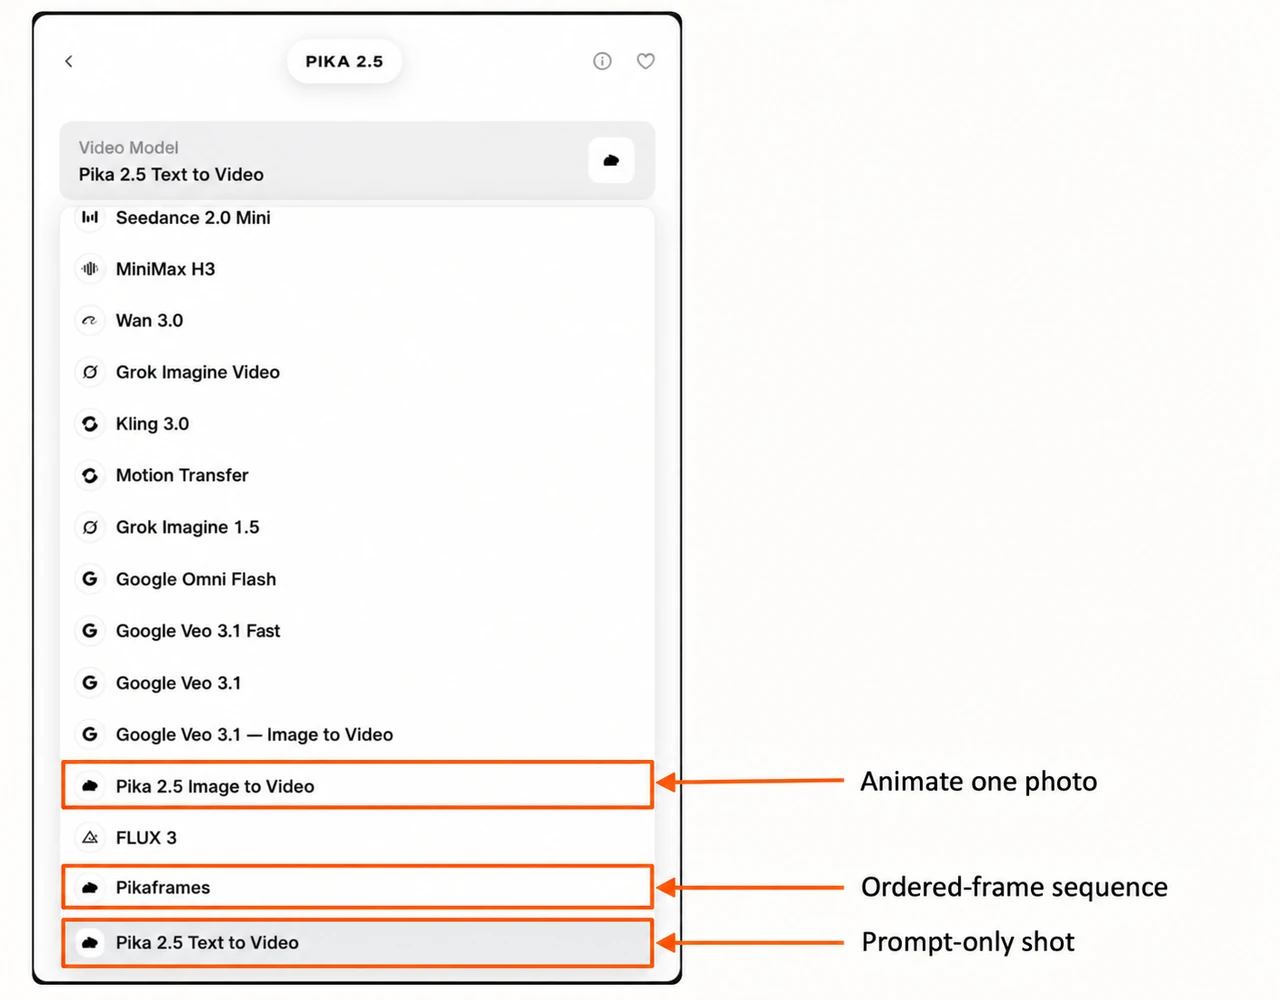
After generation, the project form has a Video Model menu. It lists Pika 2.5 Text to Video, Pika 2.5 Image to Video, and Pikaframes, alongside other models. The fresh dedicated page has a simpler form; you do not need this menu for the prompt-only steps above.
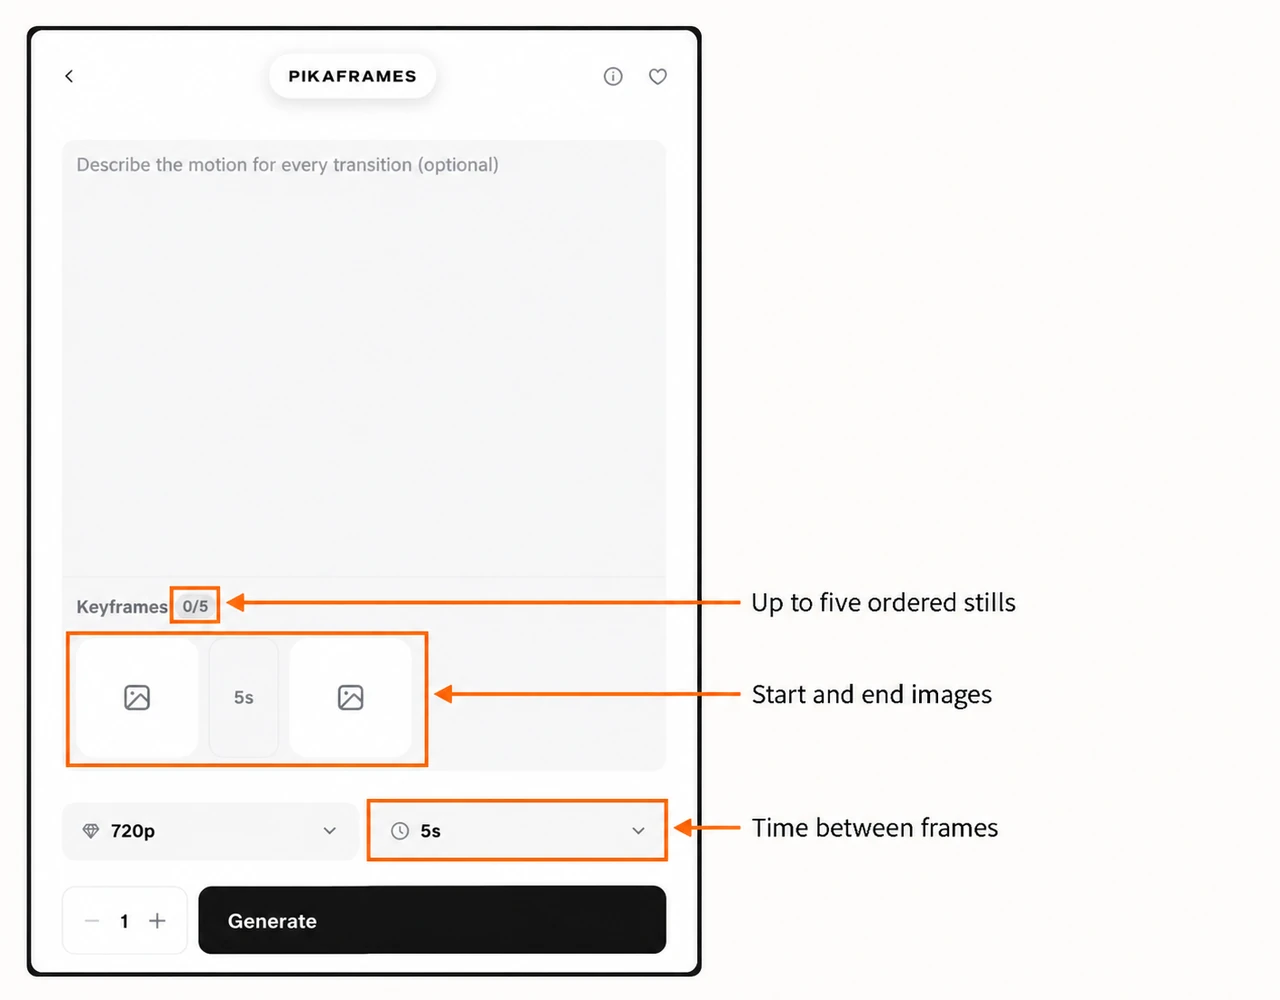
Start with two related images in the intended order. The checked frame form shows up to five slots and transition choices 1s, 2s, 3s, 4s, 5s and 10s. Pika’s page states that 10s is for exactly two frames, and a five-frame sequence renders at 720p. Recheck the available settings after attaching the frames.
I would use it for a controlled pullback or a planned pose change. For the worked example and its result, read Pikaframes versus ordinary image-to-video.
What should I do next?
- Need more control over the product? Start from a clear photo and ask for one small movement.
- Need a specific last frame? Plan two stills and use Pikaframes.
- Need sound on the finished clip? Follow Pika Soundtrack.
- Need a different camera view of an existing clip? Read Camera Director.
Keep the original prompt and selected settings with the downloaded file. That makes your next change easier to judge.