
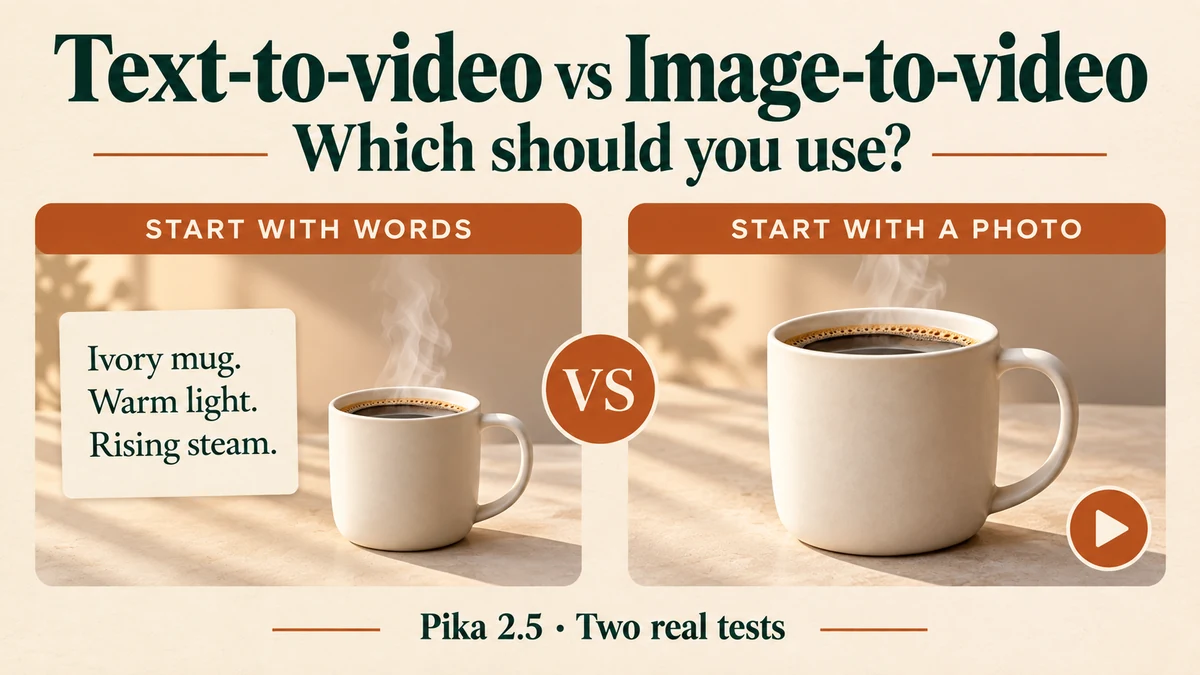
I’d start with image-to-video if I already had the product photo I wanted to use. I’d start with text-to-video if I wanted Pika to invent the scene. The deciding question is simple: do you need to keep an existing subject and composition, or are you still choosing them?
We tested both methods with an ivory coffee mug, gentle steam and a slow camera approach. Both attempts used Pika 2.5, 1080p and five seconds. The text-based result introduced an extra object near the end. The image-based result kept the mug and handle visible in the ending frame. Below, I’ll show the settings, prompts and frames that led to our choice.
Tested on 6 October 2026 in Pika’s current interface. One generation per method; 90 credits spent in total. These are two examples, not a success-rate study.
Choose your starting point
| What you need | I’d start with | What to check before spending credits |
|---|---|---|
| A clip built around an existing product photo | Image-to-video | The whole product is visible and the image is clear |
| A new scene that only exists in your notes | Text-to-video | The prompt describes subject, setting, framing and movement |
| Motion for an existing illustration or thumbnail | Image-to-video | Small details and lettering may change; inspect the result |
| Several different looks for the same idea | Text-to-video | Each attempt may invent a different subject or layout |
| A specific mug, person or branded object | Image-to-video as a starting point | A photo helps anchor the shot, but does not guarantee exact identity or readable logos |
| A precise ending frame or an edit to existing footage | Check a feature designed for that input | A single photo and motion prompt may not give enough control |
Text-to-video asks the model to create the scene and its movement from words. Image-to-video supplies the starting appearance through a photo, then asks for movement. I still review the entire output in either case.
What we tested and what it cost
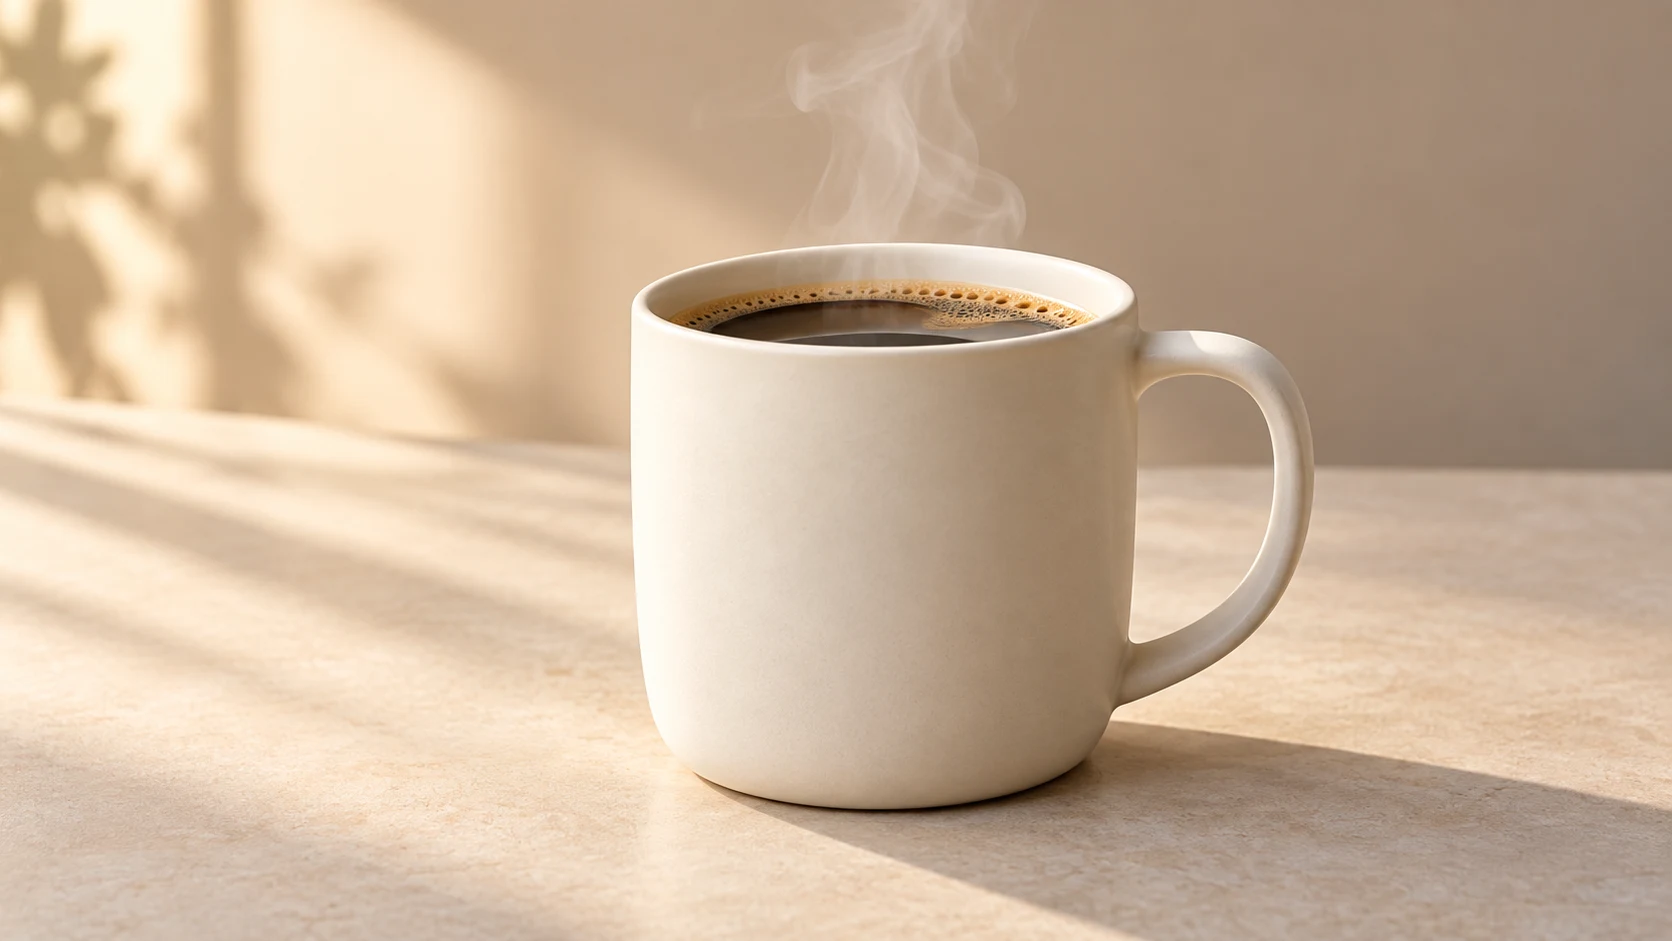
Our brief was a short coffee-product clip: a matte ivory mug on a beige tabletop, steam rising, and the camera moving closer. We reused the source photo from our image-to-video tutorial. It is an AI-generated example, not a photograph of a commercial product.
| Setting | Text-to-video | Image-to-video |
|---|---|---|
| Model | Pika 2.5 Text to Video | Pika 2.5 Image to Video |
| Input | Scene description and motion | One mug photo and motion description |
| Quality selected | 1080p | 1080p |
| Duration selected | 5s | 5s |
| Generations | 1 | 1 |
| Credits quoted and charged | 45 | 45 |
| Output details reported | 1900 × 1092; 0:05 | 1900 × 1092; 0:05 |
The selected quality was 1080p; the asset panel reported the dimensions above. I’m recording both rather than assuming every 1080p export is exactly 1920 × 1080. The player reported about 5.03 seconds for the text clip. Neither test requested audio, extra image references or a second generation.
The text prompt includes the scene description that the photo supplies for the image-based attempt. Both share the same motion sentence. We did not use a fixed seed, so these results cannot isolate input type as the only cause of every difference. Prices and controls can change; check the estimate beside Generate in your own account.
Make the text-to-video attempt
1. Open Pika 2.5 and leave the image input empty
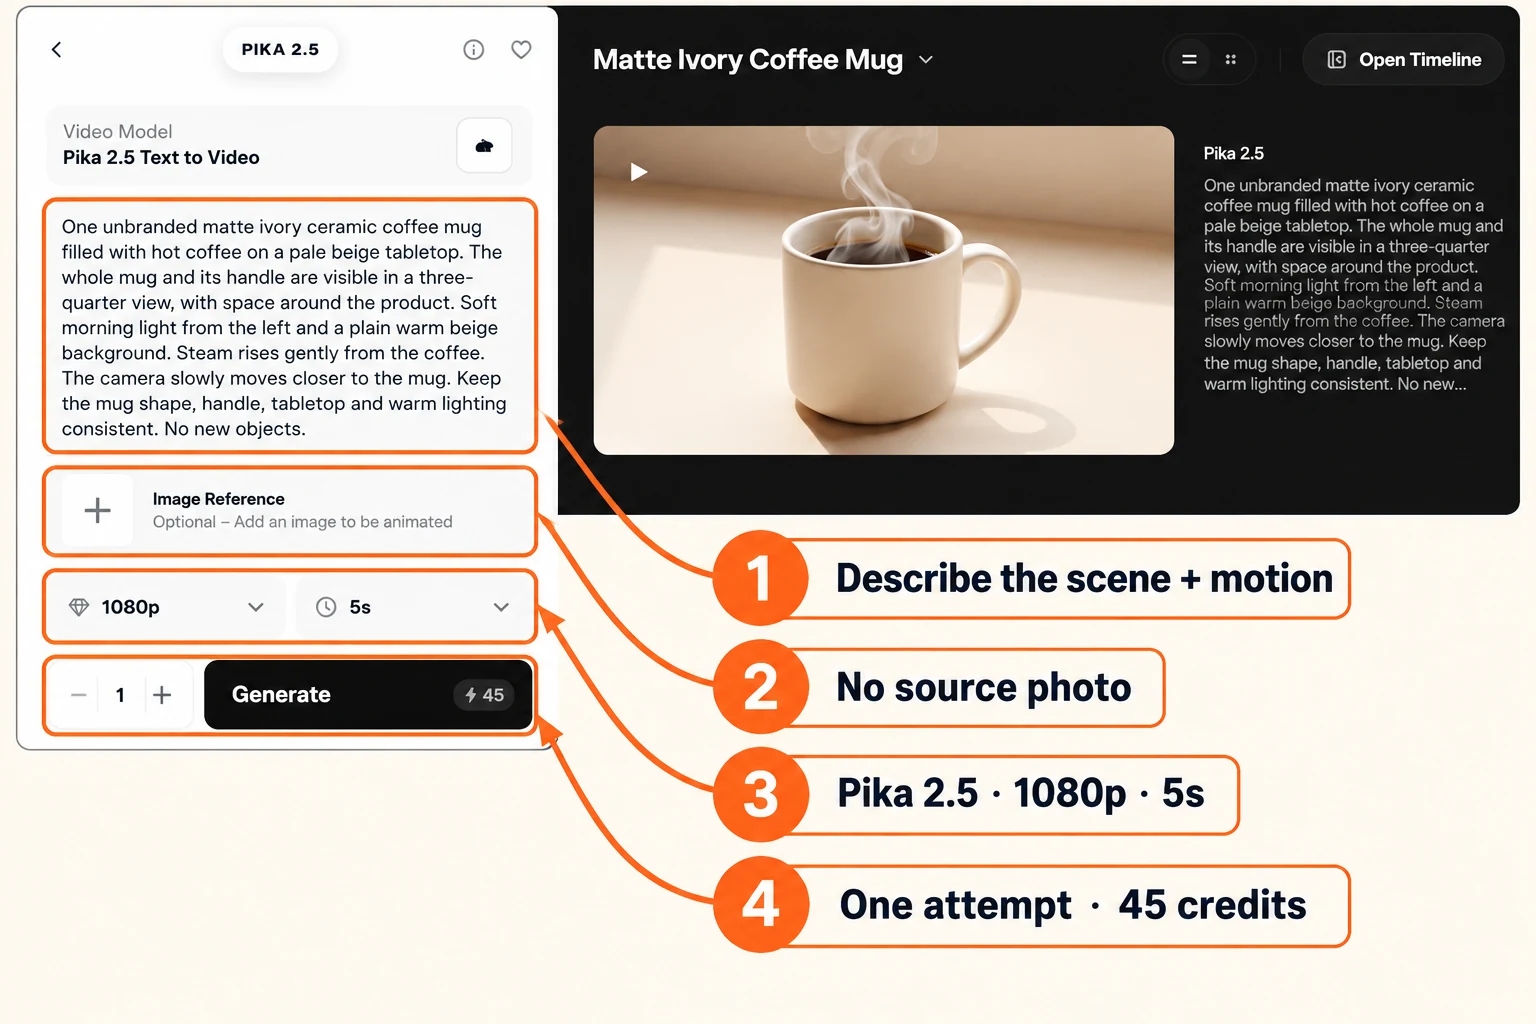
Open Pika’s Pika 2.5 app. Check that Video Model says Pika 2.5 Text to Video. Leave Image Reference empty. This matters: attaching a photo switches the app to the image-based mode.
2. Describe the scene before the movement
I used this full prompt. You can copy it, then change the product and setting to fit your own idea:
One unbranded matte ivory ceramic coffee mug filled with hot coffee on a pale beige tabletop. The whole mug and its handle are visible in a three-quarter view, with space around the product. Soft morning light from the left and a plain warm beige background. Steam rises gently from the coffee. The camera slowly moves closer to the mug. Keep the mug shape, handle, tabletop and warm lighting consistent. No new objects.
The first sentences establish the mug, background, lighting and framing. The final sentences describe movement and what should stay consistent. “No new objects” was a request, not a guarantee; our result is a useful reminder of that.
3. Match the settings, then generate once
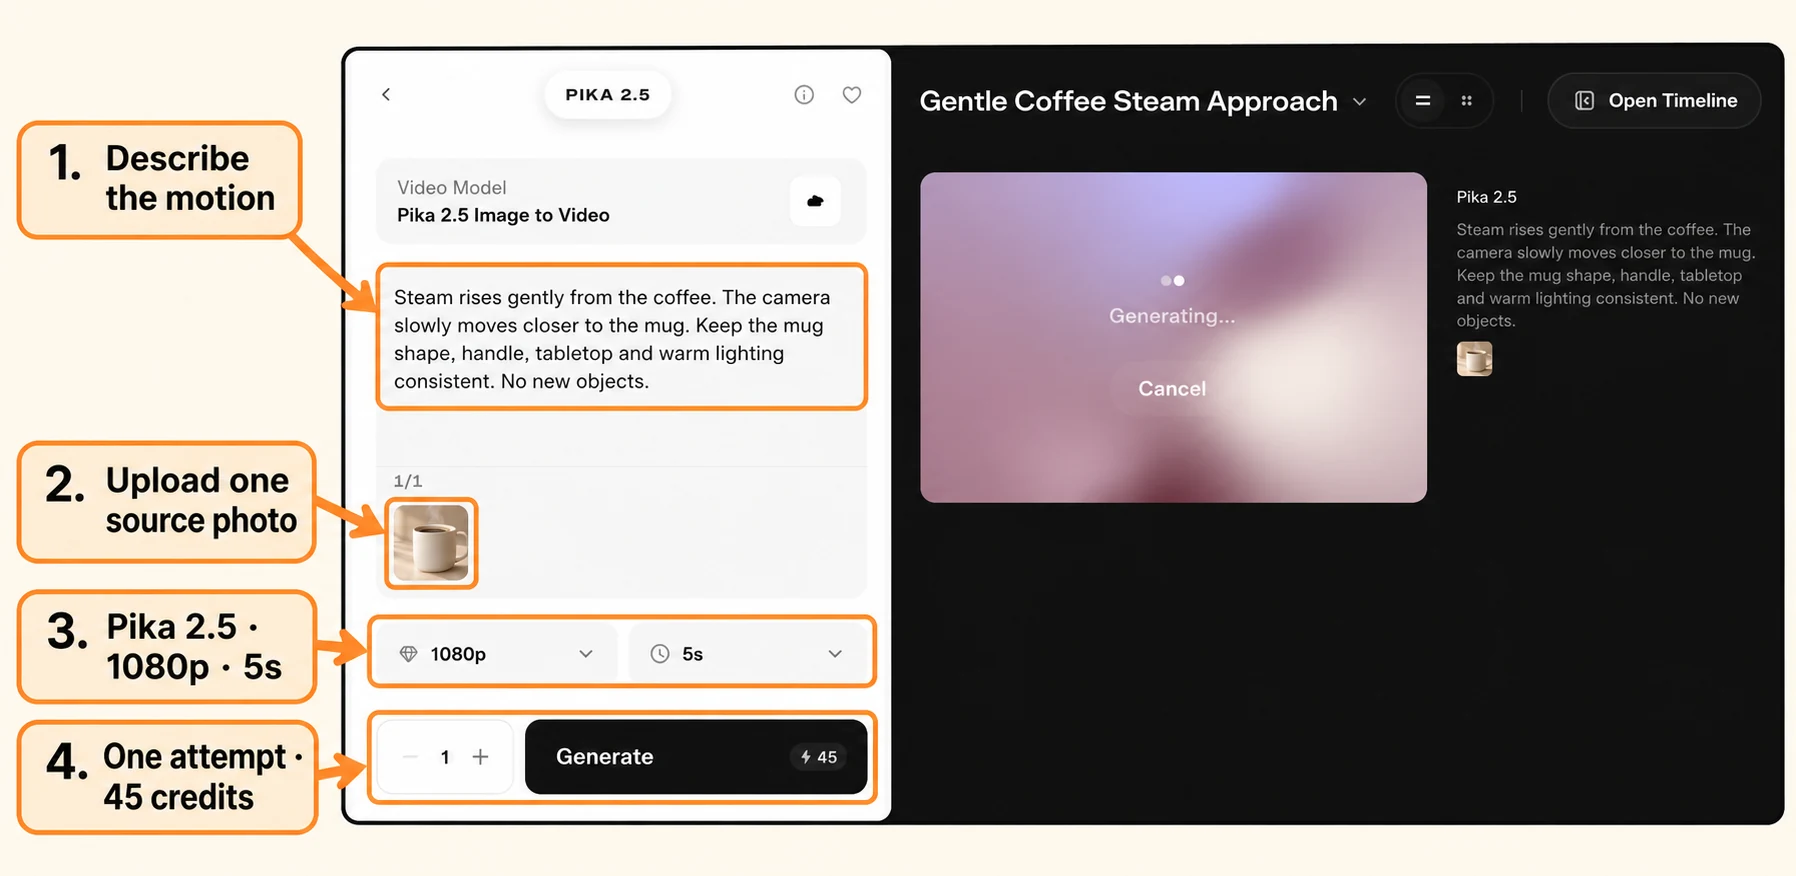
Select 1080p, 5s and 1 generation. Read the credit estimate before clicking Generate. Our screen quoted 45 credits, and that amount was charged. We submitted one attempt and waited for it to finish in the project.
Make the image-to-video attempt
1. Attach the starting photo
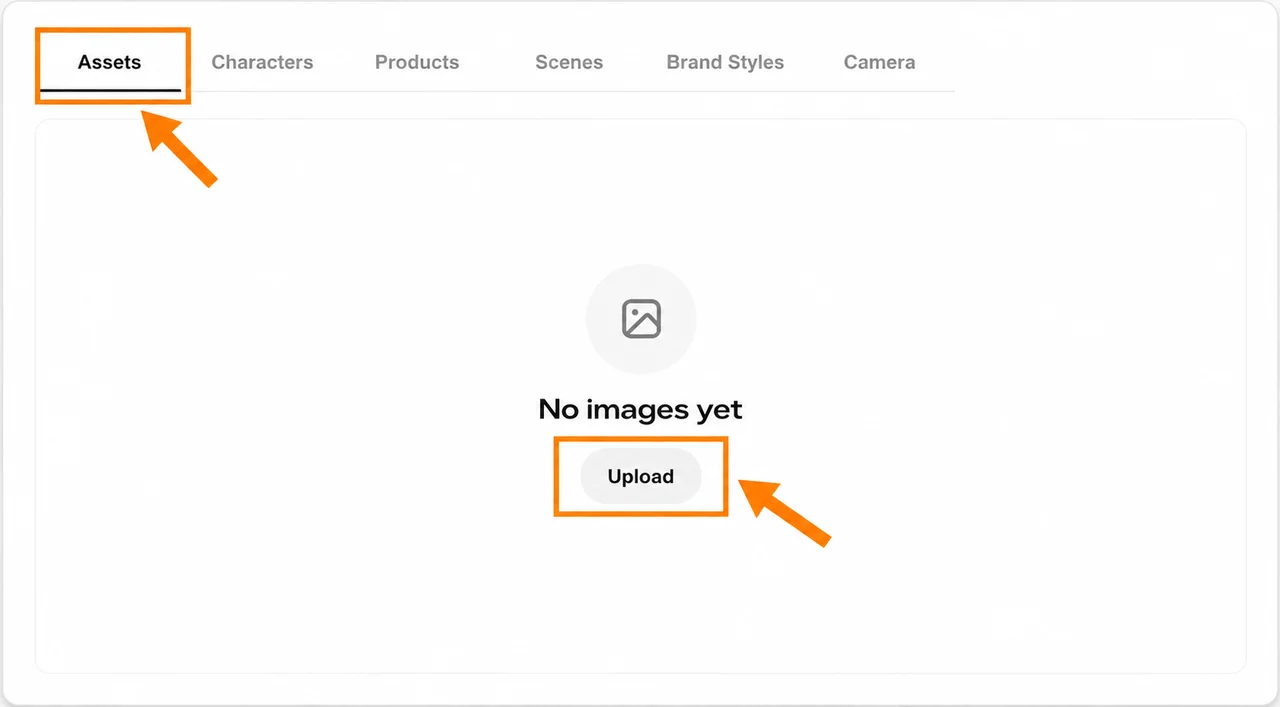
Open the same Pika 2.5 app. In the image input area, click the + button, then choose Assets → Upload and select your image. Wait for the upload to finish. For our test, we attached the mug image shown above and checked that the model label changed to Pika 2.5 Image to Video.
2. Describe what should move
The photo already shows the mug, tabletop and lighting. I used a shorter prompt that focuses on movement:
Steam rises gently from the coffee. The camera slowly moves closer to the mug. Keep the mug shape, handle, tabletop and warm lighting consistent. No new objects.
I would avoid asking for a camera orbit, a pouring action and a background change all in the same first attempt. One small movement makes the result easier to assess and the next edit easier to choose.
3. Keep the comparison settings the same
Select 1080p, 5s and 1 generation again. Confirm that one source image is attached, and check the model label before clicking Generate. Our image-based attempt also quoted and charged 45 credits.
What our two results show
Text-to-video: a usable idea, but an unwanted addition
The opening frame contained an ivory mug, coffee, steam and a beige scene. It was a newly invented mug and composition; it did not reproduce our source photo, which was never attached to this attempt.
At the ending frame, a pouring vessel and hand entered from the upper left. The closer framing also cut off the mug’s base. That breaks our “no new objects” request and makes this attempt a poor fit for the clean product shot we wanted.
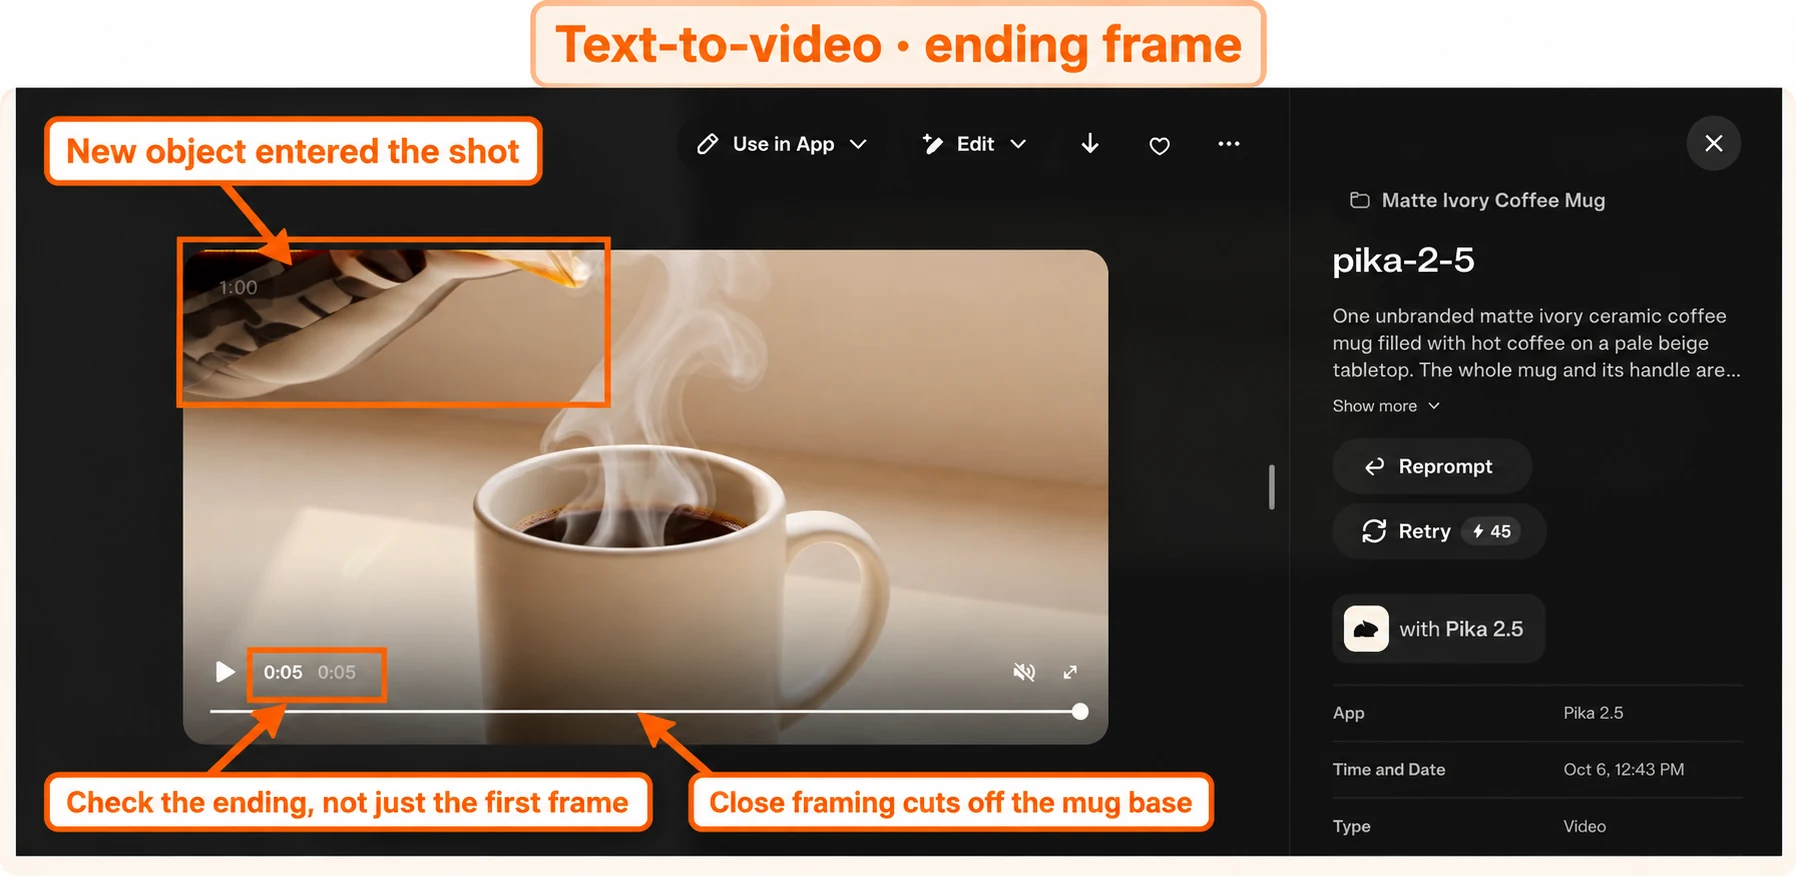
Image-to-video: closer to our product brief
The image-based clip started from our supplied mug scene. In the captured ending frame, the mug, handle and tabletop remained visible, with a different steam shape. It stayed closer to the appearance we had selected.
The camera approach was modest in the captured endpoints. I would not call the motion dramatic, or claim that every small detail stayed identical throughout the clip. For this particular brief, I prefer this attempt because the product remains the subject and the ending does not introduce the pouring vessel seen in the text-based result.
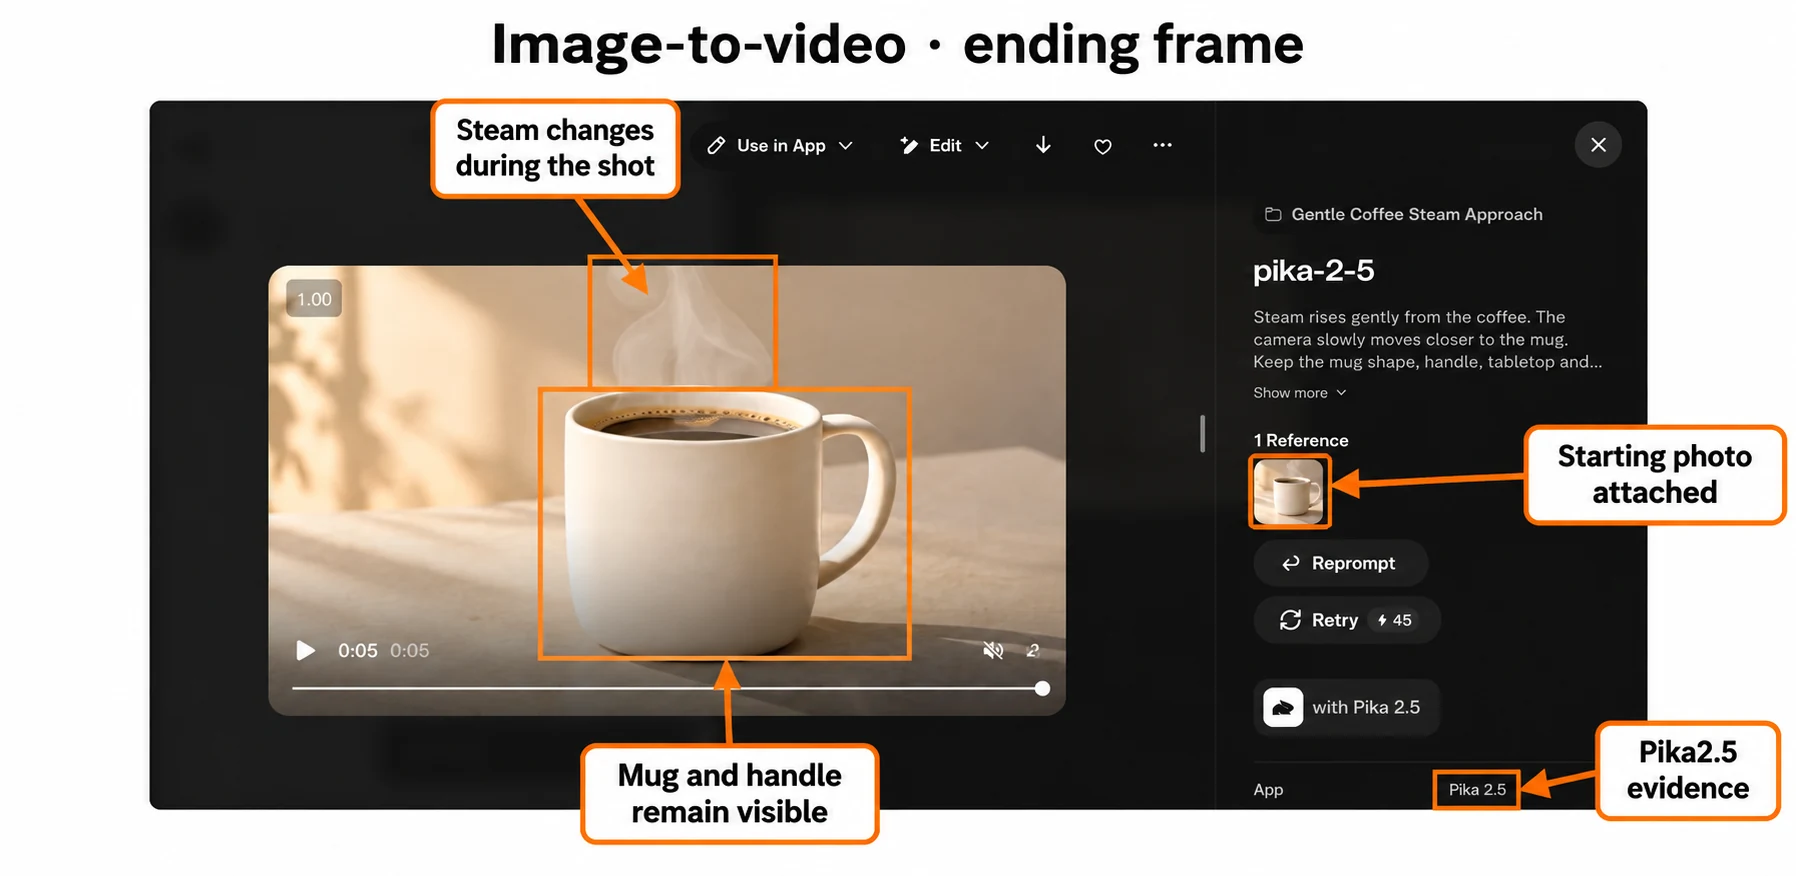
My choice for this mug example: image-to-video. That is a decision about our two outputs and our brief. It does not establish that one input method always produces better video. Both completed clips are playable above. The annotated screenshots highlight the ending frames; our notes are not a full frame-by-frame assessment.
Check the clip before you spend more credits
Open the completed asset in the project and play it through. I check the beginning, middle and ending rather than approving the thumbnail alone.
- Subject: Does the handle, shape, face or product detail change enough to make the clip unusable?
- Framing: Is the whole subject still visible where you need it? Is there room for a caption or crop?
- Action: Did the requested motion happen? Did the model add a new object or action?
- Background: Did the setting stay appropriate for your intended use?
- Delivery: Does the actual file size and shape suit your placement? Preview the crop before using a horizontal clip in a vertical post.
If the appearance is wrong, I would first improve the starting photo or scene description. If the motion is wrong, I would change one motion instruction. If the clip adds an unwanted object, simplify the action and consider anchoring the shot with an image. A retry costs credits and may produce a different result; it does not promise to fix the last one.
Common questions before your first attempt
Is text-to-video cheaper?
It was not cheaper in our matched 1080p test: both attempts cost 45 credits. Our earlier 720p image-based tutorial attempt cost 20 credits. Those are observed prices for those settings on the test date, not a permanent price list. Resolution, model, duration and number of generations can affect the estimate.
Do I need a professional product photo?
You need a useful starting image. I would choose a clear subject, enough room around it and a background that already fits the shot. Our example image was generated for the tutorial. For a real product, use a photo you have permission to use and check the output carefully before presenting it as that product.
Can image-to-video keep text or logos exact?
I would not rely on it without checking. Our mug has no logo or lettering, so this test gives us no evidence about text accuracy. Add final titles in your editor when they need to remain readable.
Should I try another model?
You can compare another available model if this output does not meet your brief. Keep the source image, motion request and target duration consistent, and record the settings and credit estimate. We tested Pika 2.5 only here; I cannot rank the other models from these results.
What would I do next?
If you already have the image you want to animate, follow our Pika image-to-video guide. If you are still inventing the scene, write a simple text prompt and make one short attempt. Save the prompt and settings that produced it, then decide from the whole clip.