
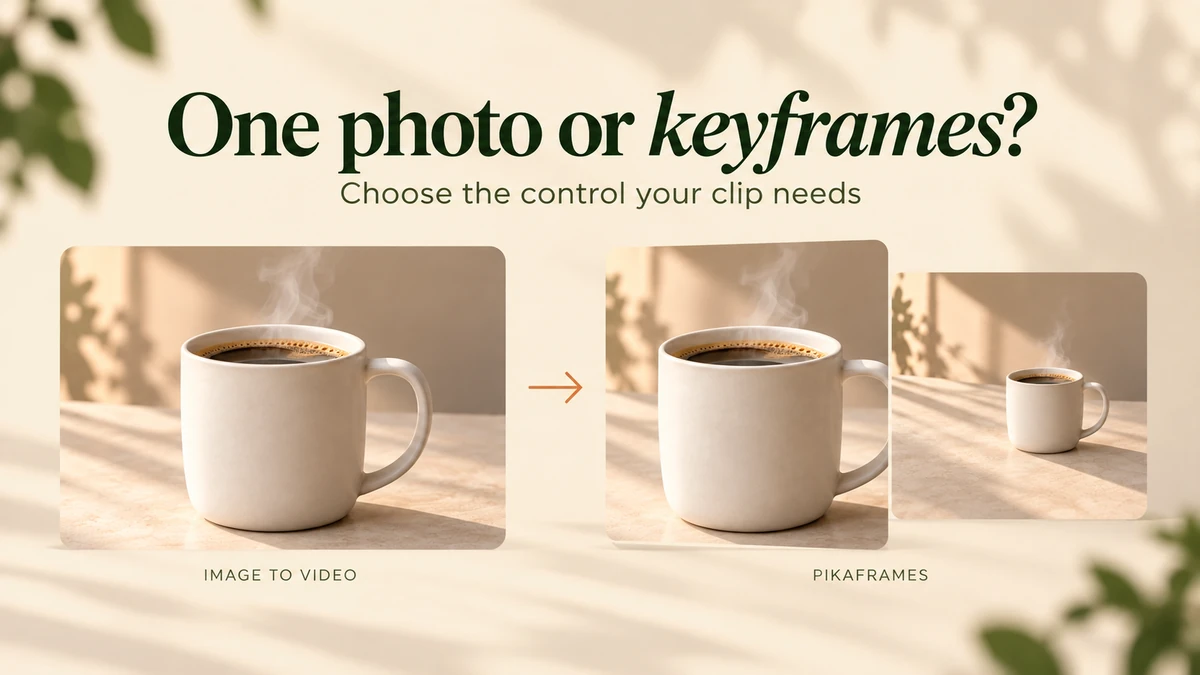
I use ordinary image-to-video when I have a starting photo and a movement in mind. I use Pikaframes when I also have an image I want the clip to end on. A product pulling back into a wider composition is a useful example: the second photo gives us a finish to check, rather than asking the prompt to invent it.
Extra images are extra decisions. I would not prepare five frames for a shot that only needs a little steam or a small camera move. Start with the least input that describes the job, then inspect the result.
Interface checked on 7 October 2026. Pika’s current Create card describes Pikaframes as animating up to five stills with Pika 2.5. We submitted one two-image, 720p, five-second test at 20 credits. The ordinary image-to-video example below is our earlier 1080p test, not a matched comparison.
Choose the input your clip needs
| What you need | My starting choice | Why |
|---|---|---|
| Steam, a breeze or a small movement from one photo | Ordinary image-to-video | One source and one motion instruction are enough to begin |
| A specific starting and ending composition | Two-image Pikaframes | Both endpoint images are supplied |
| A sequence passing through several prepared images | Pikaframes | It accepts two to five ordered images |
| A precise logo or product label throughout | Test cautiously, then review every section | Neither input method proves that lettering stays correct |
| A cut between two finished shots | A video editor | A generated transition may add movement you do not need |
| Add something to an existing video | Inspect an editing feature | Keyframes are still-image inputs, not a general footage editor |
For beginners, I recommend one photo until a missing ending image becomes the actual problem. When a client needs the shot to finish in a particular composition, the effort of preparing that second image has a clear purpose.
What the second image changes
Ordinary image-to-video supplies the starting appearance. The model still has to create the movement and the later frames. Pikaframes supplies a sequence of images and generates motion between consecutive pairs.
Think of A → B → C as two transitions. The setting is labelled Transition duration, so I read it as time between images, not automatically the total length of the whole sequence. We tested only A → B at five seconds. I would verify the exported length before promising a delivery time for a longer sequence.
An ending image is guidance, not proof of a correct clip. Inspect the beginning, middle and end separately. A neat final frame cannot excuse a stretched handle or an unwanted object halfway through.
Step 1: Prepare compatible starting and ending images
We reused the AI-generated ivory mug photo from our image-to-video walkthrough. I made a second AI-created image with a slightly wider view of the same mug, keeping the handle on the right, the beige table and the warm light.
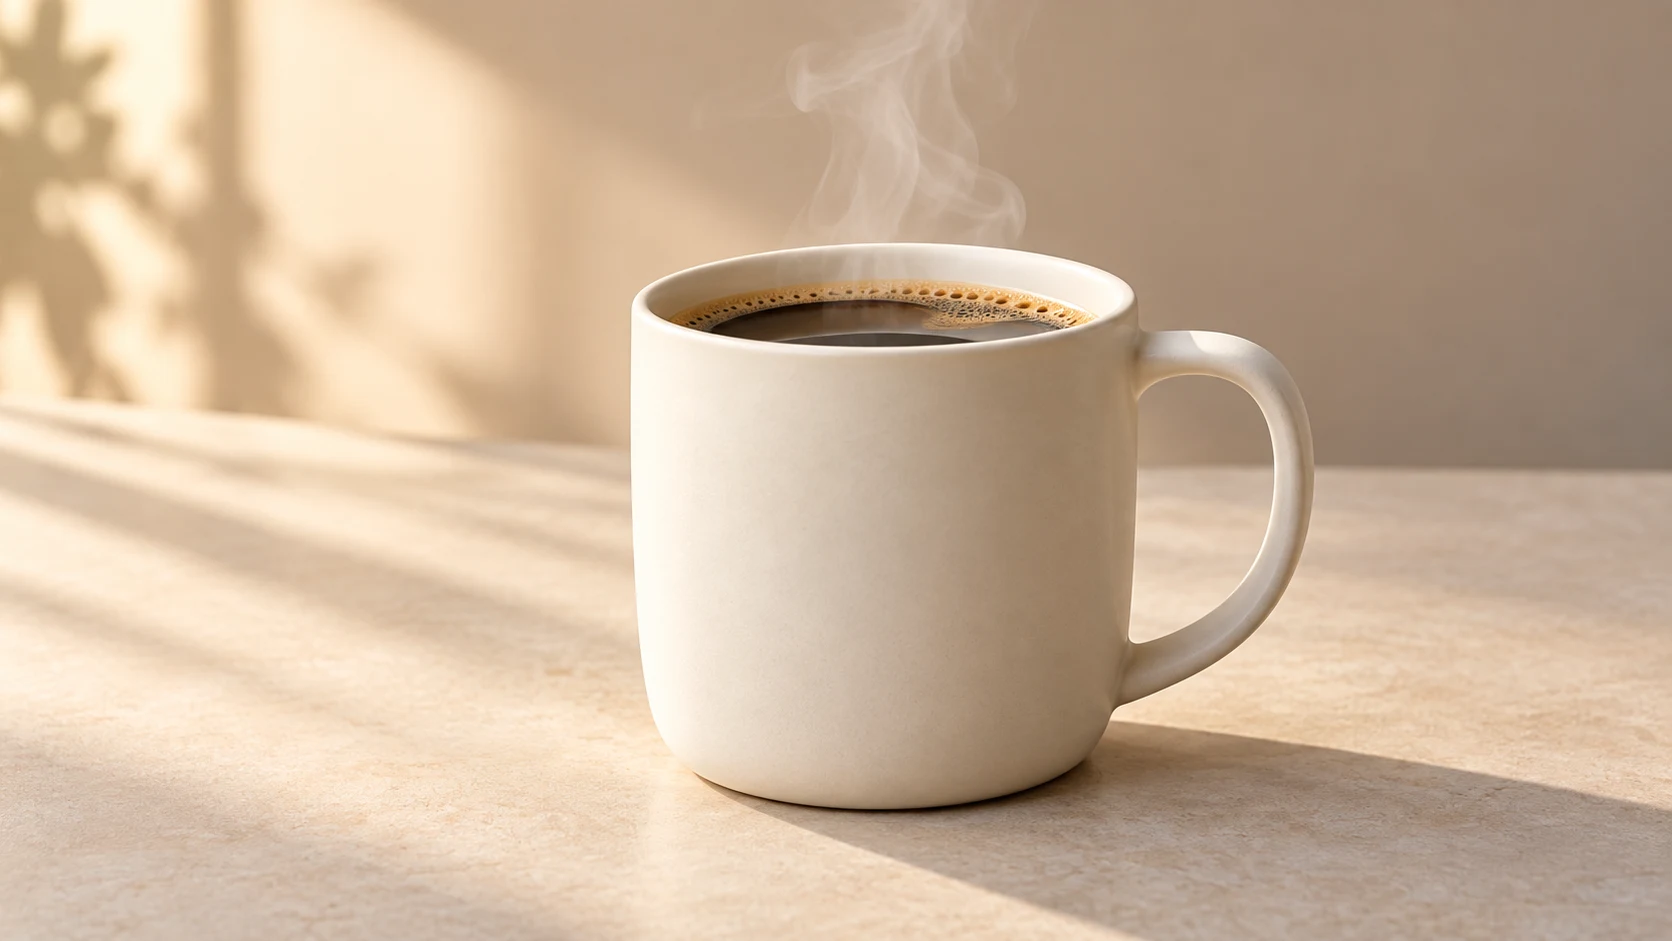
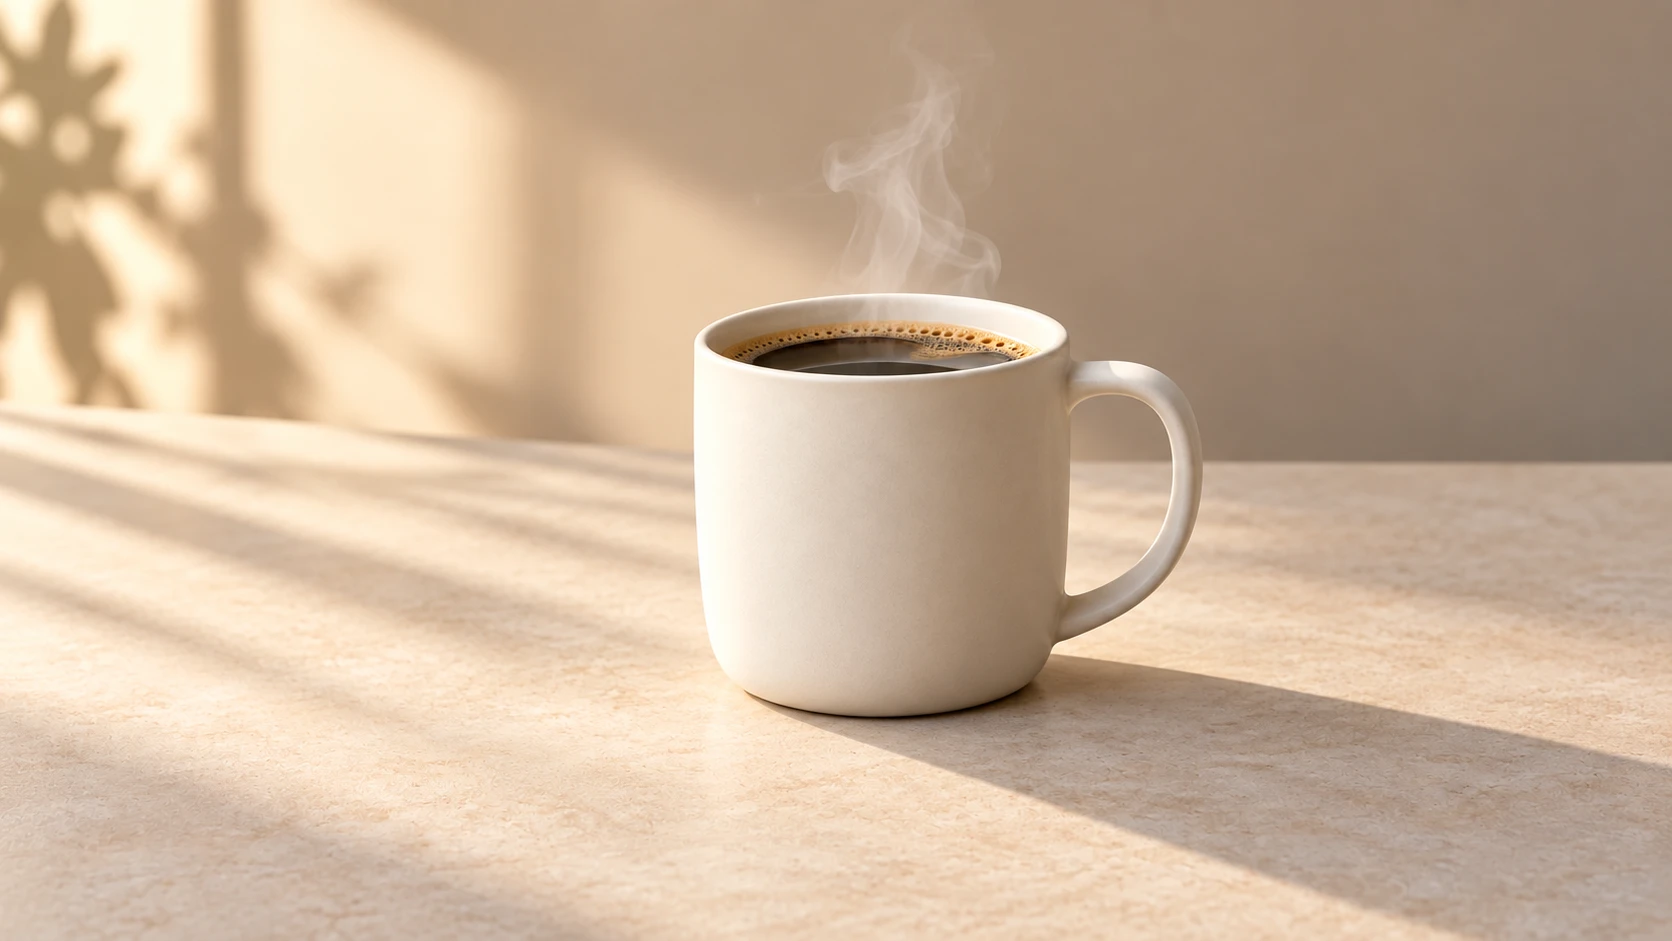
Before uploading, I compare the handle, rim, coffee level, light direction and background. Use the same image shape for both inputs. If the product or setting changes between the photos, the generator must invent that change as well as the movement.
For a real product, use your own consistent photos and check exact markings. Our unbranded mug is a teaching example; it does not establish accuracy for packaging, text or faces.
Step 2: Open Pikaframes and add the images in order
Open Pikaframes, or select its card in Create. Click Add keyframe 1. In Assets, select an existing image and click Use Selection, or choose Upload for a local file. Wait for the thumbnail.
Then click Add keyframe 2 and add the ending photo. In our check, uploading the second file attached it directly. The counter became 2/5, and a third empty slot appeared. That empty slot is an invitation to add another image; it is not a required third input.
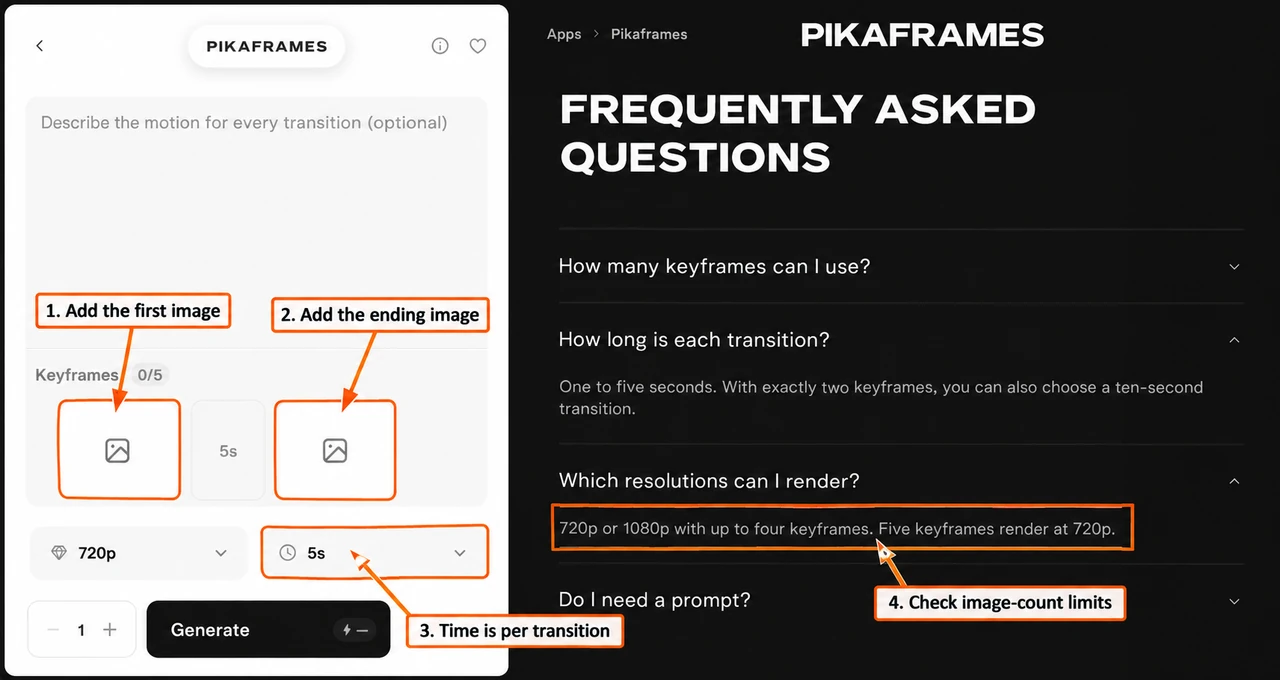
Read the thumbnails from left to right. The controls expose a reorder action for each attached image. If the order is wrong, correct it before generating; removing an image and selecting it again is another way to rebuild a short sequence. I did not test a reordered render.
Step 3: Describe one transition and check the settings
The prompt is optional, and the page says one prompt guides motion between consecutive keyframes. For a first attempt, I would describe one clear movement shared by the whole sequence. Here is our submitted prompt:
The camera slowly pulls back from the first frame to the second frame. Gentle steam rises. Keep the ivory mug, handle, coffee, tabletop and warm lighting consistent. No pouring, no hands, no extra objects.
We selected 720p, 5s and 1 generation. The estimate settled at 20 credits, and the balance dropped by 20 after submission. Read your own estimate after the files and settings finish updating.
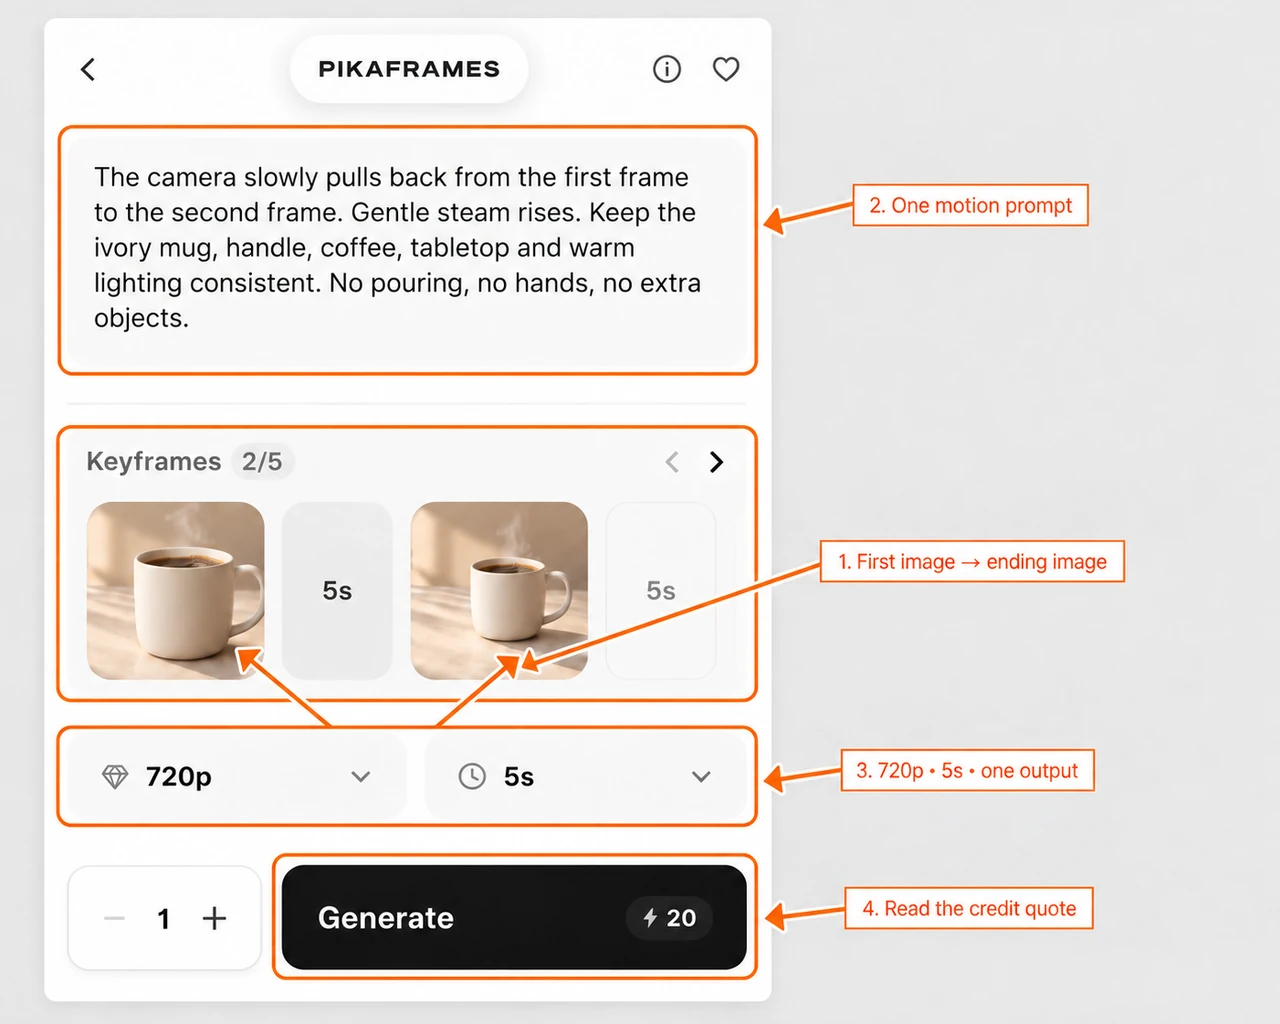
The current FAQ says transitions can be one to five seconds; exactly two keyframes can also use ten seconds. It lists 720p or 1080p for up to four keyframes, with five keyframes limited to 720p. Those are interface statements checked on this date. We used five seconds as requested and did not test every combination.
I would check the sequence at 720p before buying a higher-resolution attempt. More pixels do not repair an inconsistent source pair or a movement that misses the brief.
Step 4: Inspect the output against both inputs
The output completed in our project Ivory Mug Steam Transition. Its file reports 1304 × 706 pixels and about 5.03 seconds, with no audio track. That is the actual export size; selecting 720p does not mean the file is exactly 1280 × 720.
We inspected the first frame, a middle frame at 2.5 seconds, and the ending. The mug became smaller in the frame as requested; its base and handle stayed visible in those samples. We saw no pouring vessel in those three frames. I would keep this attempt for further review of the simple pullback brief. That is a narrower finding than claiming every frame preserves every product detail.
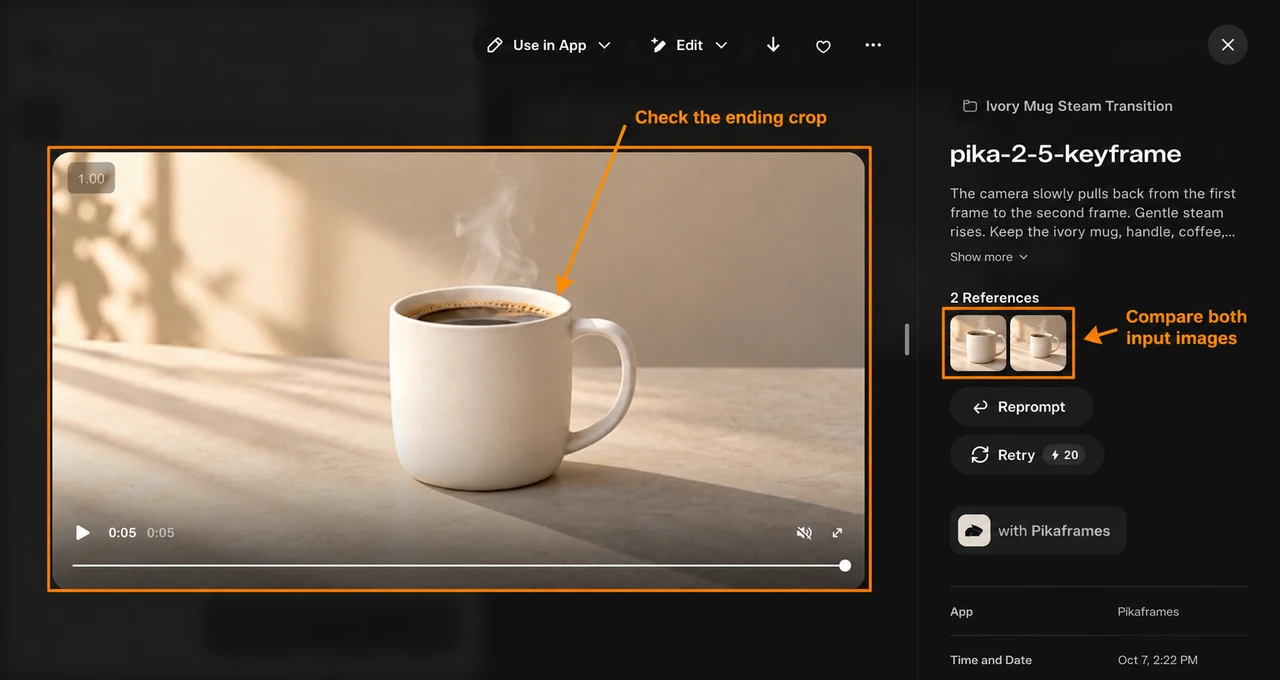
Watch the full clip above before accepting it for your project. Pause around the middle to check the handle and rim, then compare the ending with the second input. Look for added objects, changing proportions, flickering markings and motion that does not fit the brief. The source pair was deliberately simple; this test does not establish performance for a large angle change or a five-image sequence.
What our ordinary image-to-video example tells us
That earlier image-to-video attempt kept the mug and handle visible in its captured ending. It was useful for our photo-led brief. It did not use a supplied ending image, so it cannot demonstrate endpoint control.
The two attempts are examples of different jobs, not evidence that one method always wins. A fair quality comparison would keep the starting image, motion request, selected quality and duration consistent, and repeat enough attempts to understand variation. Here, the practical question is simpler: do you need to supply the finish?
Fix the input problem before spending again
| What you see | What I would check next |
|---|---|
| Wrong starting or ending composition | Image order and the uploaded crops |
| Product changes during the transition | Differences between the input photos; inspect shape and markings |
| Too many movements at once | Reduce the motion brief to one action |
| Transition feels rushed | Check transition duration and the distance between compositions |
| Unexpected total length | Count image pairs and inspect the exported duration |
| The estimate exceeds your budget | Reduce the sequence before generating; check the refreshed quote |
Change one thing per attempt and keep the original inputs. Record model, image order, prompt, duration, quality, estimate, charged credits and the reason you accept or reject the result.
I choose Pikaframes when the second image solves a real ending requirement. For a little motion from one photo, I start with ordinary image-to-video. If the task is editing footage or adding sound, our model and feature guide will point you toward the relevant input controls.