
I opened the dedicated Pika Soundtrack page and attached our new silent Pika 2.5 mug clip. We will choose the sound direction, inspect the export options and read the estimate before generating.
This is a settings walkthrough. I prepared the clip and instruction without submitting a soundtrack generation, so the video below is our silent source. Interface checked 10 October 2026.
Start with a finished clip
Watch the source first. It starts with steam, then shows coffee pouring into the mug. A useful sound brief should follow that actual action. Asking for sound on an action that is missing from the clip makes the direction less useful.
Download the source MP4, or follow the Pika 2.5 guide to see how it was made.
What is Pika Soundtrack?
Pika Soundtrack adds an audio treatment to an existing video. Its dedicated page opens the Pika Audio workspace with Soundtrack selected. Pika describes it as combining music, voiceover and action-related sound effects.
I would consider it for a silent product clip, a short creator edit or footage needing a sound direction. For a standalone song, select Music. For a single effect, select SFX. For a spoken script, select Speech.
| You need | Choose | Prepare |
|---|---|---|
| Audio based on an existing clip | Soundtrack | A finished video and optional instruction |
| A separate piece of music | Music | A music brief |
| One effect such as a knock or splash | SFX | A sound description |
| Spoken words from a script | Speech | Exact text and a voice |
The checked Soundtrack FAQ says it replaces the soundtrack and keeps the picture and duration. Treat it as an audio replacement workflow: save your original, especially if it has speech or music you need to retain. We did not test a returned soundtrack file here.
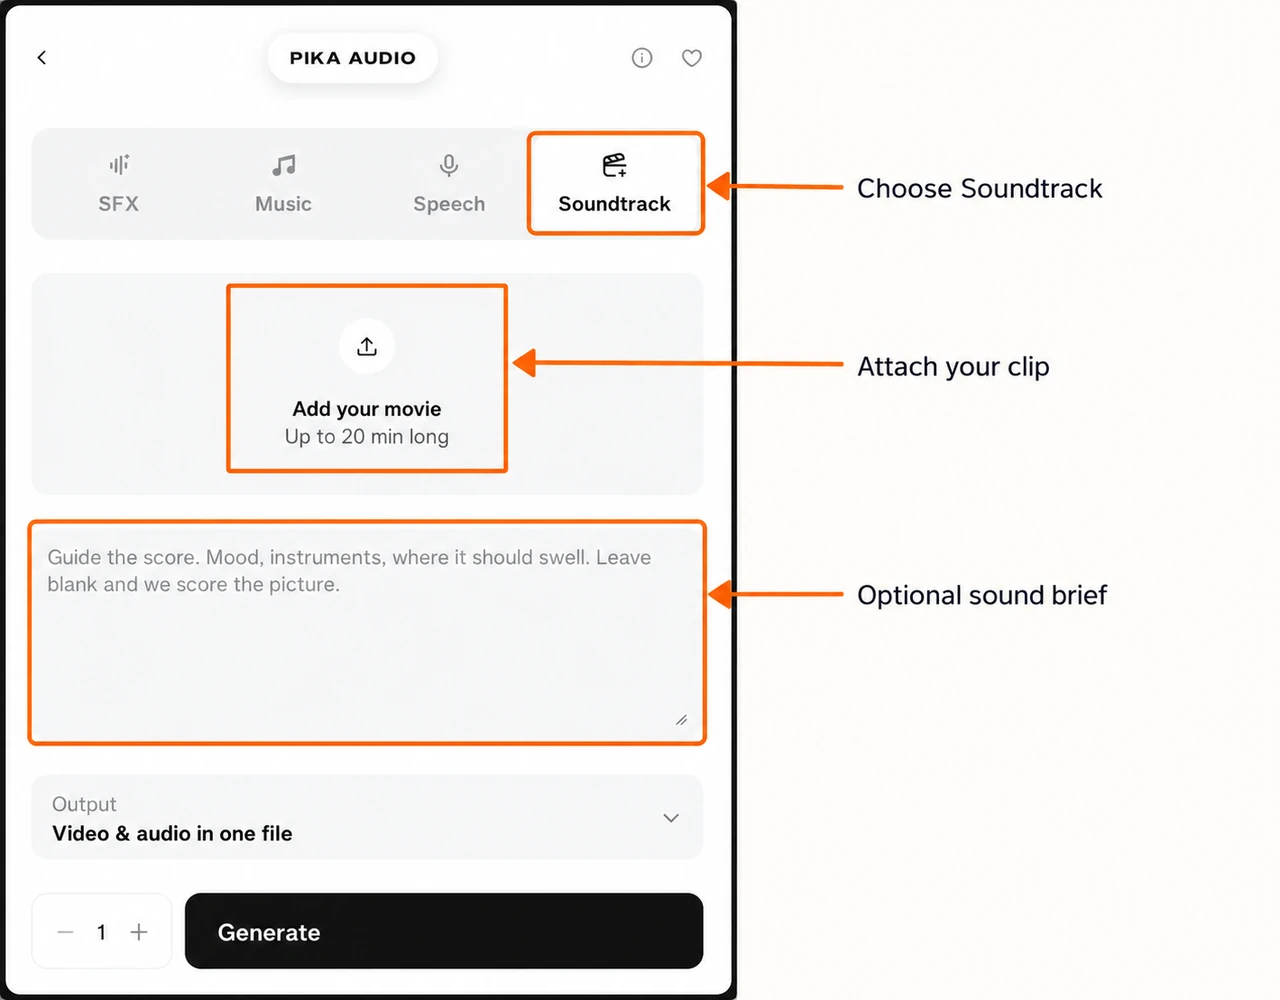
Step 1: select Soundtrack and attach a video
- Open Pika Soundtrack.
- Confirm Soundtrack is selected in the four-mode bar.
- Click Add your movie.
- Choose Upload for a device file, or select a saved video and confirm Use Selection.
- Check the thumbnail, filename and duration before writing a brief.
We selected the new pika-2-5 clip from saved assets. The preview shows 0:05. Use the cross at its top-right to remove the source and choose another clip.
Check the file before attaching it
| Item | Current page guidance |
|---|---|
| Maximum duration | Up to 20 minutes |
| Maximum file size | 2 GB, according to the FAQ |
| Supported video codecs | H.264 or HEVC, according to the FAQ |
| Source in this guide | H.264 MP4, 5.03 seconds, about 0.84 MB |
| Very small footage | Pika says it may enlarge it to its working resolution first |
The codec matters as well as the filename ending. An MP4 container alone does not tell you its codec. If a clip is rejected, export an H.264 copy from your video editor and try that file.
A short, finished cut is a practical first test. The checked form has no trim handles or separate duration setting; prepare the cut before attaching it. Pika’s FAQ also gives a processing estimate, but I would not treat that as a completion promise.
Step 2: choose a sound direction
The Instruction box is optional. Leave it empty if you want Pika to infer the sound from the clip; that behaviour is described on the app page. Add text when you need a particular mood, instrument or exclusion.
I write the brief in three parts:
- Action sounds: what can be heard from the actual scene.
- Music direction: mood, instruments and how strong the music should feel.
- Exclusions: speech, vocals or effects that do not belong.
For our mug clip, I prepared:
Quiet ceramic cup and coffee-pouring sounds timed to the action, with a soft warm instrumental bed. No speech, no vocals, no dramatic hits. Keep the pouring sound clear above the music.
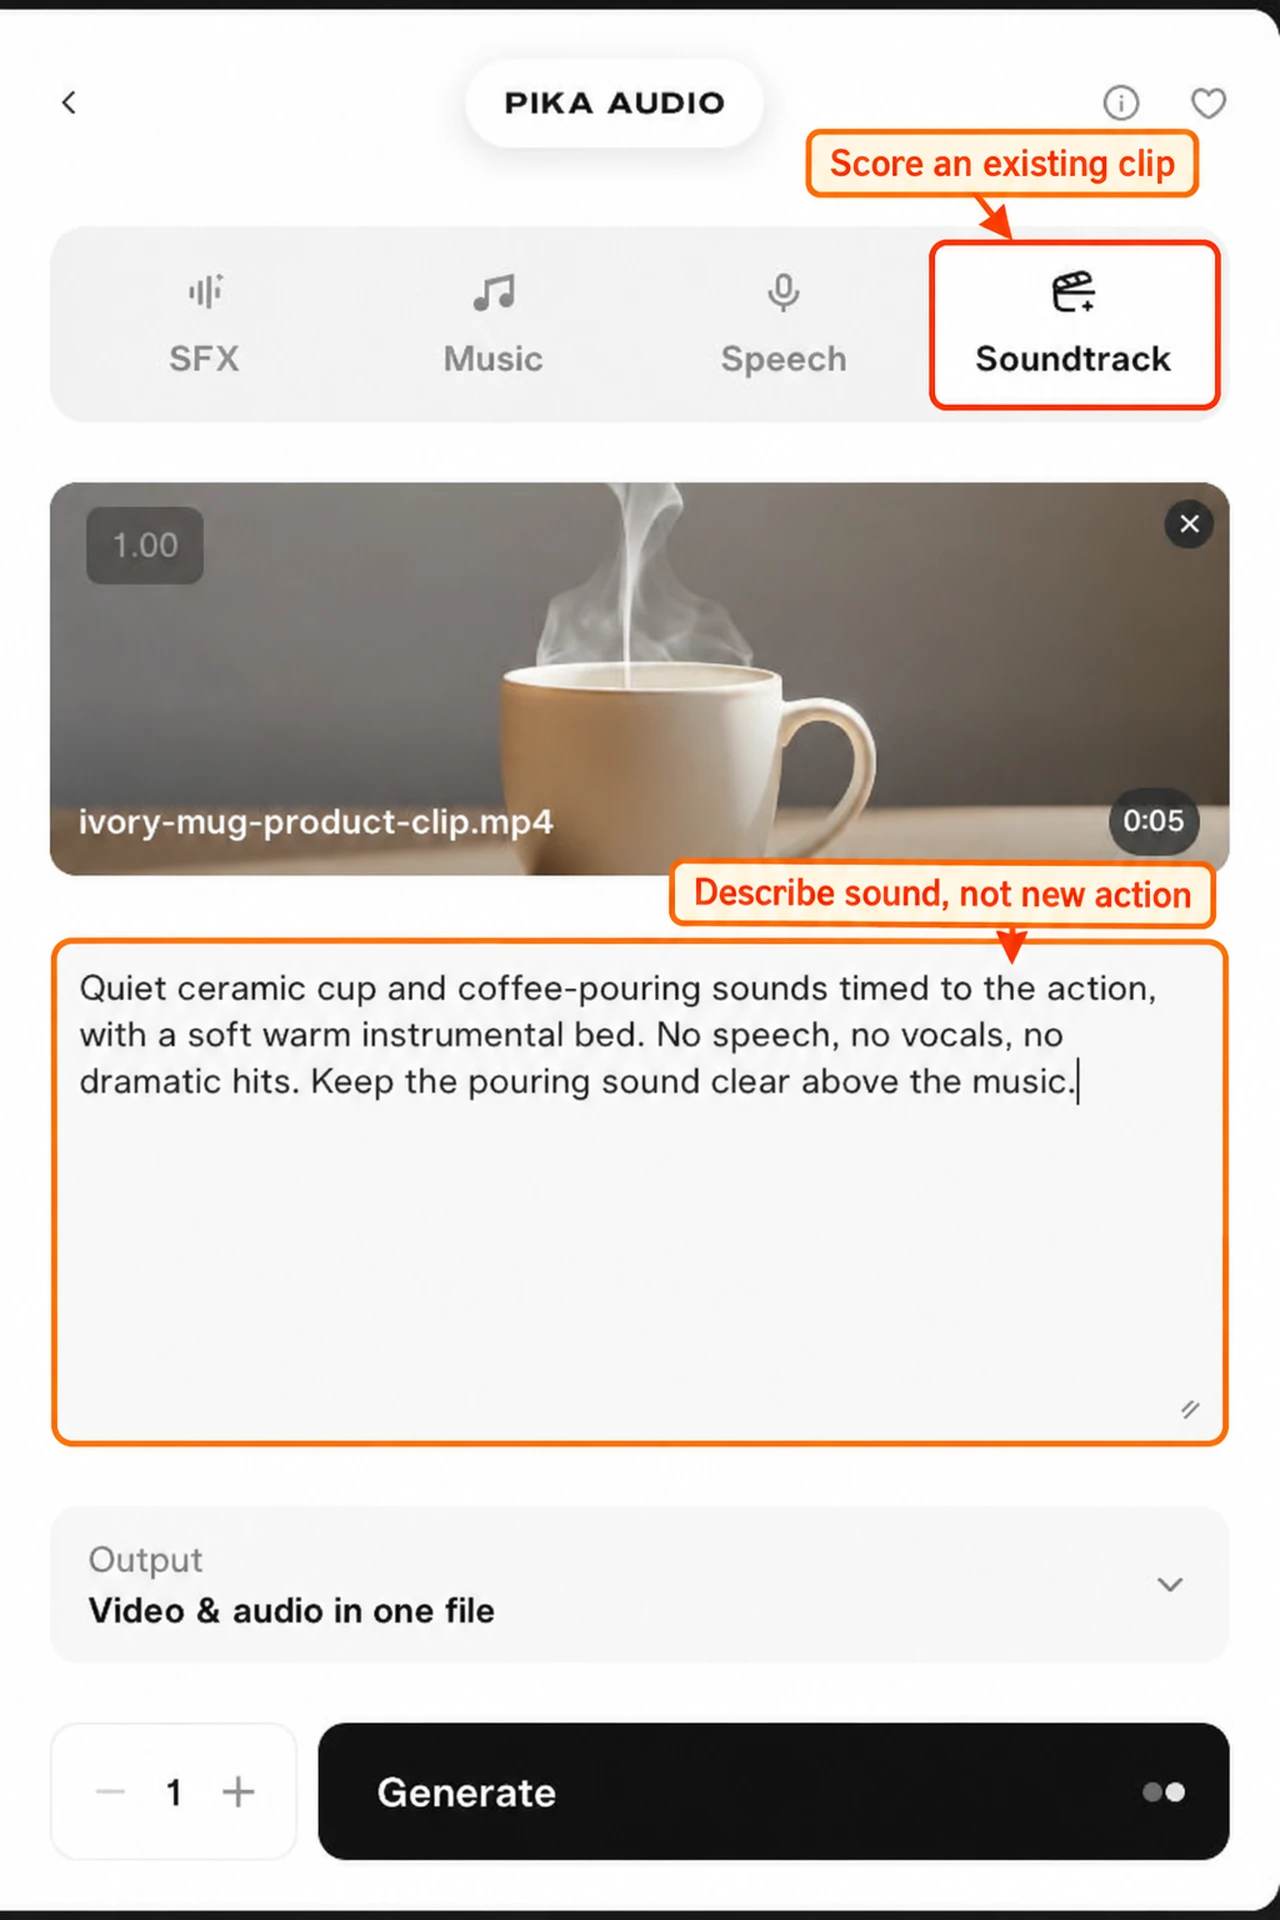
Drag the small resize handle at the lower-right of the text box if you need more room to review the instruction. The request to keep an effect above music is written direction, not a separate volume control.
Three brief examples to adapt
| Footage | Prepared direction | Why I would start there |
|---|---|---|
| Coffee product shot | Quiet pouring sounds, soft warm instrumental bed, no speech or vocals | Keeps attention on the product action |
| Shoe walking clip | Footsteps timed to contact with the ground, light rhythmic instrumental music, no narration | Gives the visible steps a clear sound cue |
| Calm creator montage | Gentle instrumental music, quiet room ambience, no speech or dramatic hits | Leaves room for captions and pacing |
These are example instructions, not tested audio results. Match them to what your footage actually shows. If you need exact spoken words, create speech separately in Speech Studio.
Step 3: inspect Output before generating
Open Output. The available choice in our checked form is Video & audio in one file. The Separate audio file option is visible but disabled.
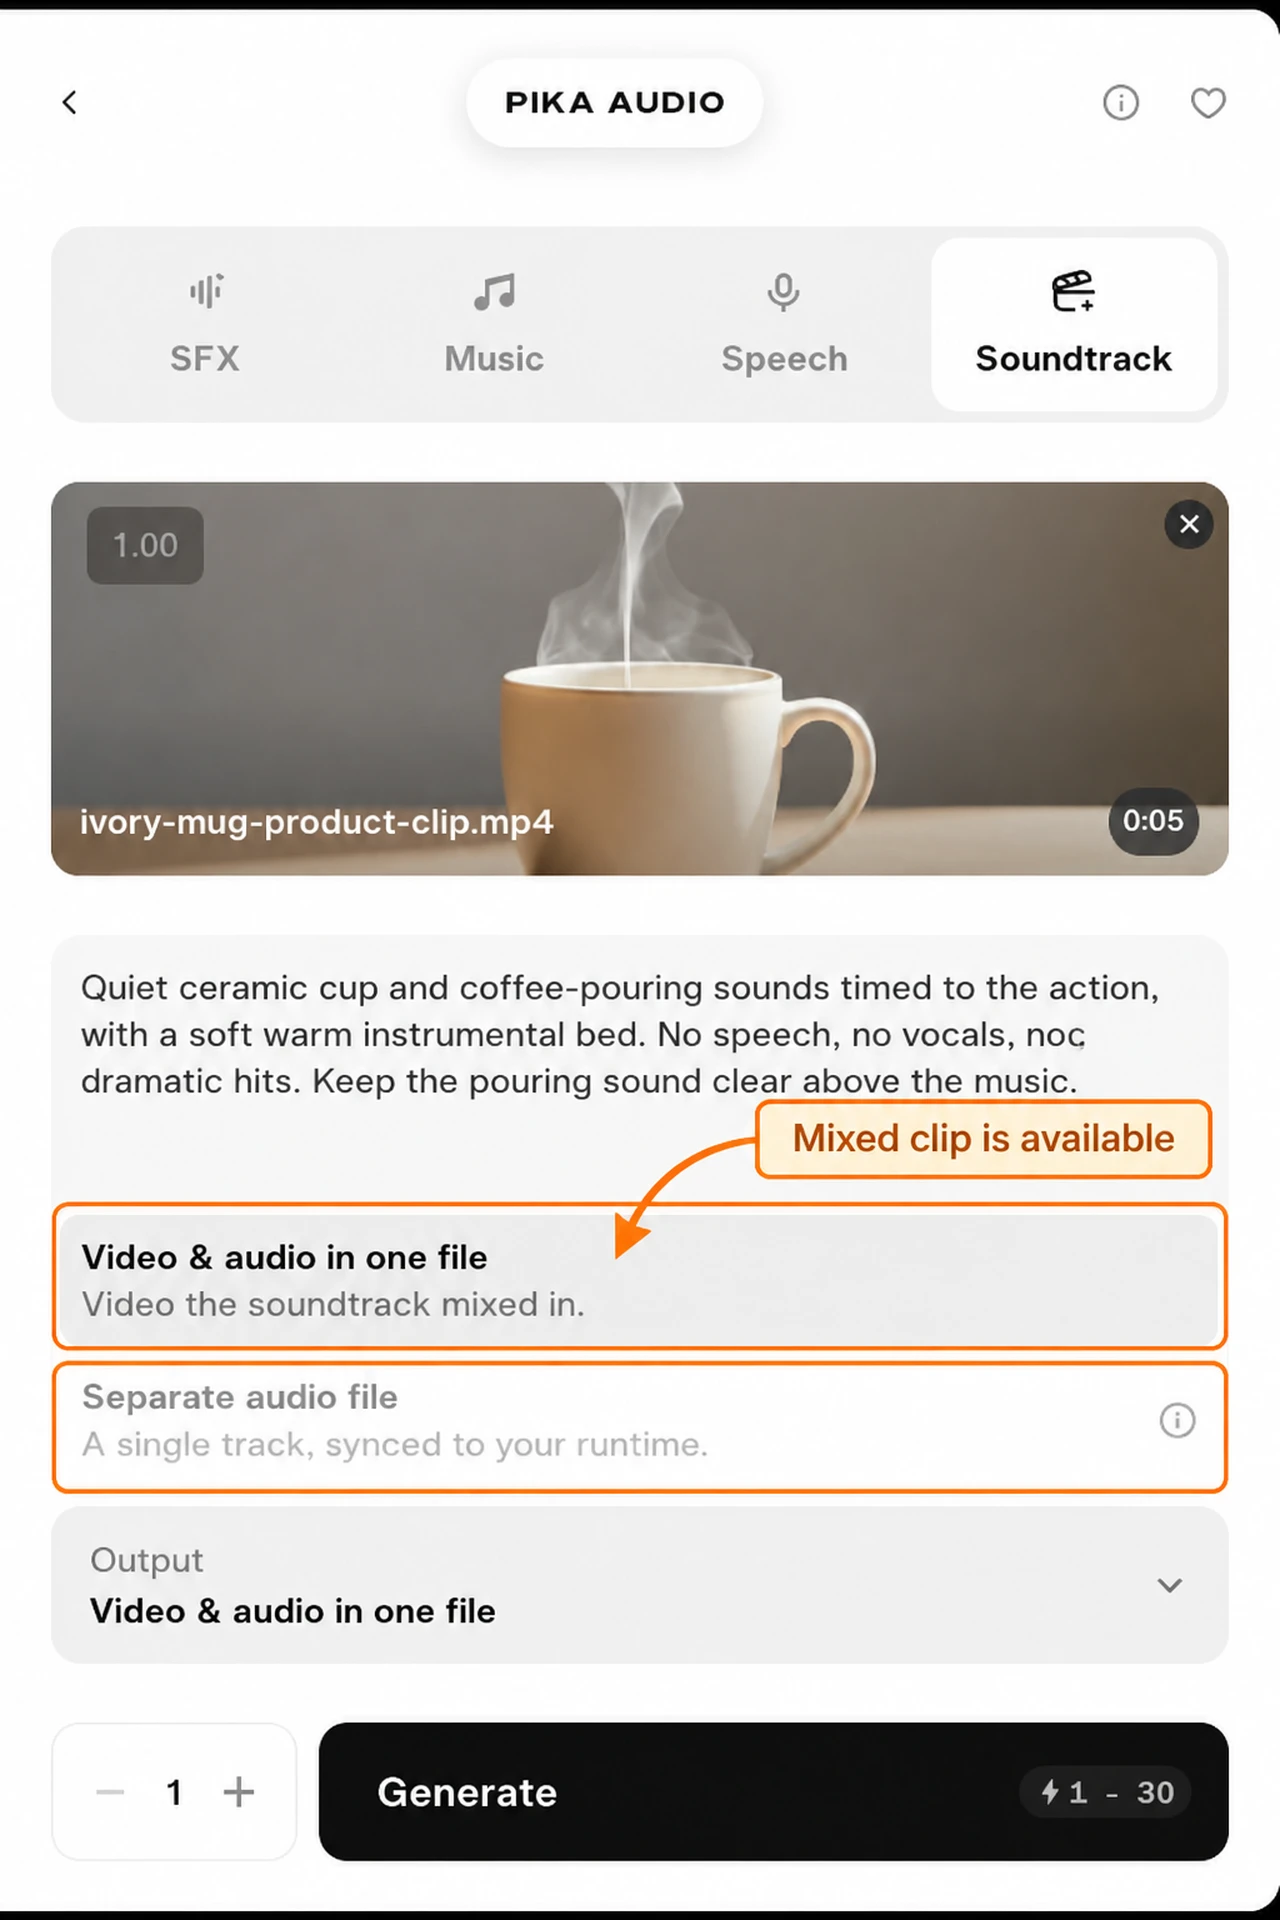
Do not plan this workflow around receiving a standalone music file. For music alone, use Music Studio. For later editing, keep both the original silent video and any scored version you create.
Step 4: keep one generation and read the range
Start with Generations: 1. The plus and minus controls change the number of versions requested. We inspected both counts and returned the setup to one.
| Prepared setup | Estimate shown |
|---|---|
| Five-second clip, one generation | 1–30 credits |
| Same clip, two generations | 2–60 credits |
| Actual soundtrack charge in this guide | None; no generation submitted |
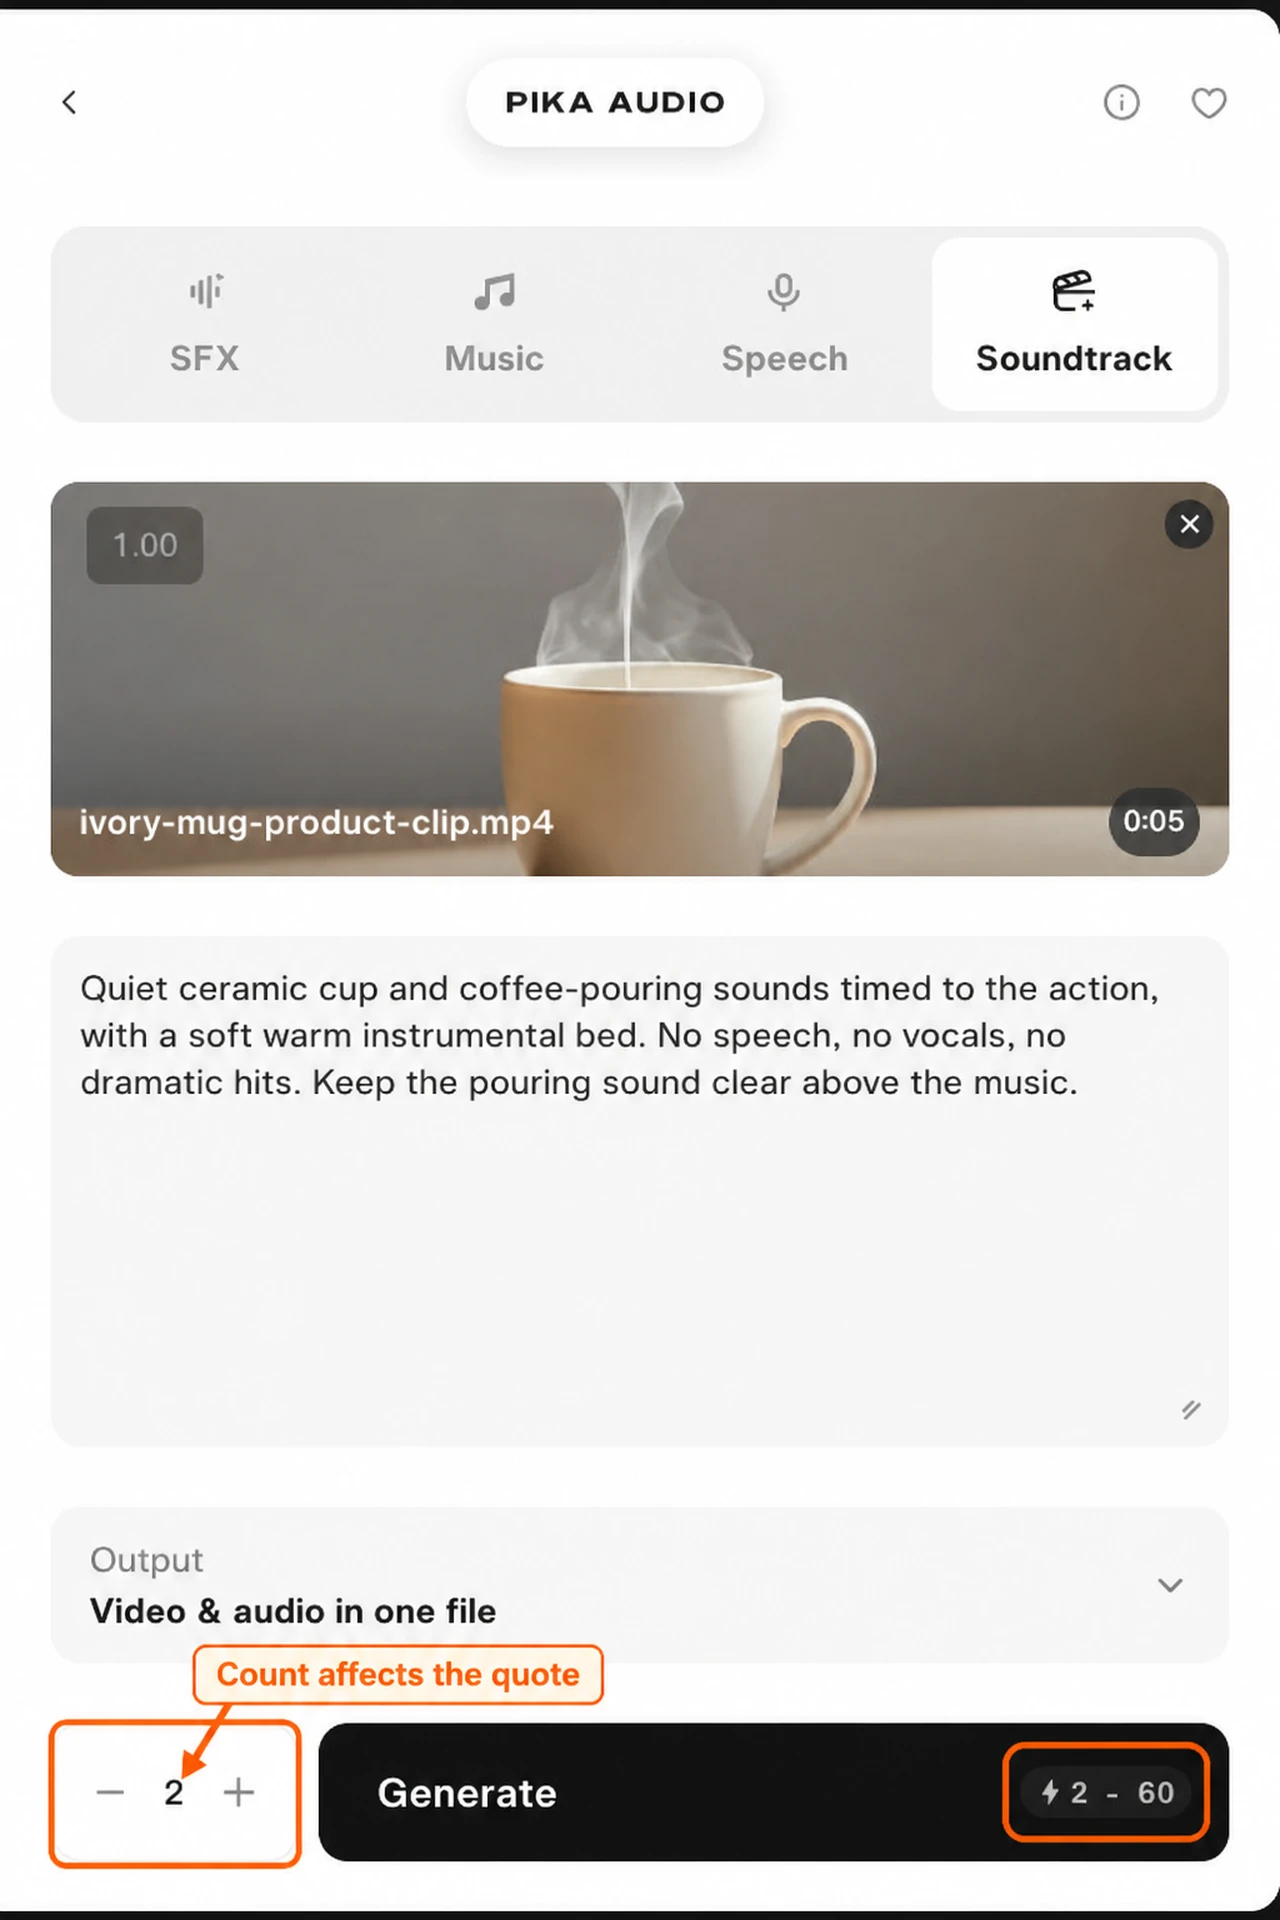
1–30 is a range, not a fixed one-credit price. Wait for the quote to appear after attaching media or changing the count. Read the completed asset details after your own run to confirm the charge.
The dedicated Soundtrack form we checked did not expose a model picker, voice selector, instrument menu, volume mixer or quality control. Put sound direction in Instruction. The clip determines the runtime; there is no ten-second selector to apply independently of the source.
Step 5: generate when your setup is ready
Before you click Generate, check:
- The right source clip and duration are attached.
- Soundtrack is still the selected mode.
- The instruction describes the action actually in the video.
- Output is the available mixed video-and-audio file.
- The generation count and displayed estimate fit your intended test.
After your own generation completes, play the entire returned clip with sound. Check event timing, unwanted speech, abrupt music changes and the beginning and end. Compare the picture and runtime with the original before replacing any file in your edit.
If you need sound by itself, use SFX Studio or Music Studio. If the clip’s action is wrong, fix it in the video workflow before writing another sound brief.