
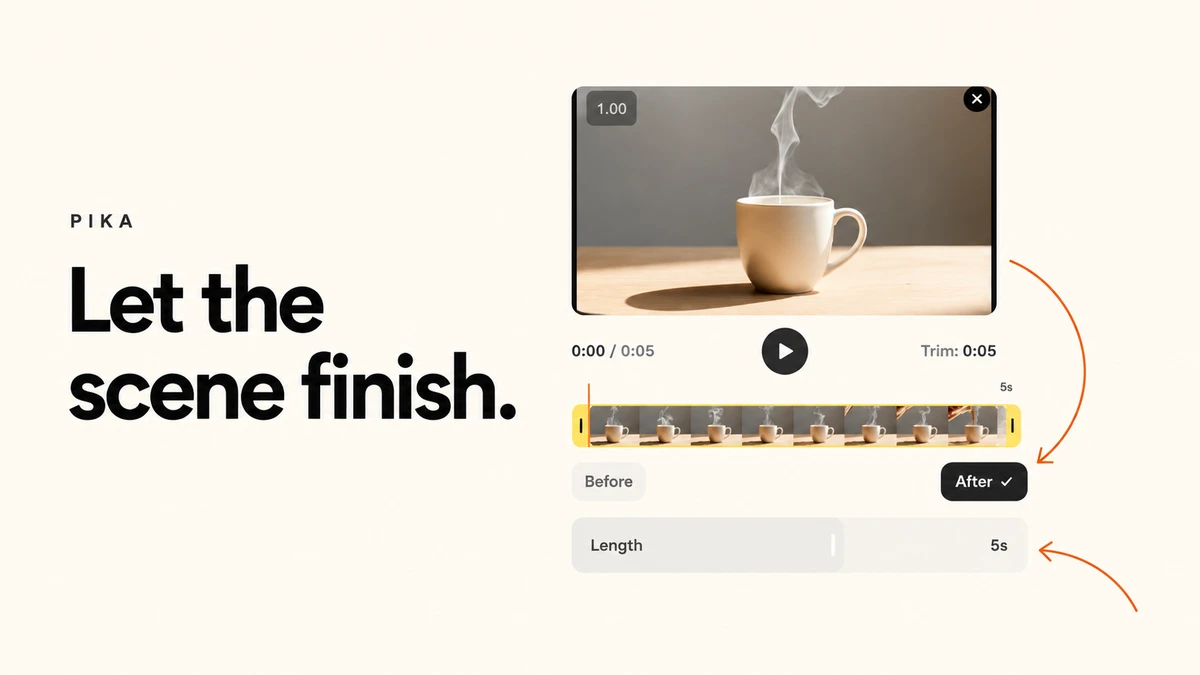
I opened Extend Video with our existing five-second mug clip. The idea is simple: let the coffee pour finish, then hold on the cup for a moment.
We prepared the settings below without pressing Extend. This is a setup guide, with no new footage or result-quality claims. Interface checked 10 October 2026.
See the prepared continuation
What is Pika Extend Video?
Extend Video asks Pika to create footage after the end of an existing clip. The app describes a continuation from the final frame, carrying the scene forward. We still need to inspect any future result for changes to the subject, motion and sound.
Use it when a useful take ends too soon. For a product close-up, that may mean finishing a pour or giving viewers more time to see the item.
| Your goal | My choice |
|---|---|
| Add action after the current ending | Extend Video |
| Remove a slow opening or an unwanted ending | Trim Video |
| Plan two specific images at the start and finish | Pikaframes |
| Keep the picture and add a score | Pika Soundtrack |
Step 1: add the clip you want to continue
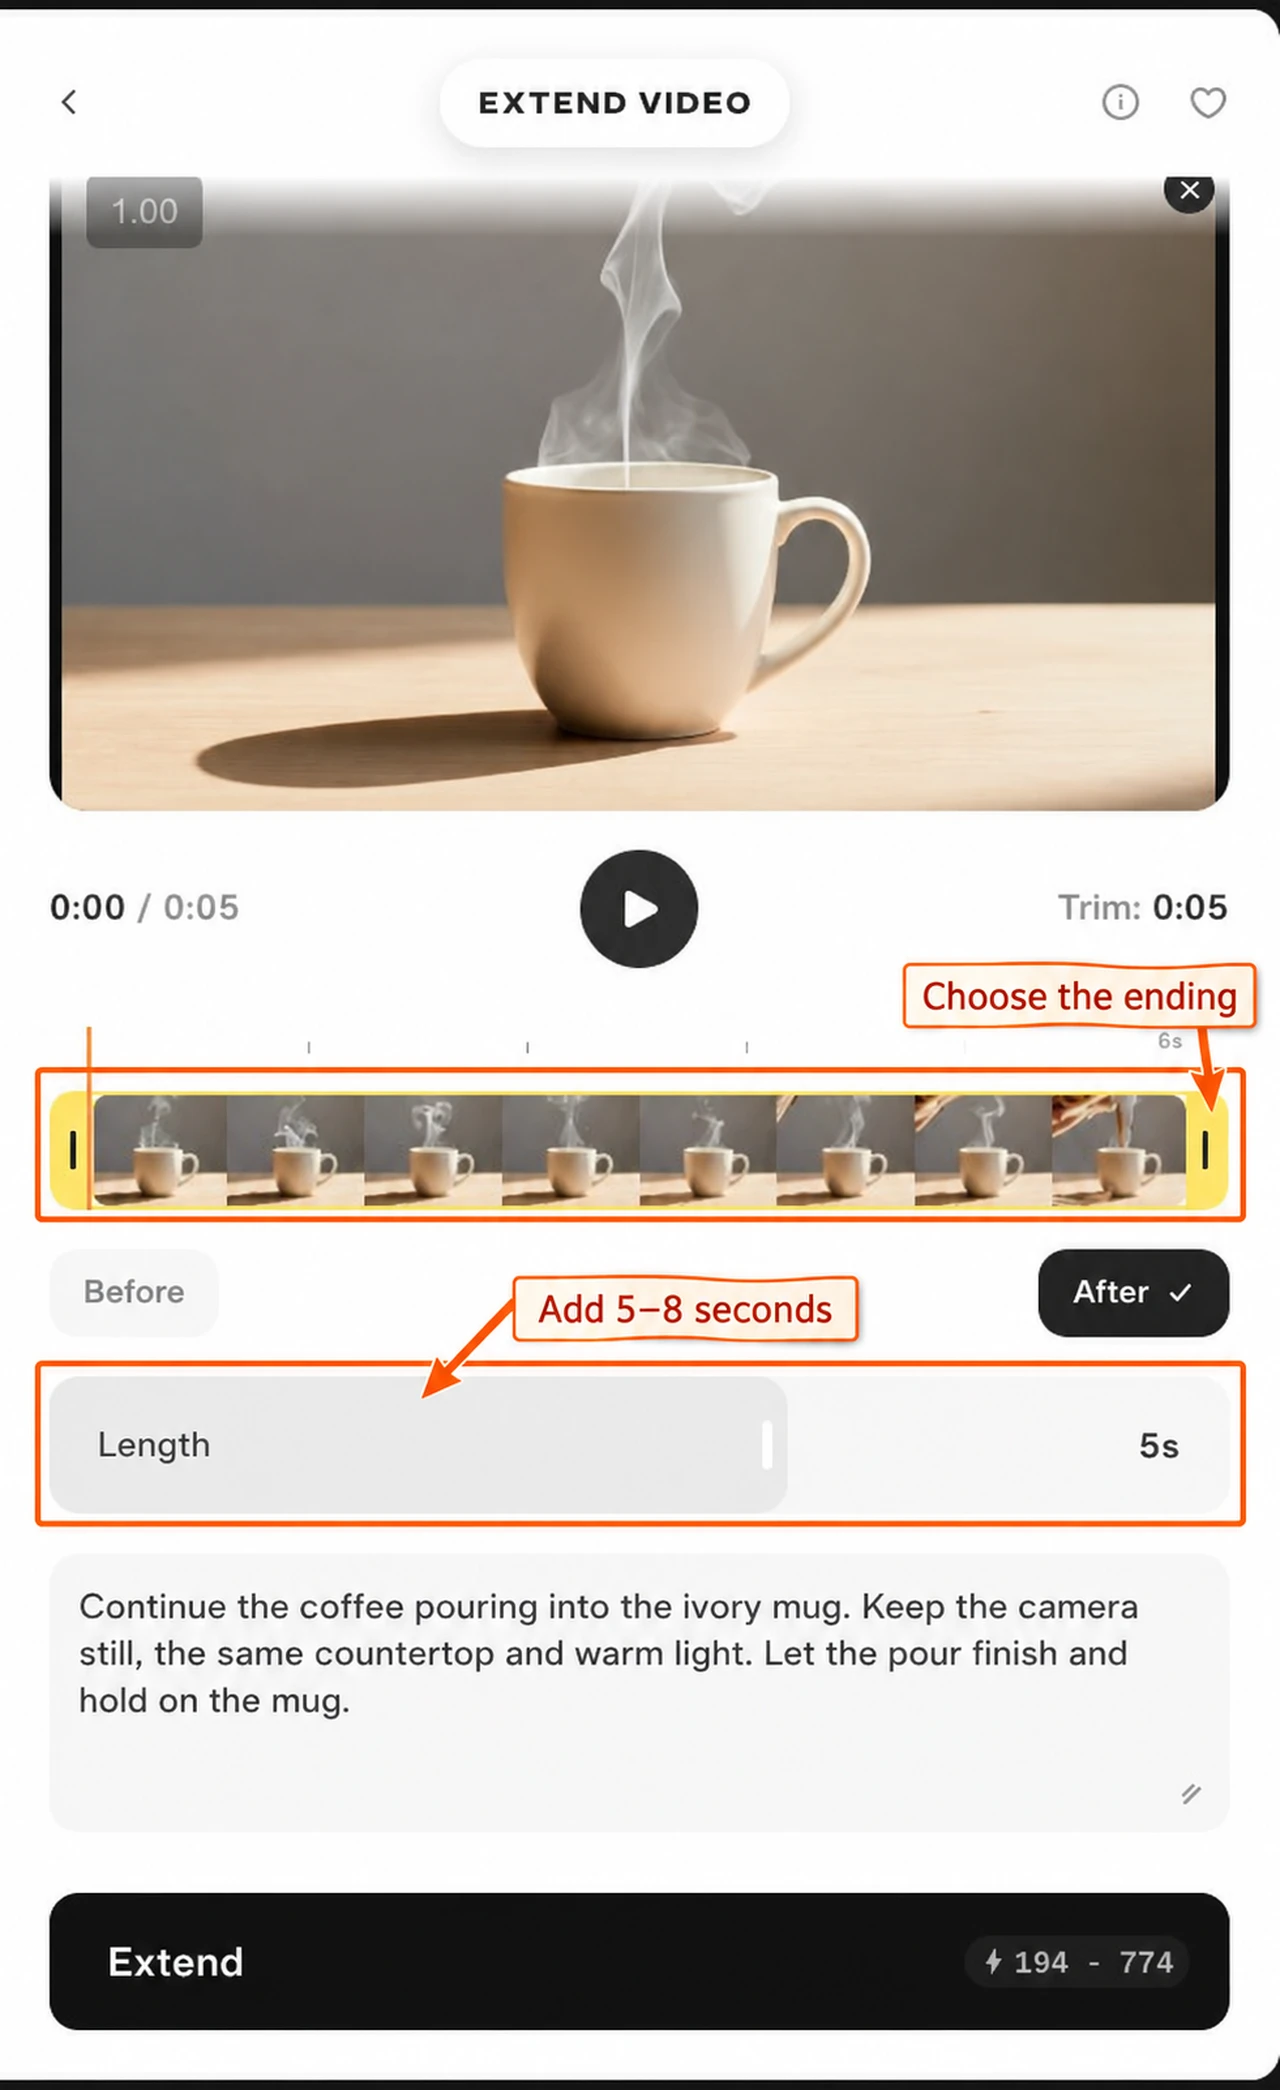
Open Extend Video. Select Add a clip to extend, then Upload. You can also choose an available asset and use Use Selection.
I used our existing mug source clip. It is about five seconds long. Wait for the upload to finish before checking the quote.
The preview has a Play control and an X to remove the clip. Play through the ending first: the last retained frame is the point we ask Pika to continue.
Step 2: choose the retained section
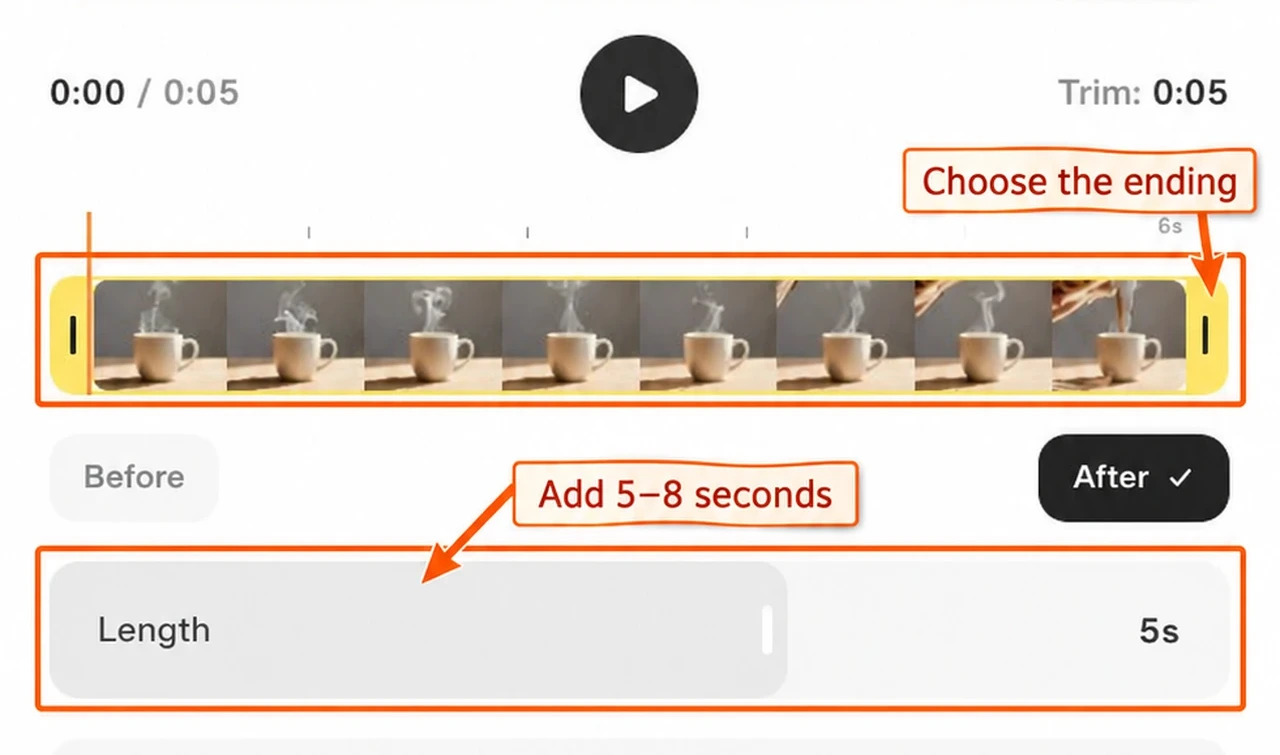
Drag the yellow Trim start and Trim end handles on the timeline. The highlighted section is what you keep from the source. The Trim readout shows its length.
For our example, I kept the whole clip. If an unwanted hand or a cut appears at the end, trim before it and write a prompt that fits that new ending.
Step 3: keep After and set the added length
After was selected. Before was disabled in the interface I checked, so this guide covers adding footage at the end.
The Length slider ran from 5 to 8 seconds, in one-second steps. I left it at 5s. This is the requested addition, not the source duration. A roughly five-second source plus five added seconds aims for roughly ten seconds in total.
Start with the shortest addition that finishes the action. Extra time gives the scene more opportunity to drift.
Step 4: describe what happens next
I wrote this in Prompt:
Continue the coffee pouring into the ivory mug. Keep the camera still, the same countertop and warm light. Let the pour finish and hold on the mug.
Keep the brief about the next action. Name the subject and the things that should stay consistent. Drag the corner of the prompt box if you need more room to read it.
| Ending you have | Continuation to ask for |
|---|---|
| A pour is still in progress | Finish the pour, then hold on the cup |
| A person has just stopped walking | Let the person settle into place, with the same camera |
| A product is turning | Complete the slow turn, then pause on the front |
These are prompt ideas, not tested extensions.
Step 5: read the quote before extending
The prepared five-second addition showed 194–774 credits. That is the displayed range for this setup, not a recorded charge or a fixed price for every clip.
A range such as 194–774 does not mean the task costs 194 credits exactly. Read the whole quote and any confirmation screen. If it is beyond your budget, shorten or trim the source where that still serves the scene, then recheck the estimate.
The form I inspected had no model picker, resolution menu or separate audio switch. I would not invent those settings from a different Pika app.
Before you press Extend, check the source ending, retained range, added length, prompt and quote. We stopped at this point for the walkthrough.
What to check when you make your own extension
Watch the join between the original and added footage. Check the mug’s shape, hand position, direction of the pour, camera position and lighting. Listen for a sudden change in sound if your source has audio.
If the ending already contains a mistake, extending it may carry that mistake further. Choose a cleaner last frame or a different source before spending more credits.