
I opened Talking Head Video to turn a presenter portrait and a spoken message into a lip-sync setup. We explored both options: Write Script with a selected voice, and Upload Audio with an existing recording.
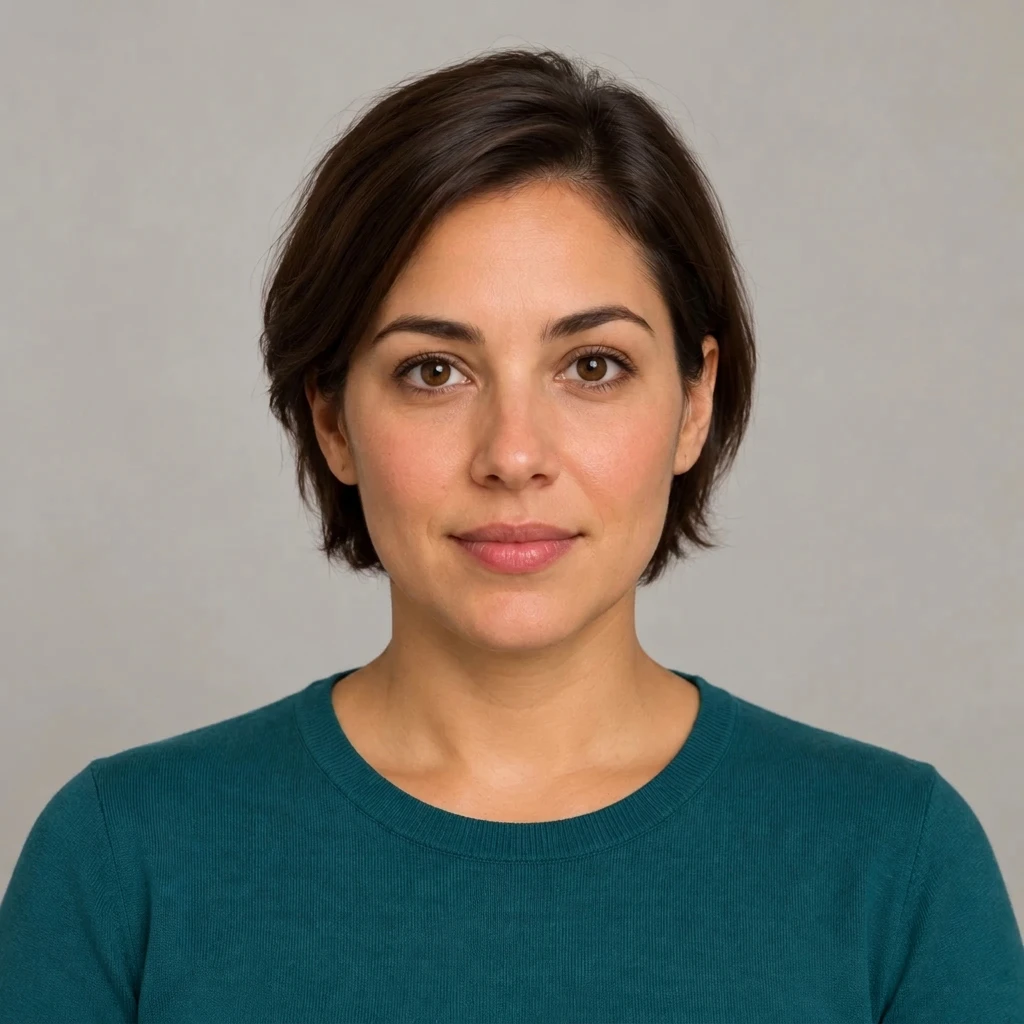
I prepared a fictional presenter, an eight-word introduction and a coffee voiceover example. Below are the source portrait and audio you can download to follow the settings. Interface checked 9 October 2026.
Start with the face and voice
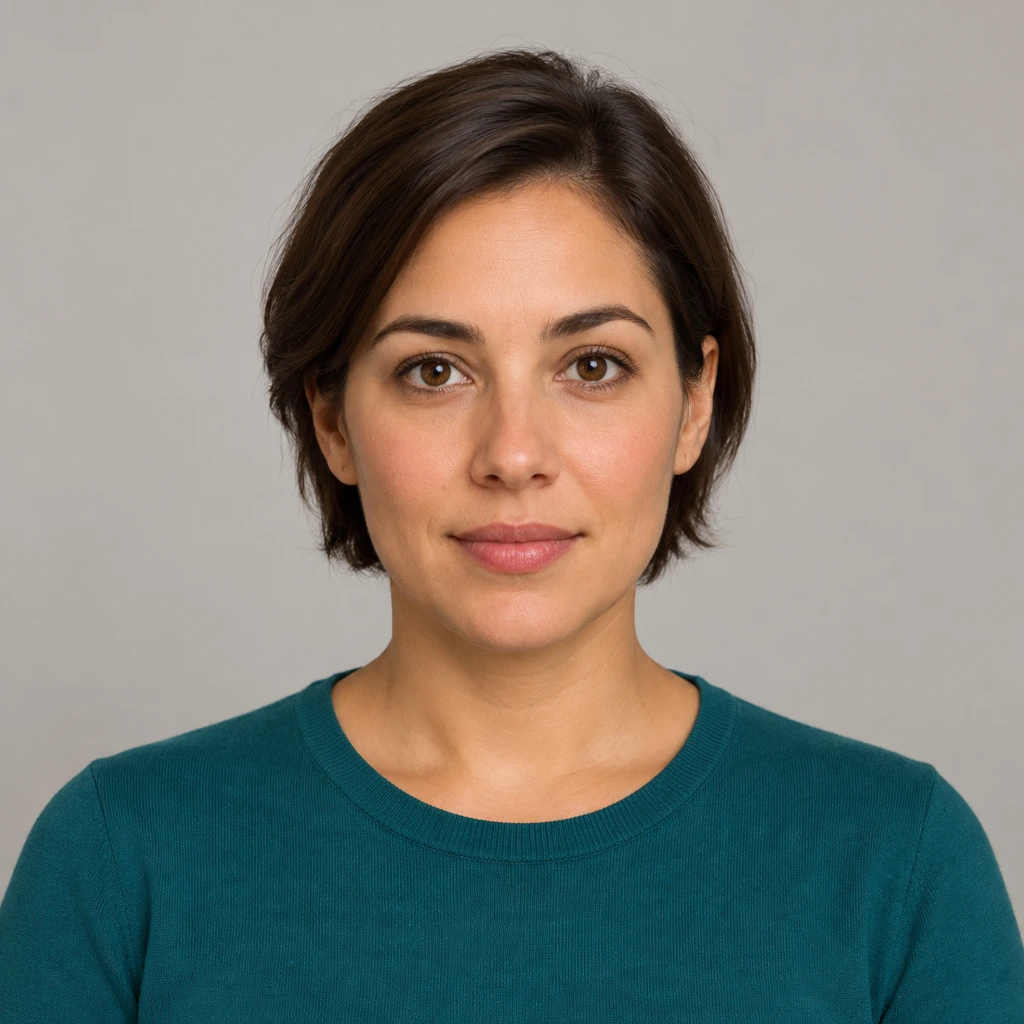
Download the portrait. The introduction is the real narration created from our script. The coffee audio is reused from our Pika Speech guide; it is not another generation for this page.
What is Pika Talking Head Video?
Talking Head Video combines a face with spoken words and a chosen lip-sync model. You can pick a preset face or upload your own portrait, then supply a script or an audio file. An optional scene description or background image adds another direction.
I would use it for a short introduction, lesson opener, product explanation or presenter segment. It is a useful choice when the face needs to speak the message. Ordinary image-to-video is a better starting point for a product moving without a speaker.
| What you already have | Workflow to start with |
|---|---|
| Written words, but no recording | Write Script and choose a voice |
| A finished narration or approved spoken read | Upload Audio |
| No presenter image | Pick a preset face |
| A particular presenter portrait | Upload a face |
The face and voice are separate choices. Selecting a face called Rachel does not explain the voice setting; check the Voice field as well. Use an invented character or a portrait you have permission to animate.
Step 1: choose or upload a face
- Open Talking Head Video.
- Under Pick a Face, click a preset, or press Upload.
- In the image chooser, upload your portrait or select a saved image and press Use Selection.
- Wait for the upload to finish and check the selected thumbnail.
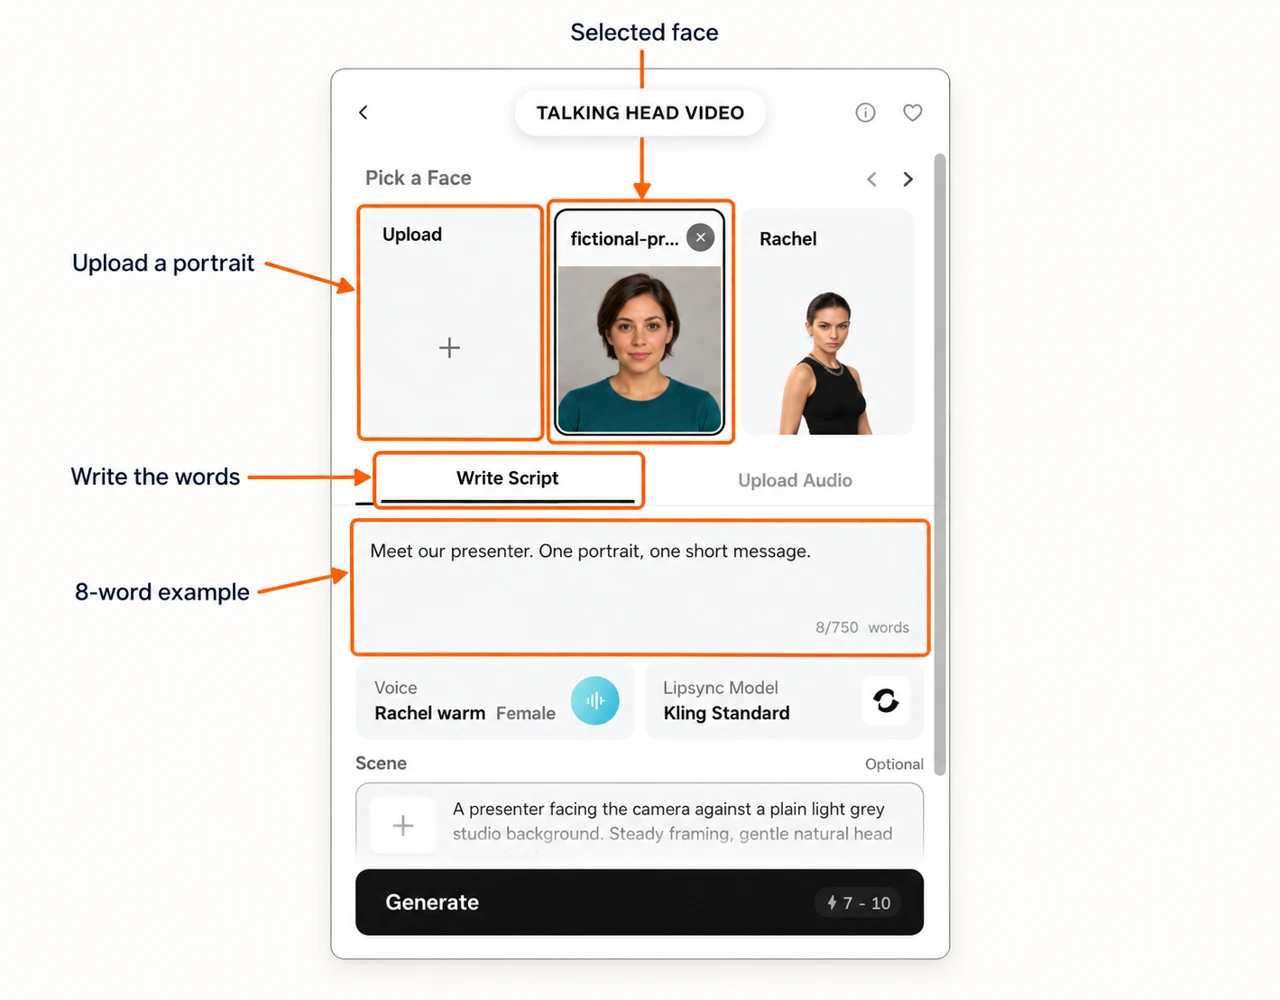
The carousel has left and right controls for browsing faces. The checked list included Rachel, Alejandro, Jessica, Zach, Mareena, Mr. Q, Louise, Jonny, Kiki, Matt, Josie, Luke, Maya and William. Some cards sit beyond the first visible row.
For a first test, use one face looking toward the camera. Keep the mouth clear, the eyes visible and the lighting even. A hand over the lips or a strongly turned head gives the lip-sync model less to work with.
Step 2A: write a script and choose its voice
Choose Write Script, then enter the words the presenter should say. Our example is:
Meet our presenter. One portrait, one short message.
The counter showed 8/750 words. That is a word counter, not a duration selector. Shorten the words when you need a shorter first test; the spoken pace also affects the resulting audio length.
Open Voice and select a delivery. We kept Rachel — warm — Female. Her generated introduction is 3.90 seconds in the downloaded file.
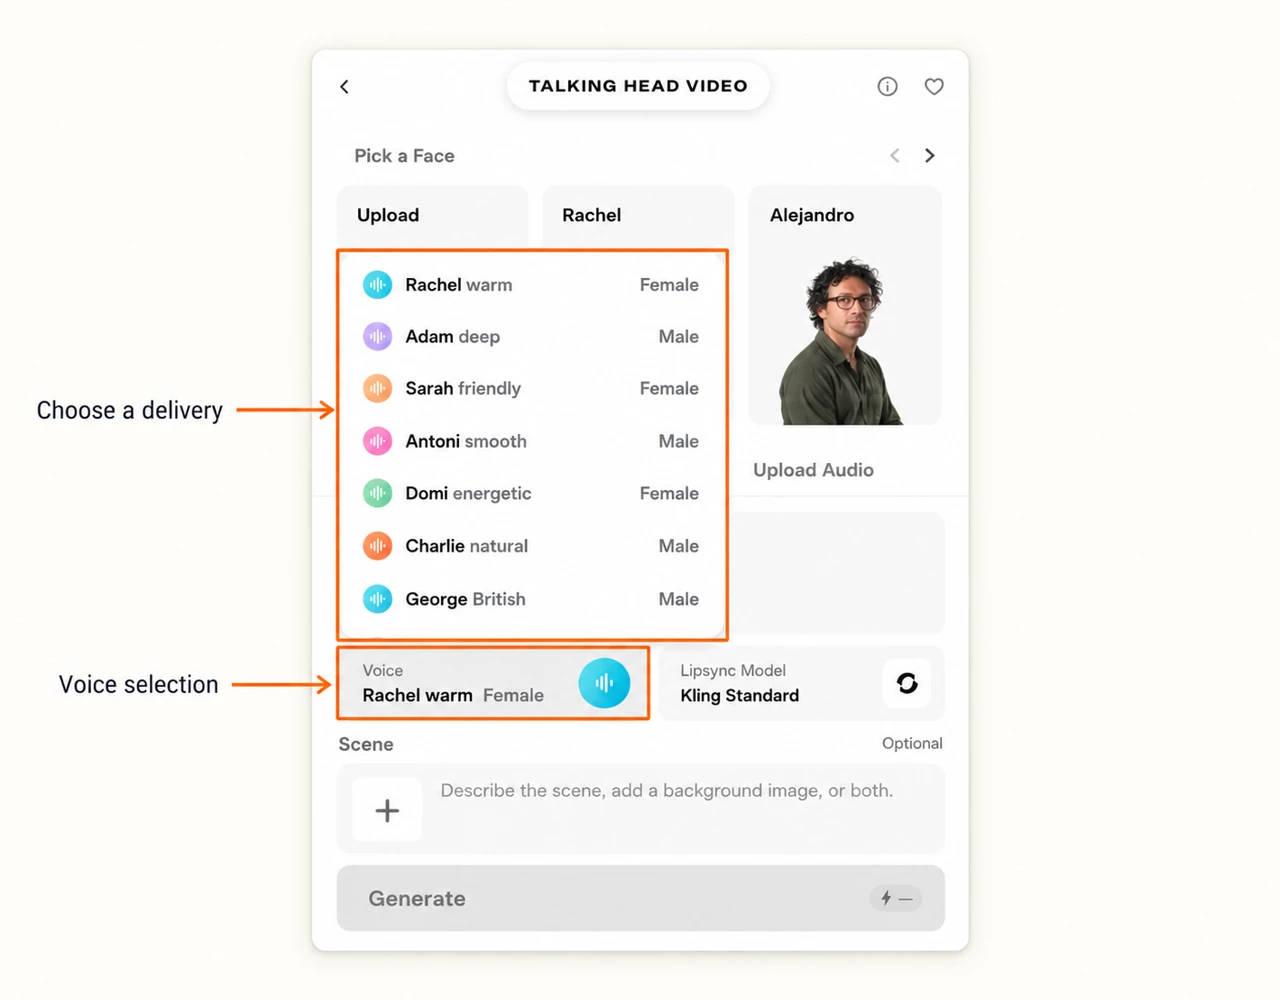
The checked menu contained Rachel (warm), Adam (deep), Sarah (friendly), Antoni (smooth), Domi (energetic), Charlie (natural), George (British), Liam (youthful), Lily (soft), Brian (narrator) and Jessica (expressive). Scroll the menu for the lower entries.
I keep a test script to one message. Listen to the prepared read before finishing the video: pronunciation, pauses and the ending are easier to judge in a short line.
Step 2B: upload audio instead
Choose Upload Audio when you already have the spoken read. Press the audio upload area, select your file and wait for it to finish attaching.
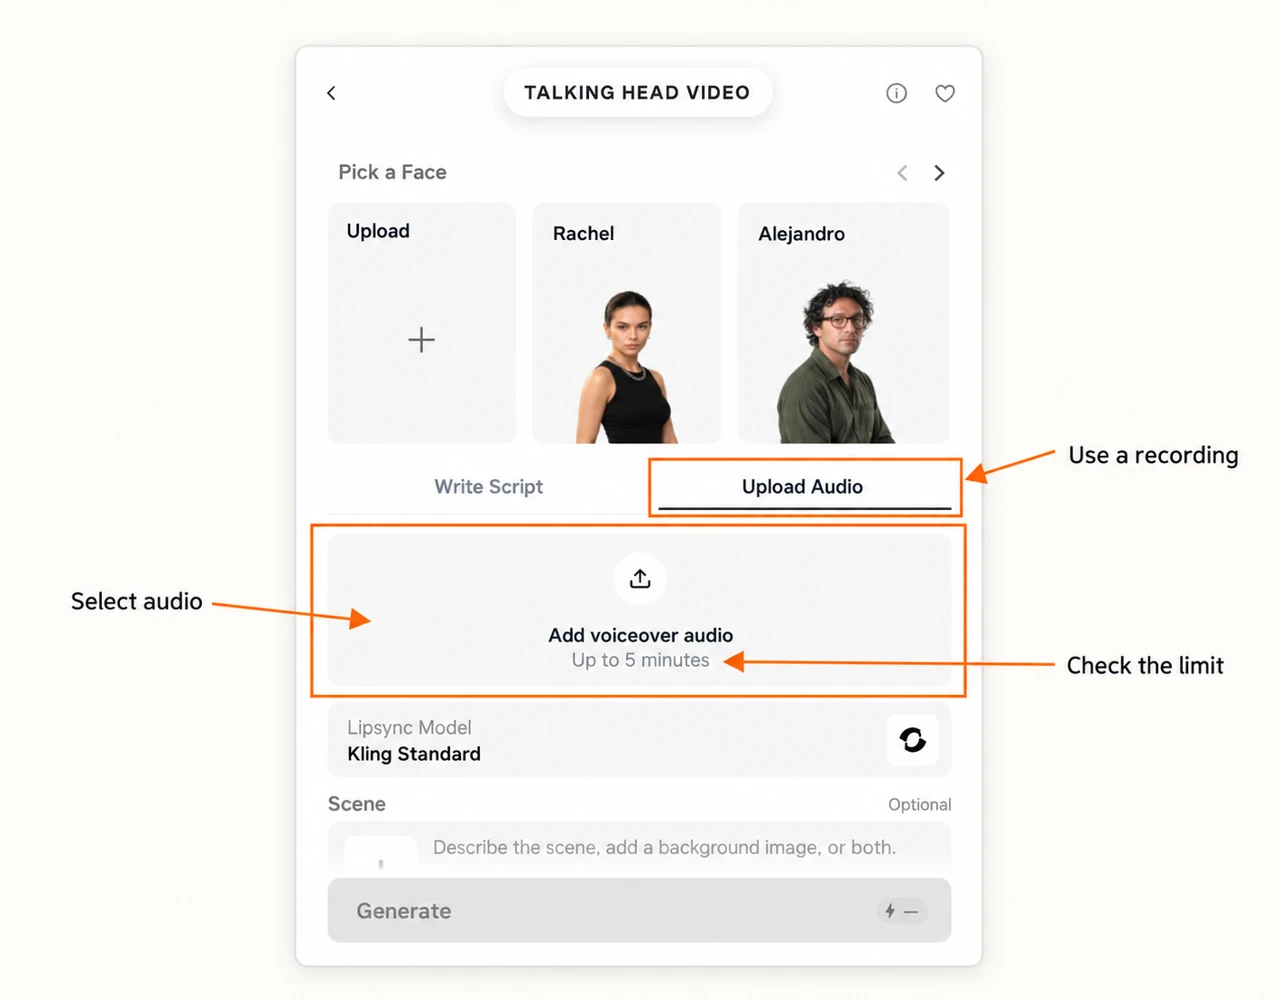
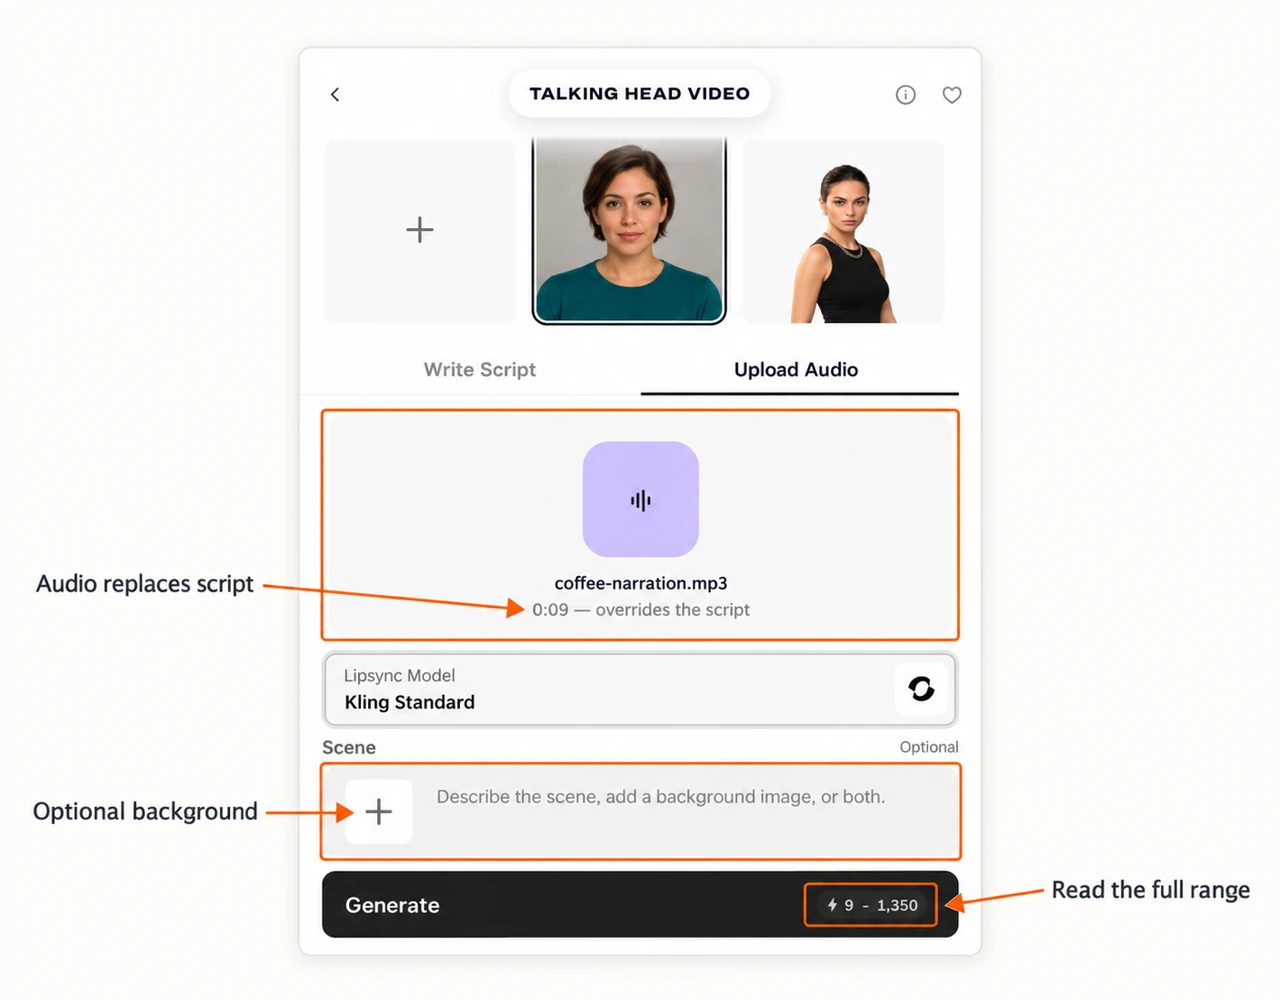
We attached coffee-narration.mp3, a 9.01-second recording from our Pika Speech example. Its words are:
A quiet morning starts with one small ritual. Pour your coffee, take a breath, and make a little room for yourself.
After upload, the panel showed 0:09 — overrides the script. The separate Voice menu disappears in this workflow because the recording supplies the voice. Use Replace audio to change the file, or the remove control to clear it.
Use a clean spoken recording with no competing music for your first setup. Keep the full sentence and its ending; trimming away the final syllable also removes what the model needs to match.
Step 3: choose a lip-sync model
Open Lipsync Model. The checked menu offered Kling Standard, Kling Pro, Seedance 2.5 and Wan 3.0. We selected Kling Standard for the prepared examples.
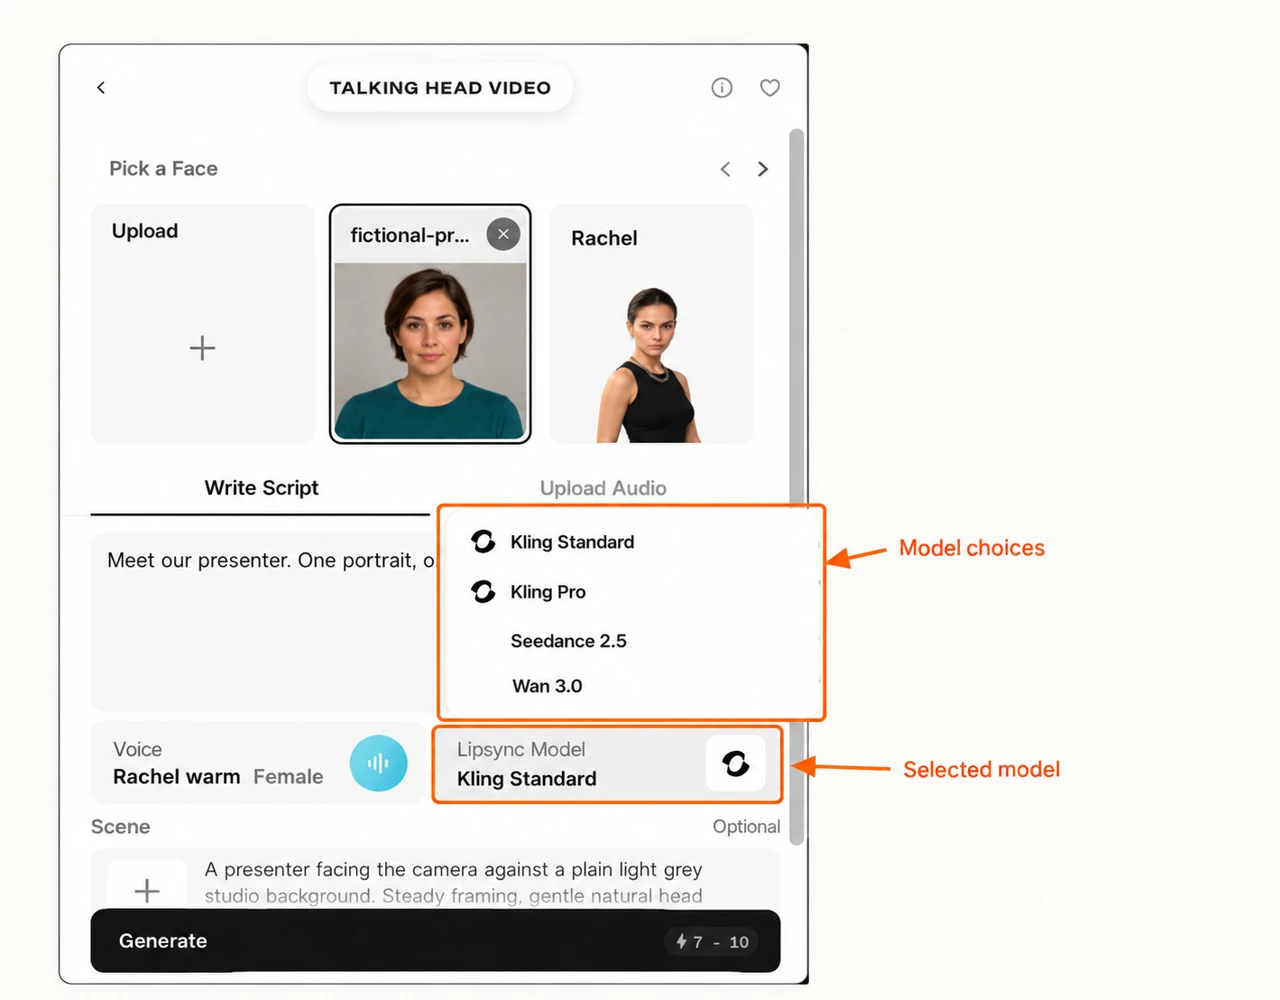
I would start by checking the estimate for the shortest useful audio. Changing the model can change the displayed cost. Keep the portrait and recording the same if you later compare models, so the comparison has one clear change.
For our nine-second audio setup, the page displayed these ranges:
| Selected model | Displayed estimate |
|---|---|
| Kling Standard | 9–1,350 credits |
| Wan 3.0 | 26–390 credits |
| Seedance 2.5 | 98–801 credits |
Those are the ranges shown by the interface, not measured charges for completed videos. We did not submit the latter two models. Do not infer a per-second price from the lowest number alone.
Step 4: set a scene, or keep the original portrait
Scene is optional. You can write a description, add a background image, or supply both. For the script example, I used:
A presenter facing the camera against a plain light grey studio background. Steady framing, gentle natural head movement.
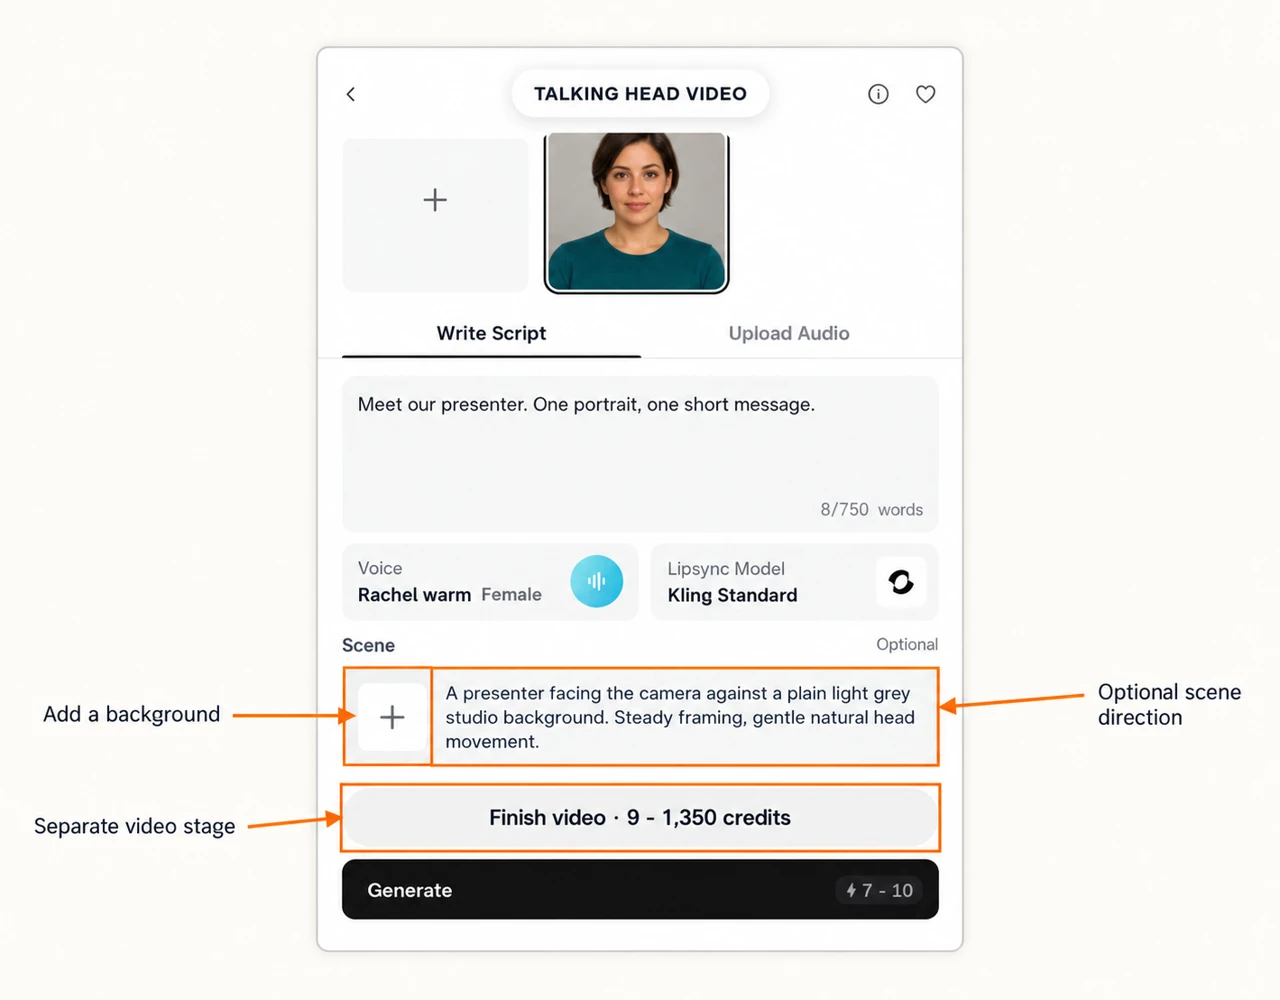
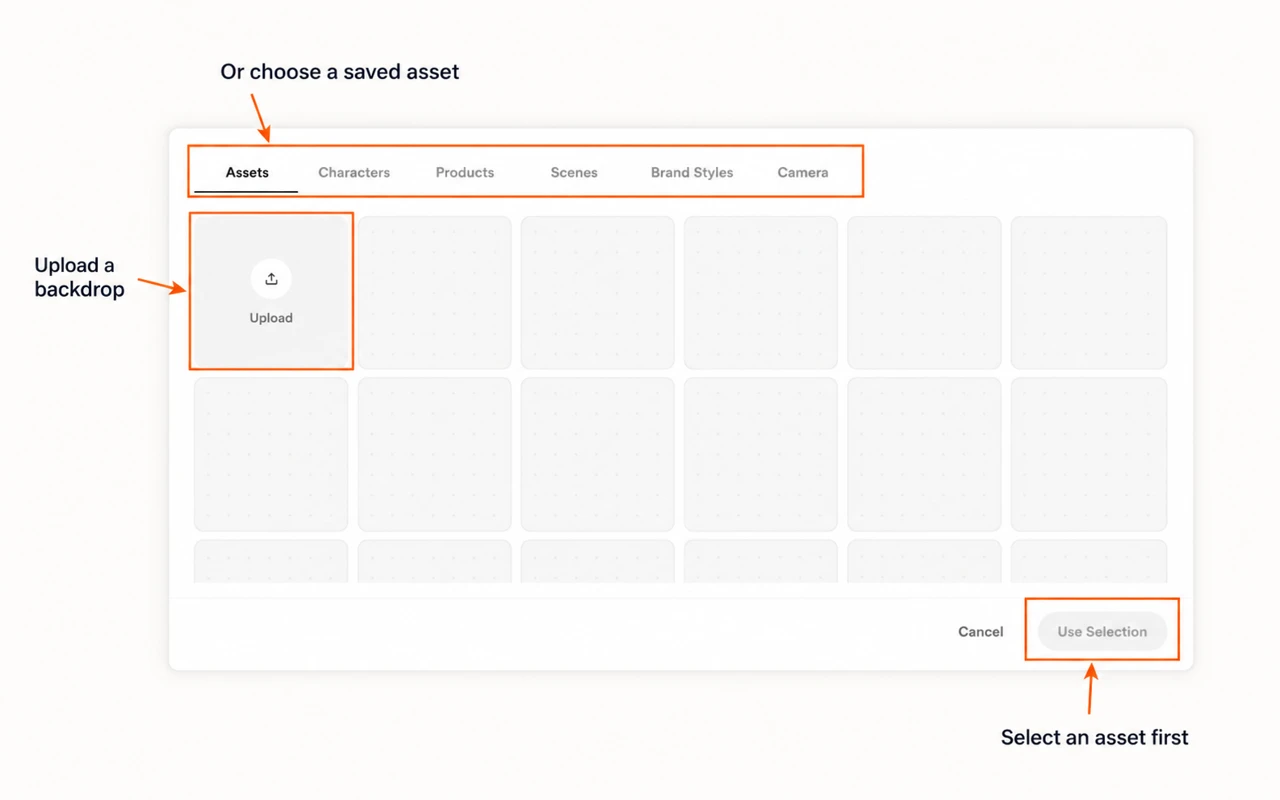
Press the + in the scene box to open its image chooser. It includes Assets, Characters, Products, Scenes, Brand Styles and Camera tabs. Use Upload for a local backdrop, or select a saved image and confirm Use Selection.
Our scene direction produced this prepared still. It cost 7 credits and was returned at 1024 × 1024. A scene still is a preparation asset, not a talking video.
For the uploaded coffee recording, we left Scene blank and attached no background image. Keeping the source portrait is the simpler example when a different location is unnecessary.
Step 5: review the full cost before finishing
The script-and-scene setup first showed Generate · 7–10 credits. In our preparation, Pika made a scene image for 7 credits and the narration for 1 credit. The project then displayed Finish video, with a separate 9–1,350-credit range.
Do not count the first estimate as the total video price. Review the prepared face and narration, check the selected model, and read the full Finish video estimate before submitting the lip-sync stage.
| Part of our script preparation | Confirmed charge |
|---|---|
| Scene still | 7 credits |
| Narration | 1 credit |
| Preparation total | 8 credits |
| Final lip-sync video | Separate charge; not included above |
For a fixed budget, check each stage separately. A range starting at 9 does not guarantee the job costs 9. If the full range exceeds your budget, settle the price before submitting.
The checked panel did not offer separate resolution, aspect-ratio, duration, batch-count or emotion sliders. Here, the spoken material controls the content and length; the face, voice workflow, model and optional scene are the main decisions.
Two examples you can copy
| Setting | Short introduction | Coffee presenter |
|---|---|---|
| Face | Our fictional portrait | Same portrait |
| Voice workflow | Write Script | Upload Audio |
| Words or file | Eight-word introduction above | coffee-narration.mp3 above |
| Voice | Rachel, warm, Female | Supplied by the recording |
| Lip-sync model | Kling Standard | Kling Standard |
| Scene | Plain grey studio description above | Blank; no background image |
These are two reproducible input setups. The narration and scene still on this page are preparation examples; they are not video previews.
Check the finished video before using it
When you have a completed video, watch it with sound. Check the opening consonants, the lips at the end of each sentence, the face during pauses and any changes in clothing or crop. A clear speaking face matters more than extra movement in a short presenter segment.
Open the video asset and use its downward-arrow download control to save it. Reprompt returns to settings; Retry submits another paid generation. Keep the source portrait and recording so you can revise one part without rebuilding the whole brief.
I would start with one face and one short sentence, then extend the message after the first result fits the intended edit. For preparing a separate voiceover, use our Pika Speech guide.