
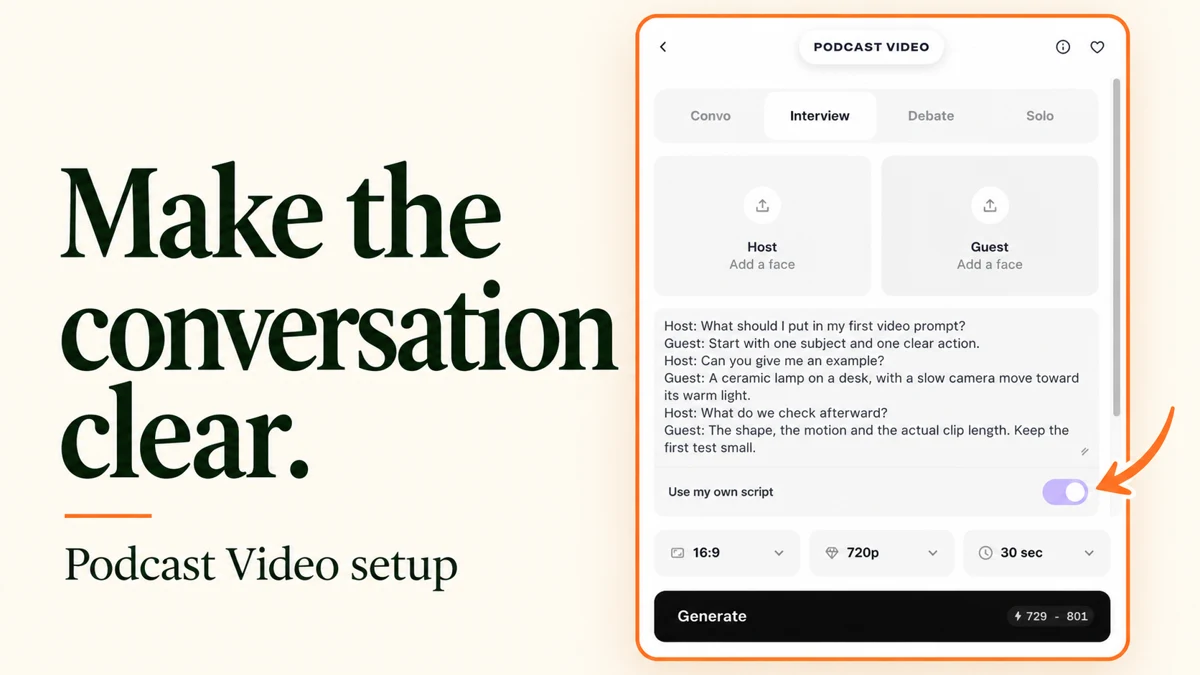
I explored Podcast Video with a short interview about writing a first AI-video prompt. We keep the discussion narrow: one question, one example and one way to check the clip.
This guide shows the settings and a script we prepared. We did not generate an episode or audio. The app’s large preview is Pika’s demo, not a result from our script. Interface checked 10 October 2026.
See the prepared interview setup
| Setting | Our example |
|---|---|
| Format | Interview |
| Speakers | Host and Guest; photo slots left empty in this walkthrough |
| Content mode | Use my own script on |
| Frame | 16:9 |
| Resolution | 720p |
| Length | 30 seconds |
| Set | Fresh Air |
| Model label | Seedance 2.5 Reference To Video |
What is Pika Podcast Video?
Podcast Video prepares a video conversation from a topic or a script. You choose the discussion format, cast photos, frame shape, resolution, length and a set, then add scene directions if needed.
I would use it for a short explainer conversation, a creator interview concept or a single-host segment. It is useful when the spoken exchange drives the clip. A story built around actions belongs in Short Film; one face speaking a prepared message may fit Talking Head Video.
Step 1: choose how the conversation works
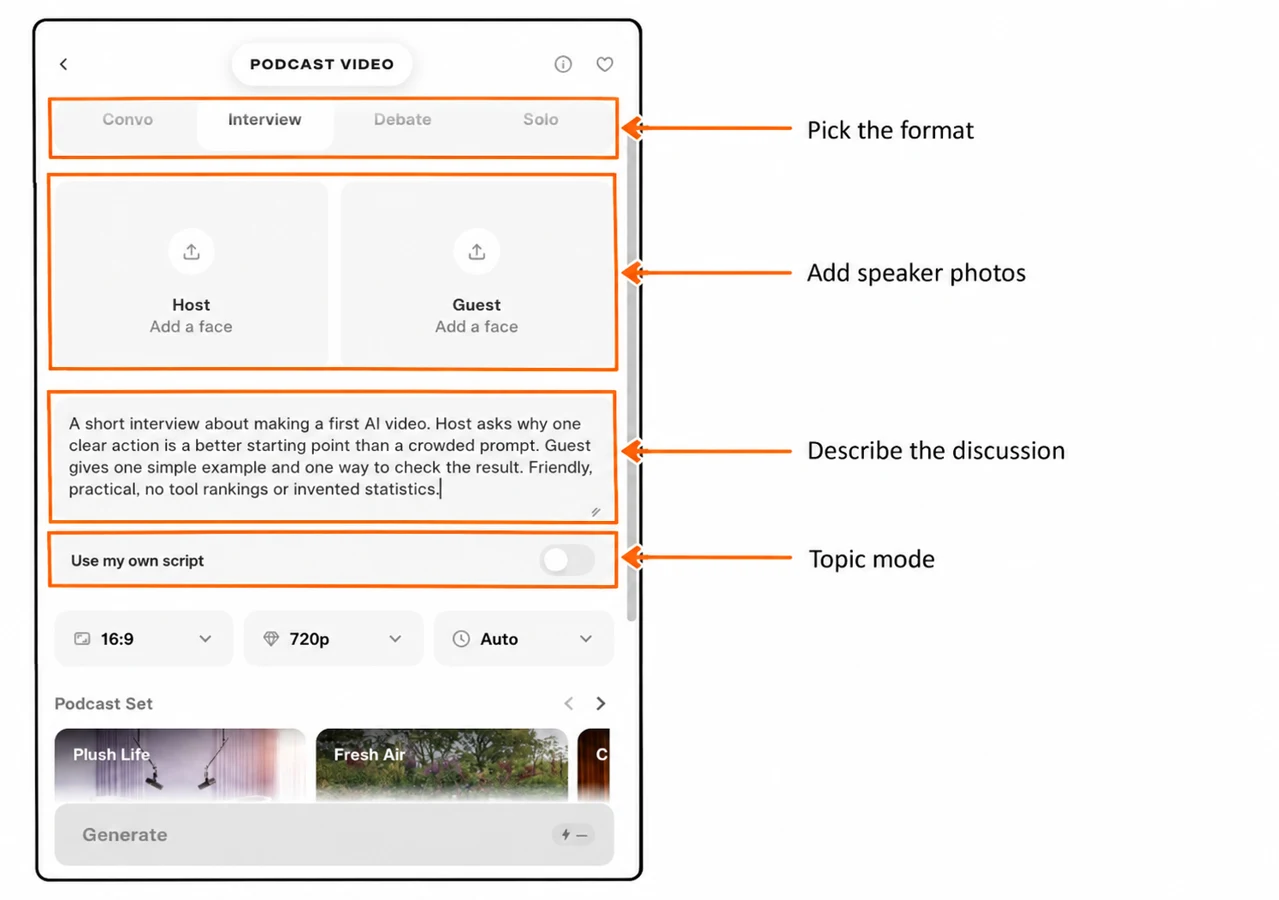
The format row has four choices. I checked the role labels as I switched between them:
| Format | Cast labels shown | When I would use it |
|---|---|---|
| Convo | Host and Co-host | Two presenters discussing one topic |
| Interview | Host and Guest | One person asks; the other answers |
| Debate | Host and Guest | Two clearly defined positions |
| Solo | Host only | One presenter explaining a point |
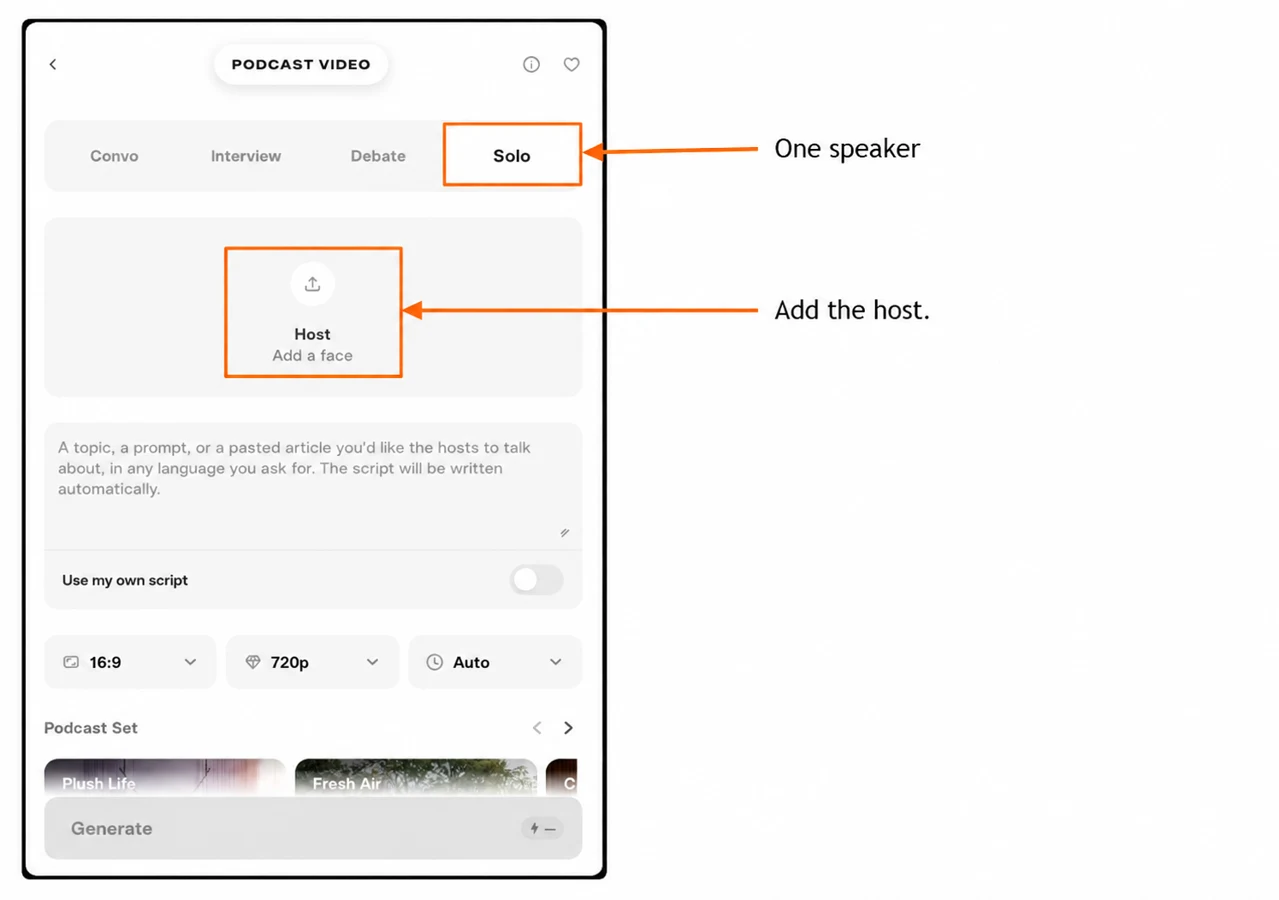
Changing a format changes the structure. For a debate, write both positions fairly and keep the question specific. For Solo, remove Guest lines from your script.
Step 2: add the speaker photos
Each cast tile has Add a face and an upload control. Add Host photo opens the image picker; it includes Upload and saved collections. Choose the correct portrait and confirm Use Selection. Repeat for the second role when the format has one.
Use a clear, front-facing portrait with the face fully visible. Pick distinct people for distinct roles. We inspected the picker but left both photo slots empty, so this page does not claim a tested cast or a finished likeness.
Step 3: choose a topic brief or your own script
Topic mode: let the app plan the wording
Keep Use my own script off and put a focused brief in Podcast content. Our example topic was:
A short interview about making a first AI video. Host asks why one clear action is a better starting point than a crowded prompt. Guest gives one simple example and one way to check the result. Friendly, practical, no tool rankings or invented statistics.
Say what the discussion should answer and what to leave out. We have not submitted this topic, so we have not checked the app’s drafted dialogue.
Script mode: prepare the lines yourself
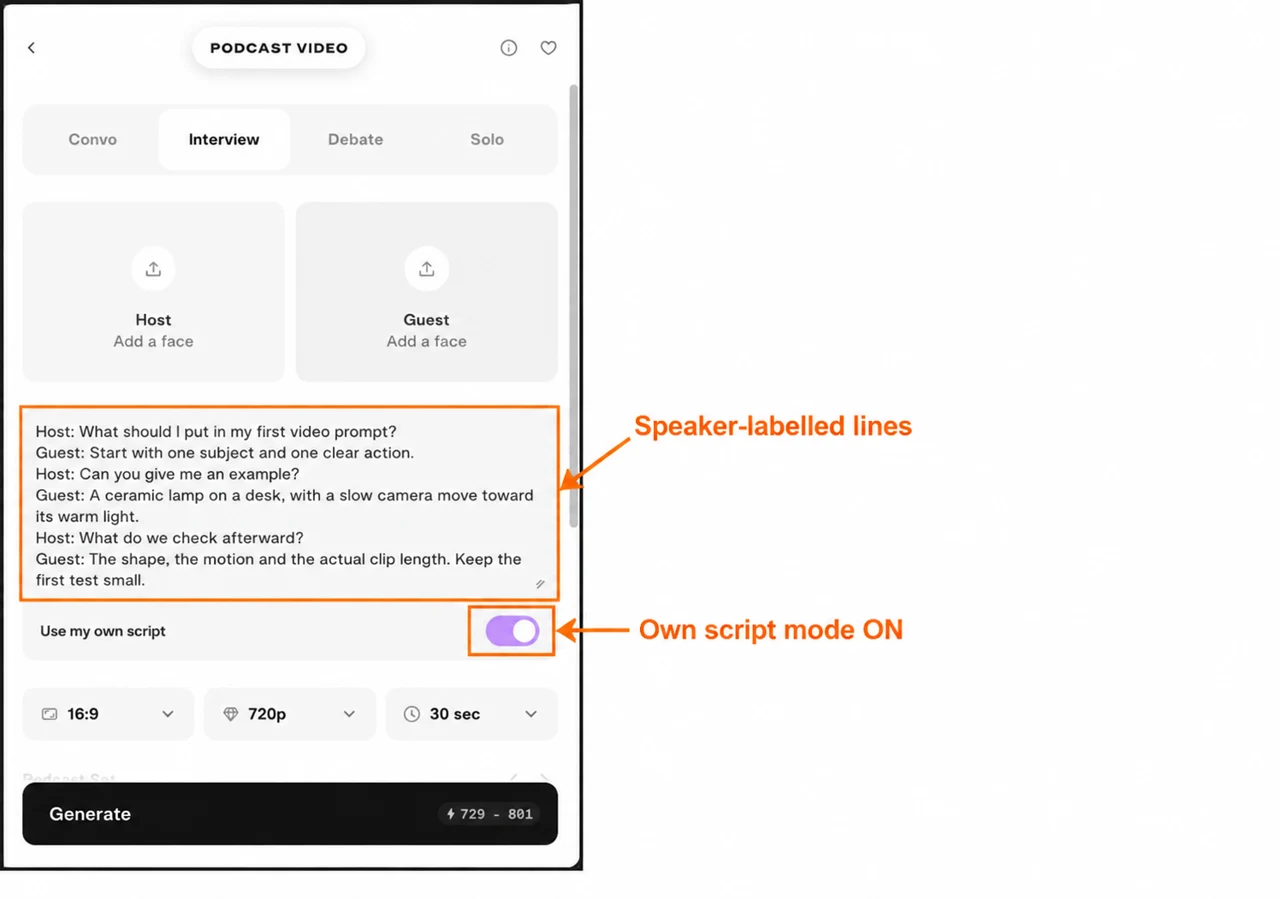
Turn Use my own script on. The same content box holds your script. I label each turn so the intended speaker is clear:
Host: What should I put in my first video prompt?
Guest: Start with one subject and one clear action.
Host: Can you give me an example?
Guest: A ceramic lamp on a desk, with a slow camera move toward its warm light.
Host: What do we check afterward?
Guest: The shape, the motion and the actual clip length. Keep the first test small.
Read it aloud before choosing the length. At 30 seconds this example may need brisk delivery; remove a question or choose a longer setting if you want pauses. Speaker labels are our writing convention, not proof that the app will reproduce every line exactly.
The text box also has a resize handle. Drag it when you need more room to review the turns.
Step 4: set the shape, resolution and length
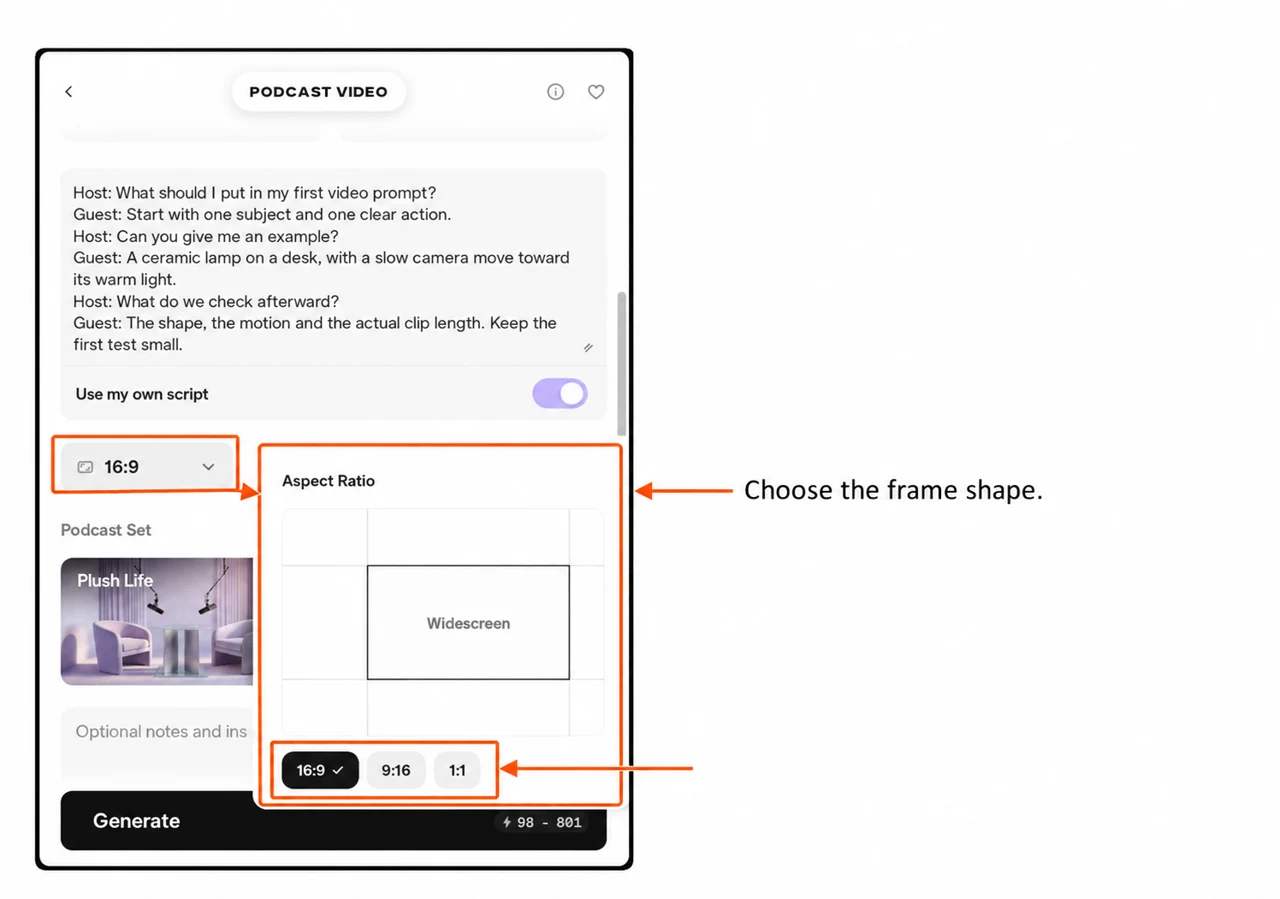
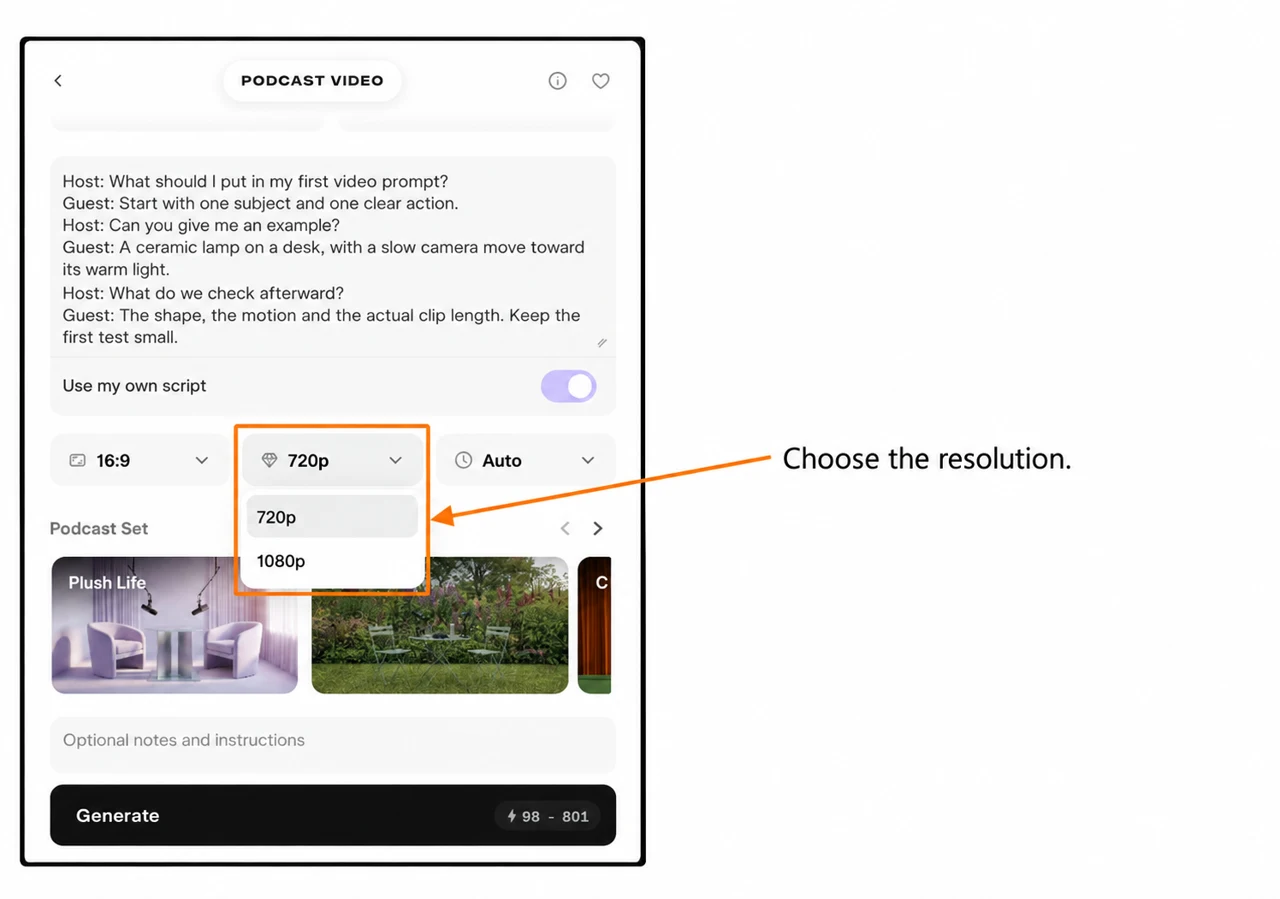
Choose the shape for the placement, then make sure the speaker arrangement fits. Two people side by side need more care in a vertical frame.
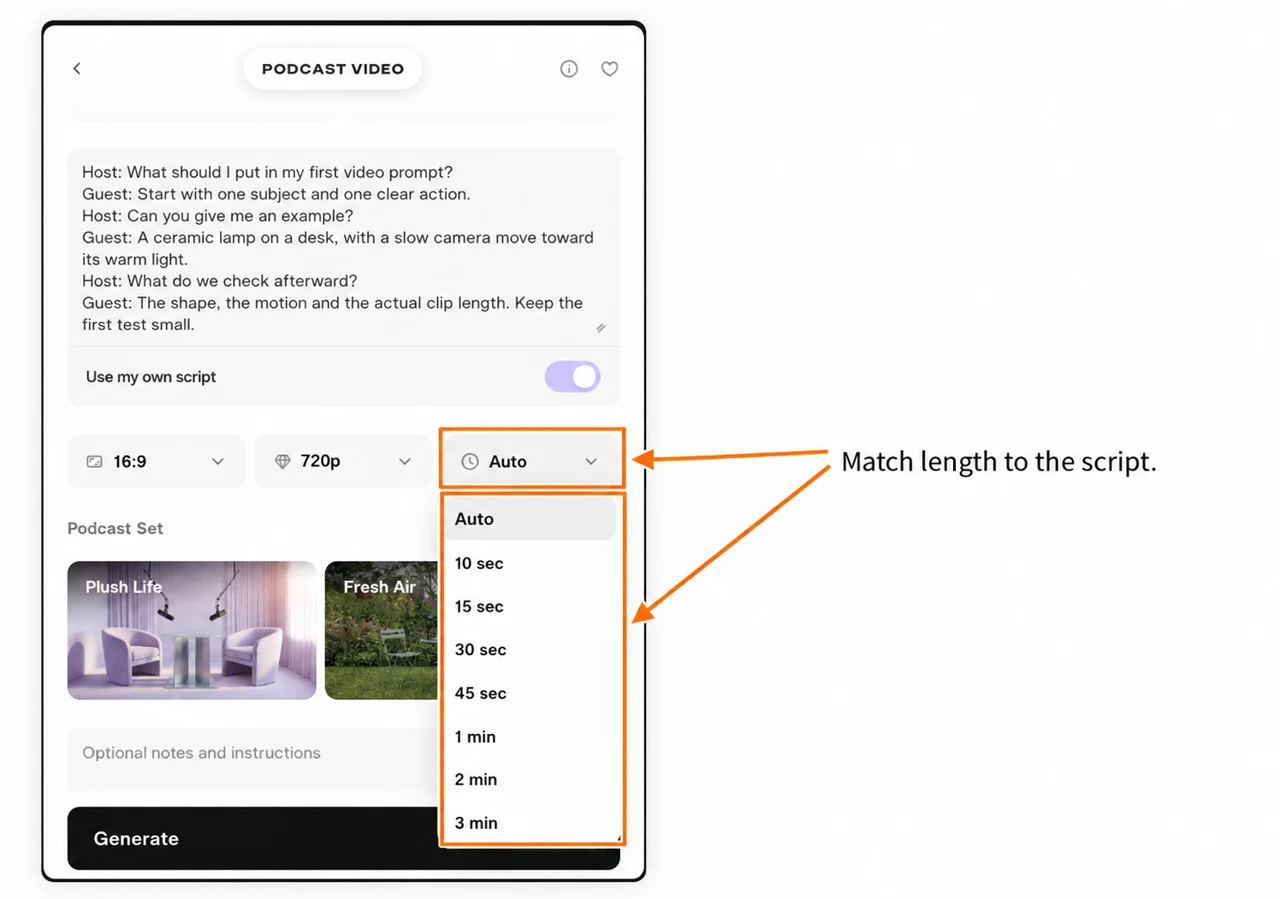
Length offered Auto, 10 sec, 15 sec, 30 sec, 45 sec, 1 min, 2 min and 3 min. We selected 30 sec for the prepared interview.
Auto leaves the timing choice to the app. A fixed length gives you a clear target, but it does not prove the finished file will have that exact duration. Check the download after a future generation.
Step 5: choose a set and give scene directions
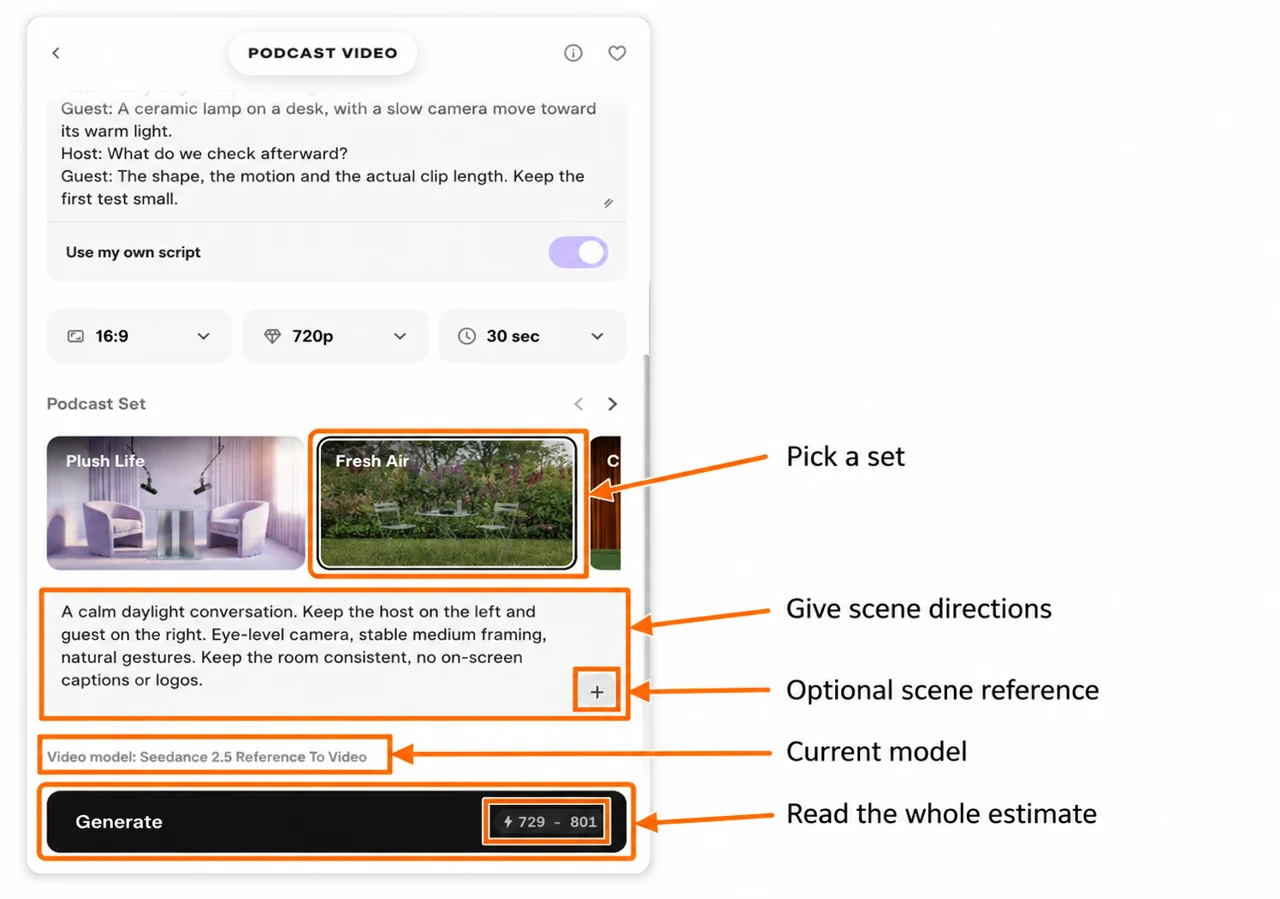
The set carousel offered Plush Life, Fresh Air, Curtain Call, Safari Lounge, Collector’s Edition, What’s Cooking, Wide Open and Round Lounge. Use its arrows to see the cards; the selected card has a border. The initial selection was Collector’s Edition, and I changed it to Fresh Air.
In Scene instructions, I wrote:
A calm daylight conversation. Keep the host on the left and guest on the right. Eye-level camera, stable medium framing, natural gestures. Keep the room consistent, no on-screen captions or logos.
Keep the notes compatible with the set. For a Solo clip, remove the guest arrangement. Describe the frame and movement rather than repeating the whole dialogue here.
Optional scene references
The plus button opens Add reference images. Its picker offers Upload or a saved collection; select the image and confirm Use Selection. We inspected it and attached nothing.
A scene reference explains the room or treatment. Cast photos identify the speakers. Keep those purposes separate so a background picture does not become an unintended cast reference.
Step 6: read the model and complete estimate
The checked form displayed Video model: Seedance 2.5 Reference To Video. We did not find a model dropdown, separate voice selector, music switch or lip-sync selector on this page. Use the available content and scene fields for directions rather than searching for controls the form does not show.
For our prepared Interview / own script / 16:9 / 720p / 30 sec / Fresh Air setup, Generate displayed 729–801 credits after the estimate settled. This is an estimate for that setup, not a charged amount or a price for every episode. Changes to settings may change the quote.
We did not press Generate. Before you do, review the cast, spoken lines, timing and both ends of the credit range. A low number in another configuration is not a guaranteed total for yours.
My pre-generation check
- The format matches the speaker roles.
- Each photo belongs to the intended speaker.
- Topic mode or script mode matches what you entered.
- The script makes one useful point and fits the selected length.
- The frame shape suits the intended placement.
- Scene notes agree with the chosen set.
- The full credit estimate fits the budget.
After a future render, listen to the entire clip and check speaker turns, names, lip movement and the downloaded duration before sharing it.