
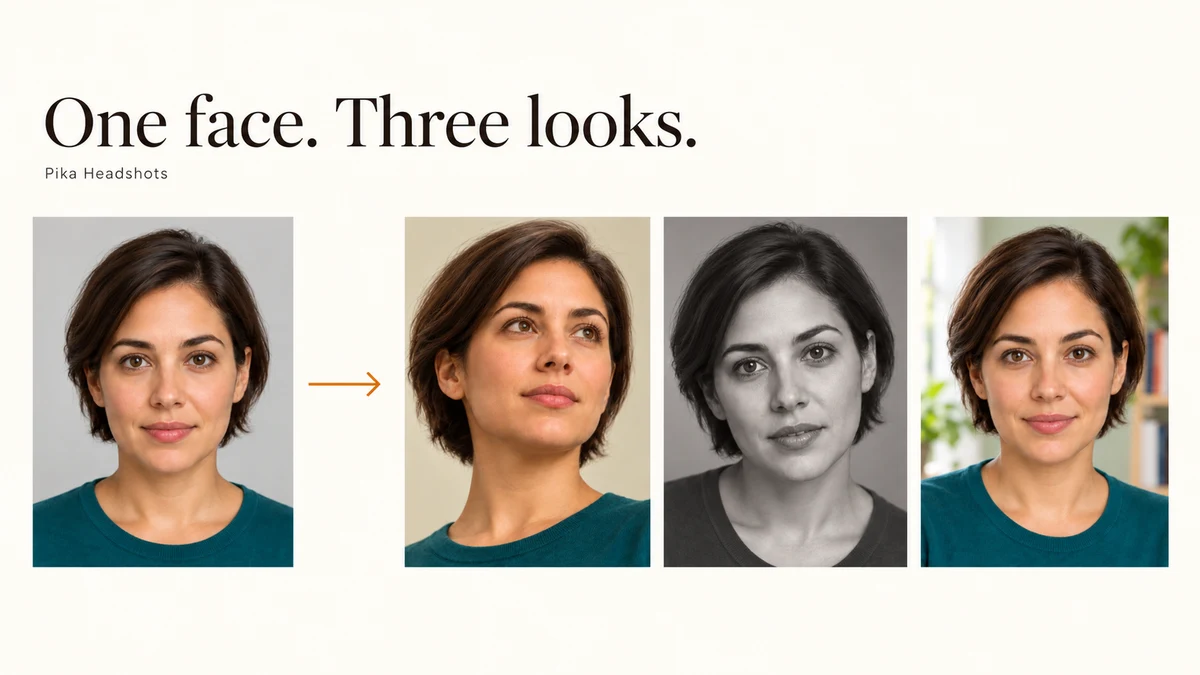
I used Pika Headshots to give one fictional portrait three different treatments: Cream Matte, Silver Screen and a setting I described myself. We kept the source photo the same so the lighting, crop and expression changes are easy to compare.
Each finished image cost 3 credits in this test, or 9 credits for all three. The Generate button estimated 2–4 credits per image. Interface checked 9 October 2026.
See the three portraits first
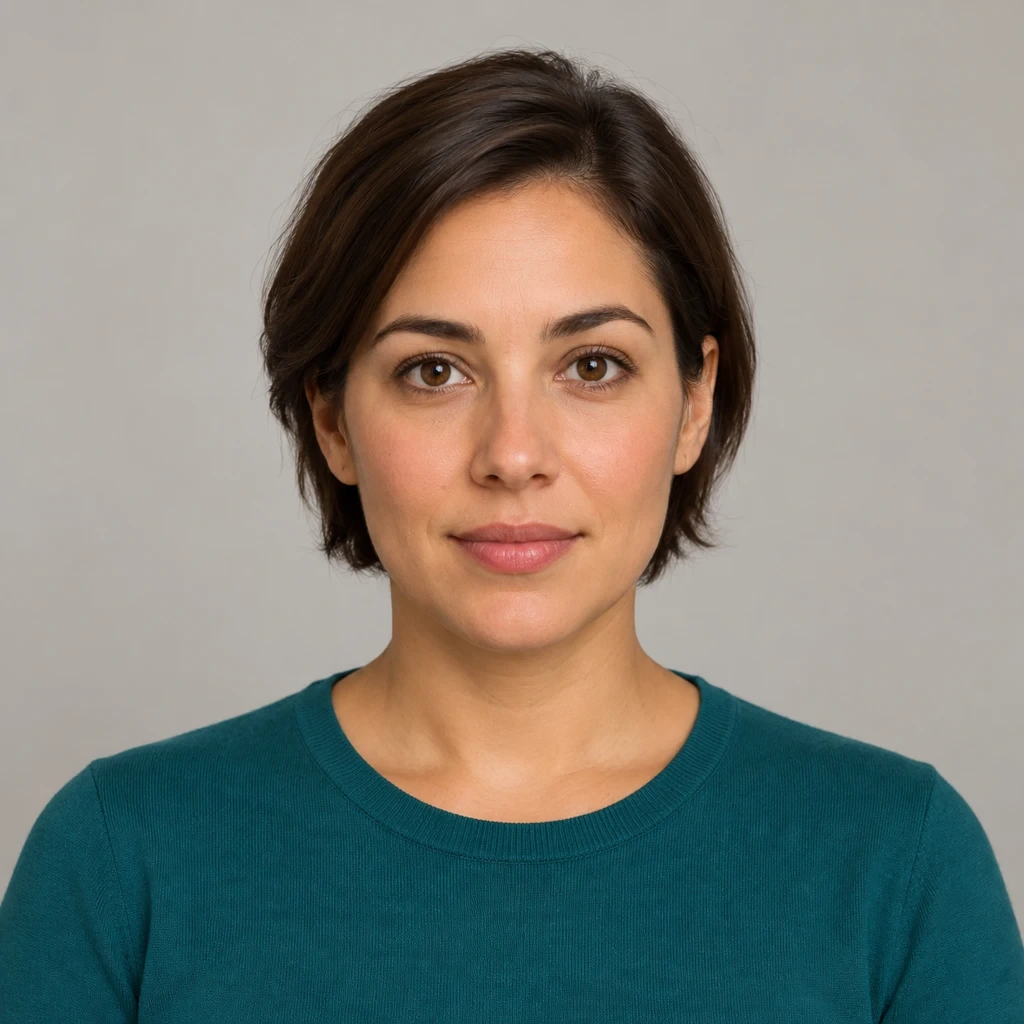
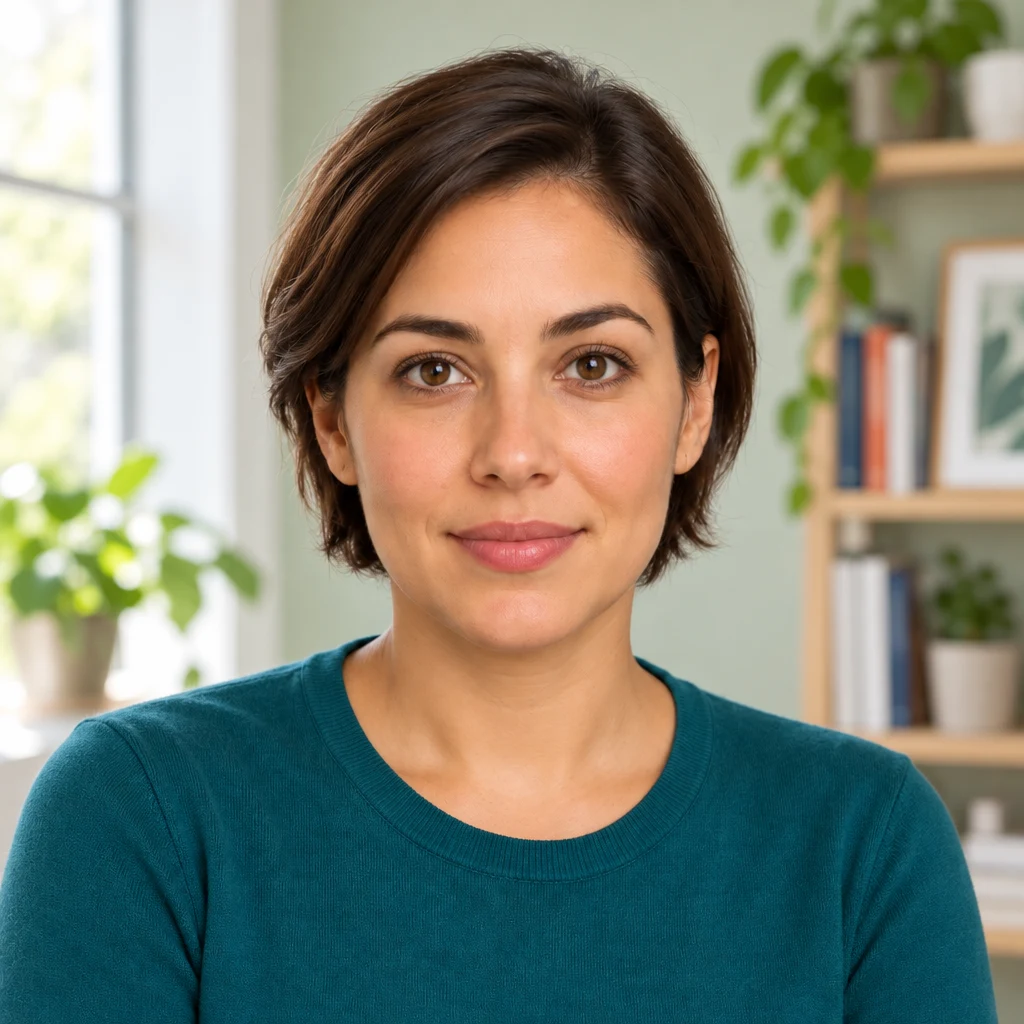
Download our source portrait to follow the same steps. Click any image to inspect it at full size.
What is Pika Headshots?
Headshots makes a new portrait from an uploaded photo. Templates supplies a preset treatment; Describe lets you write the setting yourself. It can change the pose and expression as well as the background.
I would start here for a creator profile, author photo concept or a set of portrait styles. We still need to compare the result with the source before using it as a real person’s profile photo: facial details can change.
| Your goal | My starting choice | What to check |
|---|---|---|
| Warm, simple portrait | Cream Matte | Crop and gaze suit your profile layout |
| Black-and-white portrait | Silver Screen | Face remains recognisable at thumbnail size |
| A specific room or lighting direction | Describe | Background, expression and clothing match the request |
| A small correction to an existing picture | Edit Image | A new headshot may change more than you need |
Step 1: upload a clear portrait
- Open Pika Headshots.
- Press Upload a photo and choose a file, or select a saved image in the chooser.
- Check the attached preview before selecting a setting.
The upload area lists PNG, JPG, WEBP and HEIC. I used the WebP portrait shown above. Choose a clear face with visible eyes, normal proportions and enough of the shoulders to explain the clothing.
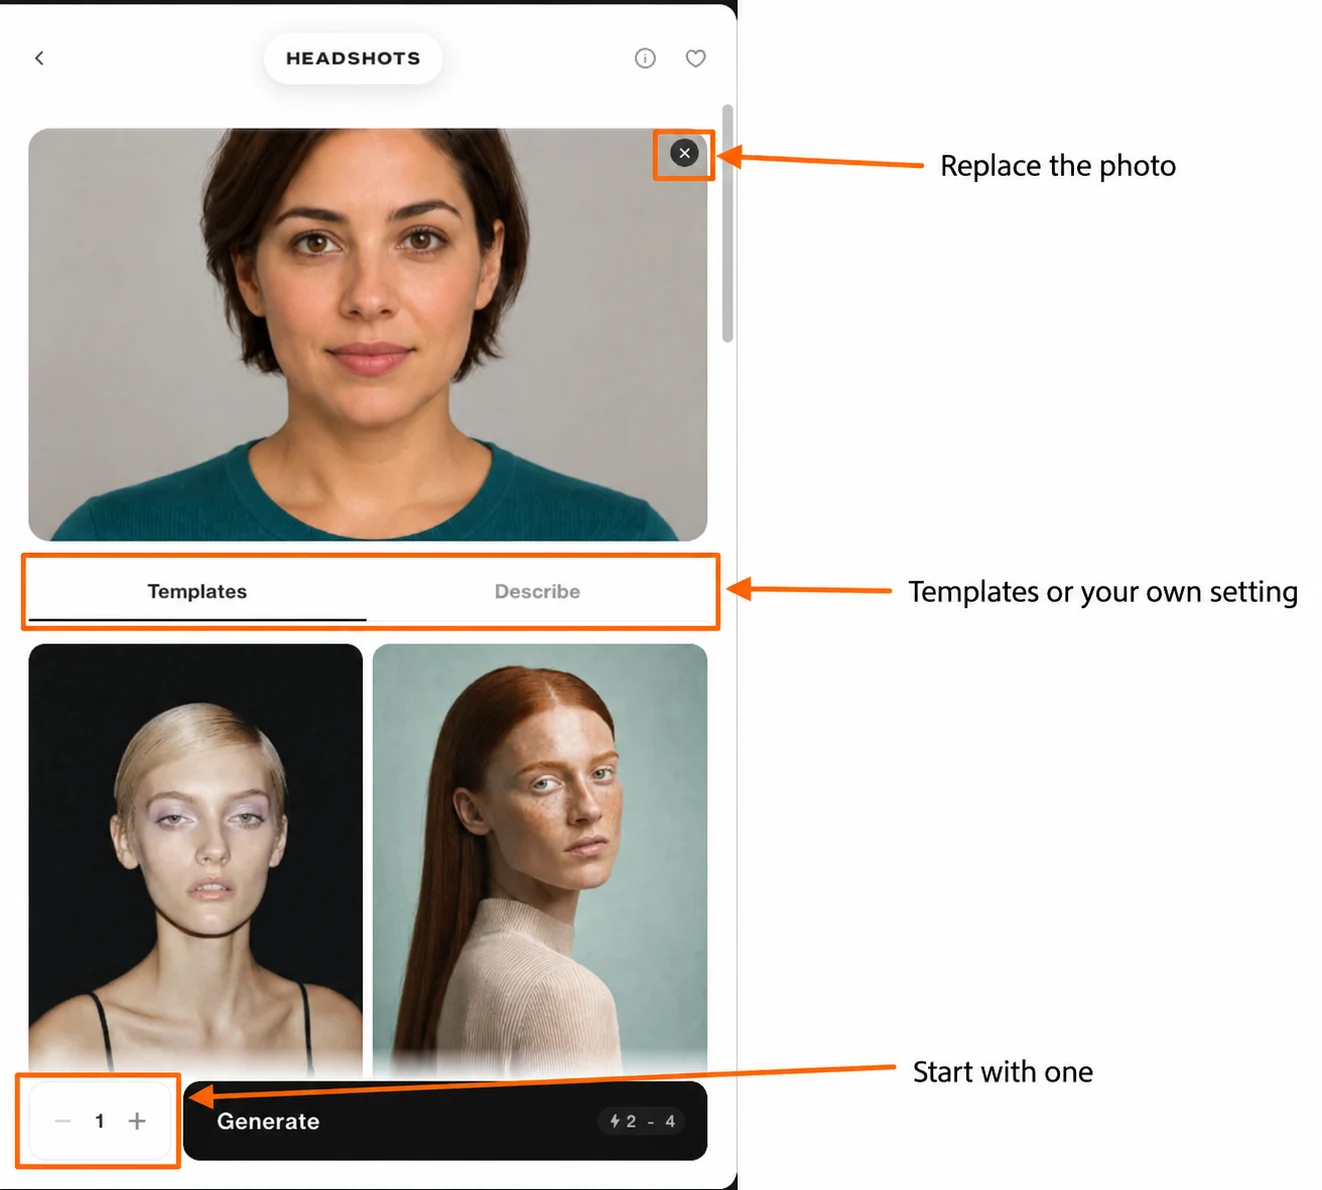
The chooser can show saved Assets, Characters, Products, Scenes and Brand Styles alongside upload options. These are places to find a source, not separate headshot styles. Use a portrait you have permission to edit.
Step 2A: choose a template
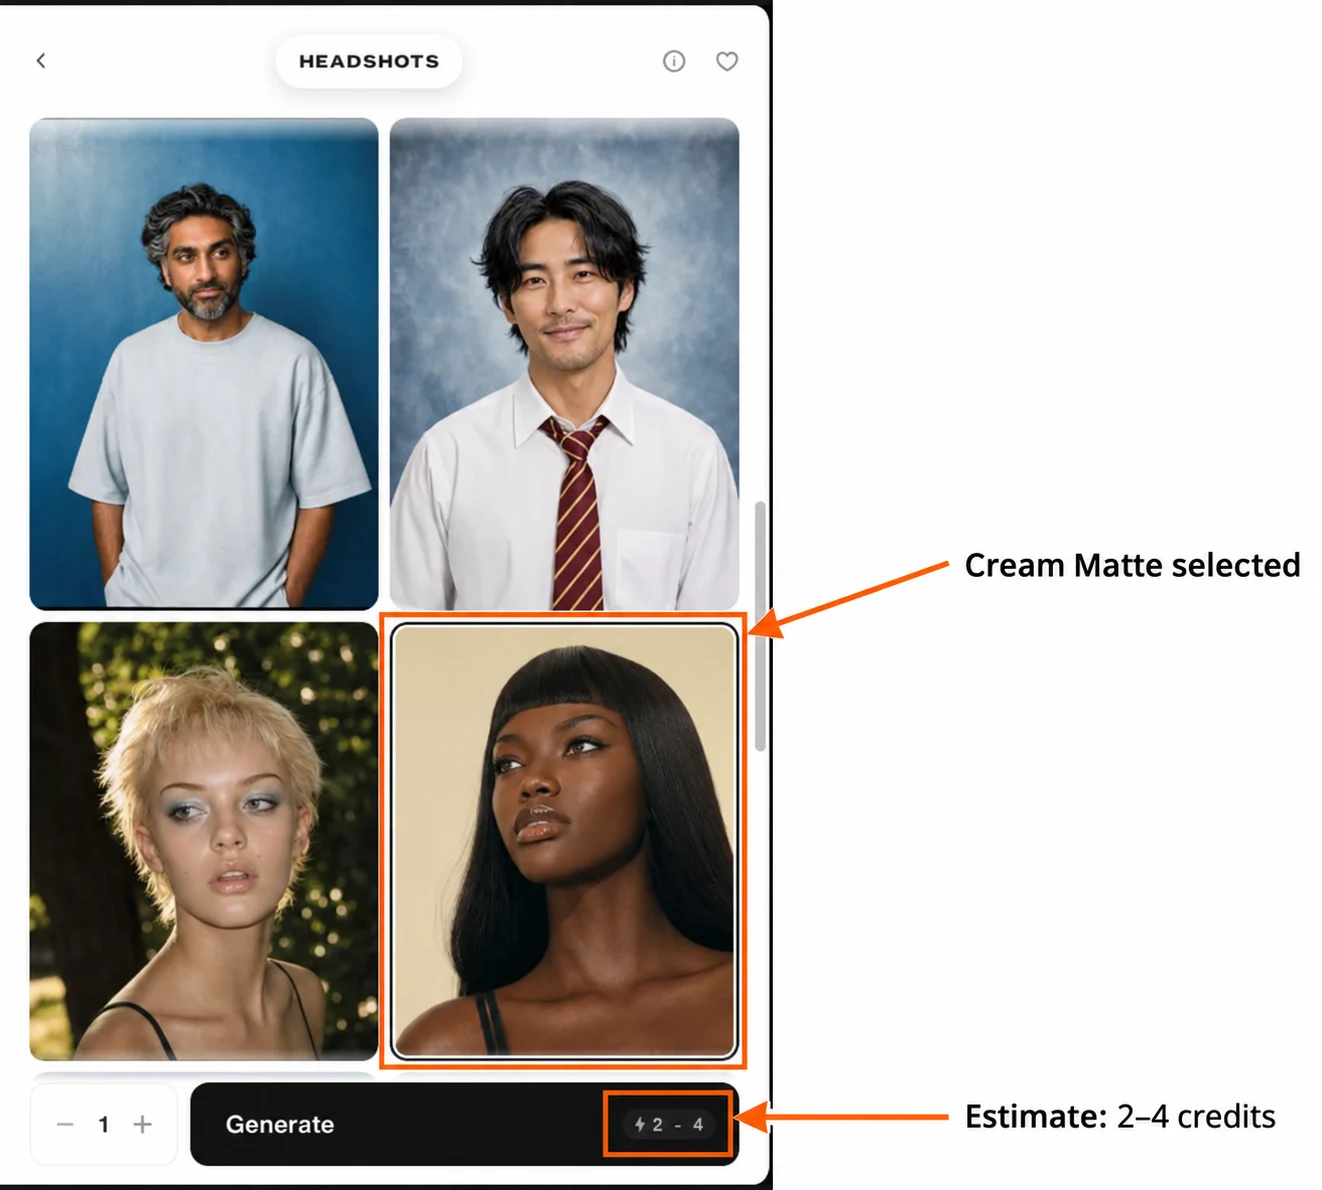
Stay on Templates, scroll the cards and click the treatment you want. Check the selected border. The card pictures are examples of the style; your attached portrait remains the source.
The checked list contained Flash Forward, Over the Shoulder, Silver Screen, Renaissance, Darkroom, Yearbook, Sun Kissed, Cream Matte, Head in the Clouds, Newsprint, Pinned Up, Portrait Sitting, Photobooth and Outtakes.
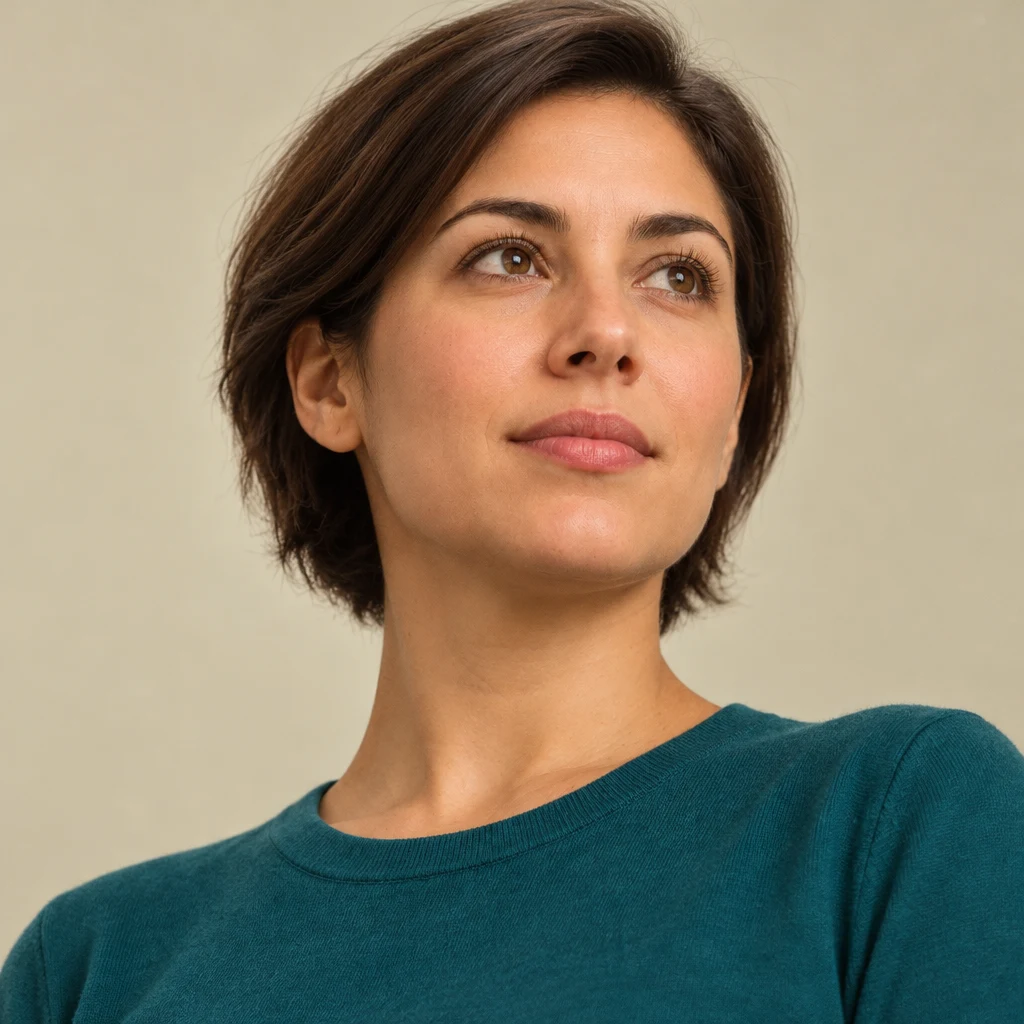
Our first take: Cream Matte
I selected Cream Matte, kept Generations at 1, checked the 2–4 credit estimate and pressed Generate.
I would pick this for a warm editorial portrait. For a direct-to-camera profile, check the gaze before choosing it.
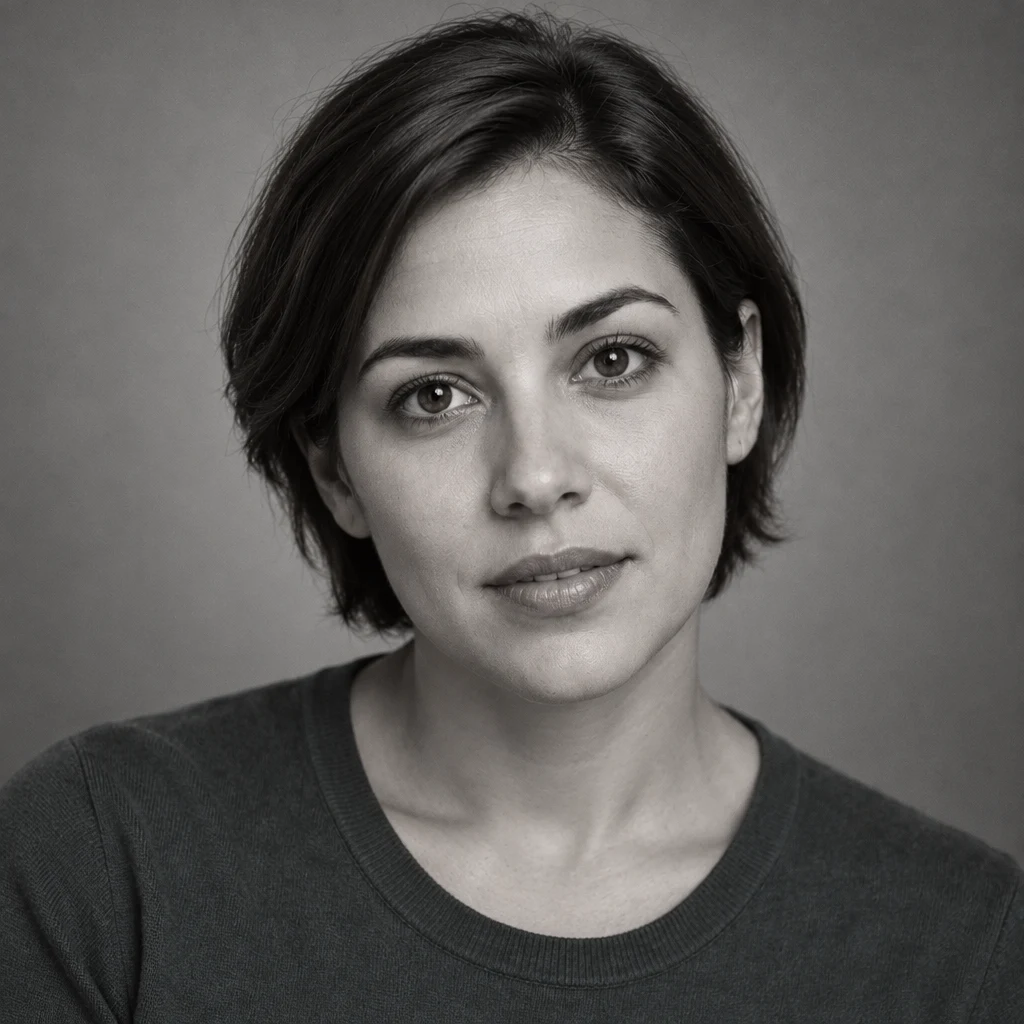
Our second take: Silver Screen
Keep the original source attached, select Silver Screen and make one image. I changed the template only; I did not feed the first result back into the app.
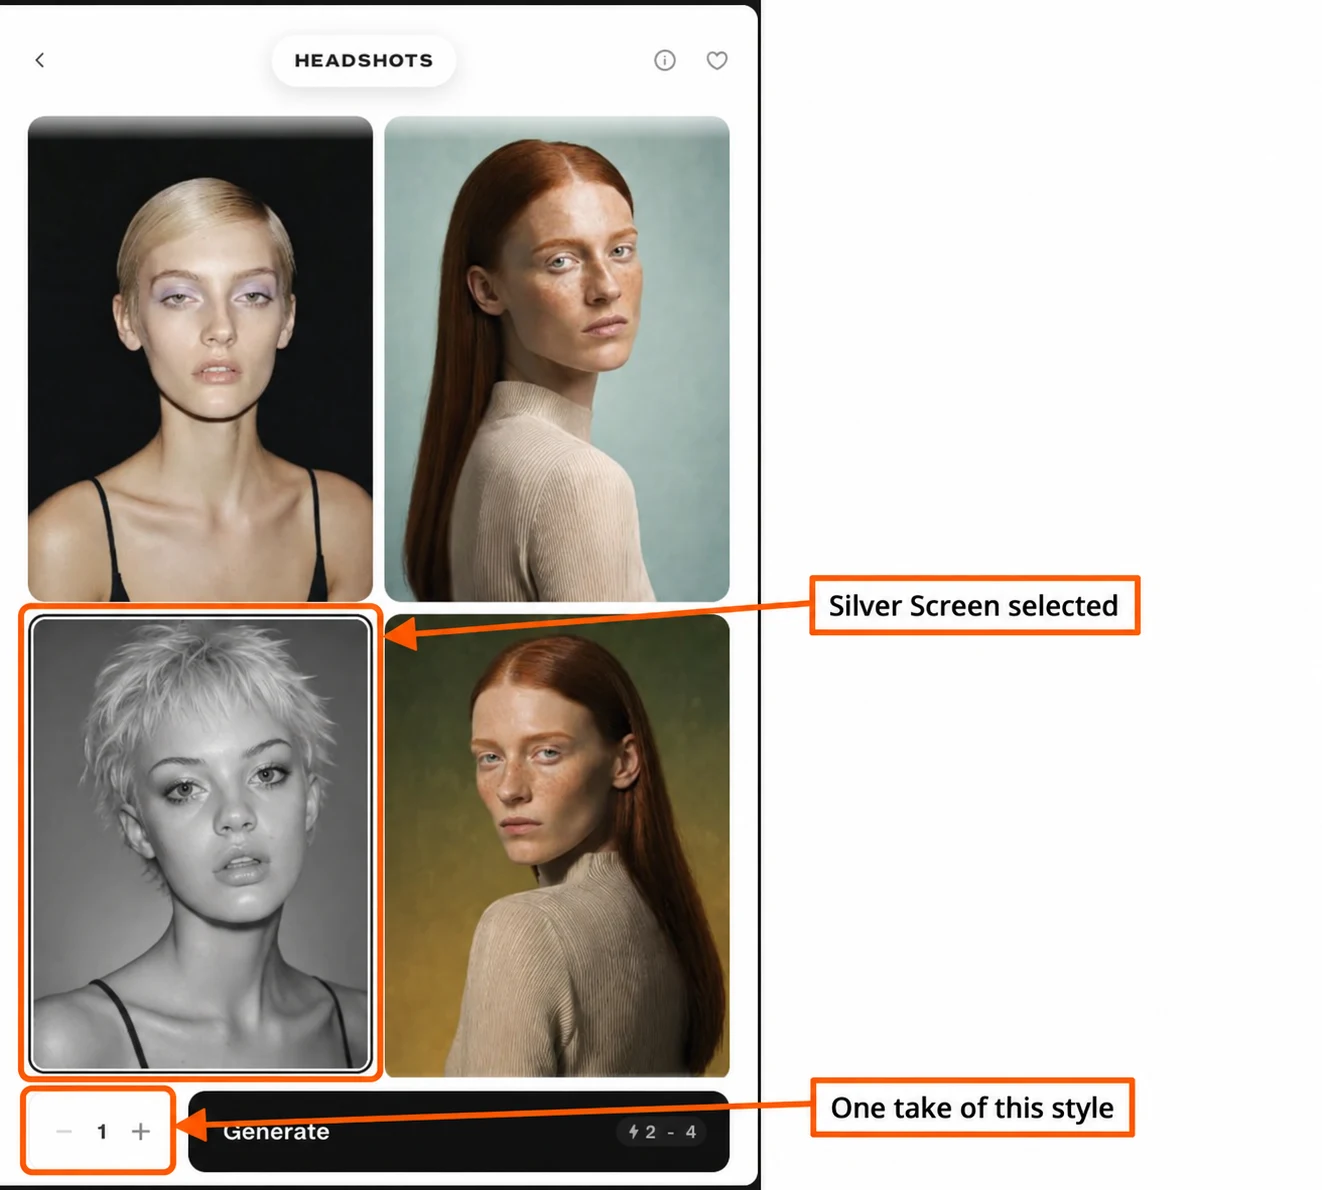
I would use this when the portrait needs a consistent monochrome treatment. Compare facial shape, hair and expression before publishing.
Step 2B: describe your own setting
Choose Describe and enter a concrete request. I named the room, light direction, framing, expression and details to keep:
A friendly professional head-and-shoulders portrait in a bright creative studio, facing the camera with a relaxed small smile. Soft daylight from a window on the left, pale sage wall and a softly blurred bookshelf behind. Keep the same short brown hair, facial features and teal crew-neck top. Eye-level camera, natural skin texture, no added glasses, no logos or text.
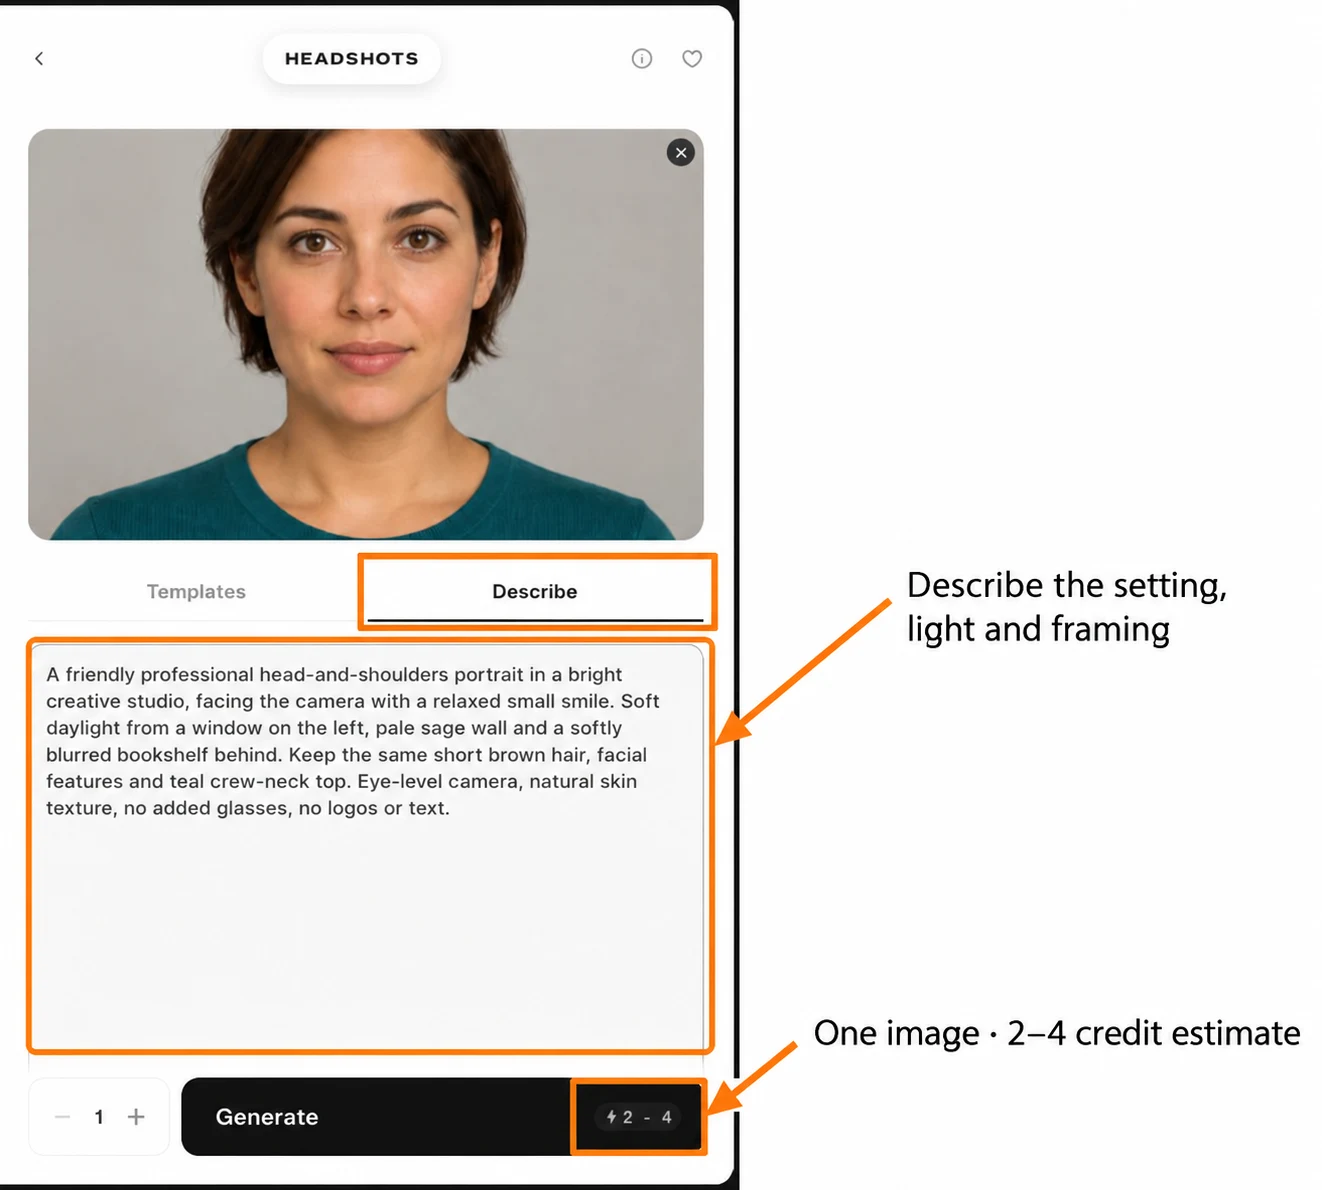
Keep Generations at 1, check the estimate and press Generate. Our custom request made this portrait:
The request asked for a pale sage wall; the result reads as a brighter neutral room with shelves and plants. I would treat colour wording as direction and judge the actual picture.
Step 3: understand the count and cost
Generations controls how many takes of the current setting you request. A count of 3 does not choose three different templates. We made three separate requests with the count at 1.
| Test | Count | Estimate before Generate | Finished cost | Download |
|---|---|---|---|---|
| Cream Matte | 1 | 2–4 credits | 3 credits | 1024 × 1024 image |
| Silver Screen | 1 | 2–4 credits | 3 credits | 1024 × 1024 image |
| Describe: creative studio | 1 | 2–4 credits | 3 credits | 1024 × 1024 image |
| Total | 3 images | — | 9 credits | Three separate files |
In this interface, changing the count to 2 showed a 4–8 credit estimate. We returned it to 1 before generating. There was no separate model, resolution, aspect-ratio or lighting dropdown in the checked form; the template or written setting supplies the direction.
Step 4: inspect and download
Open the finished image in the project feed, then use Download headshot in its detail view. Inspect the full-size face, hairline, ears, clothing and crop. Try the image in the actual circular or square profile layout before picking it.
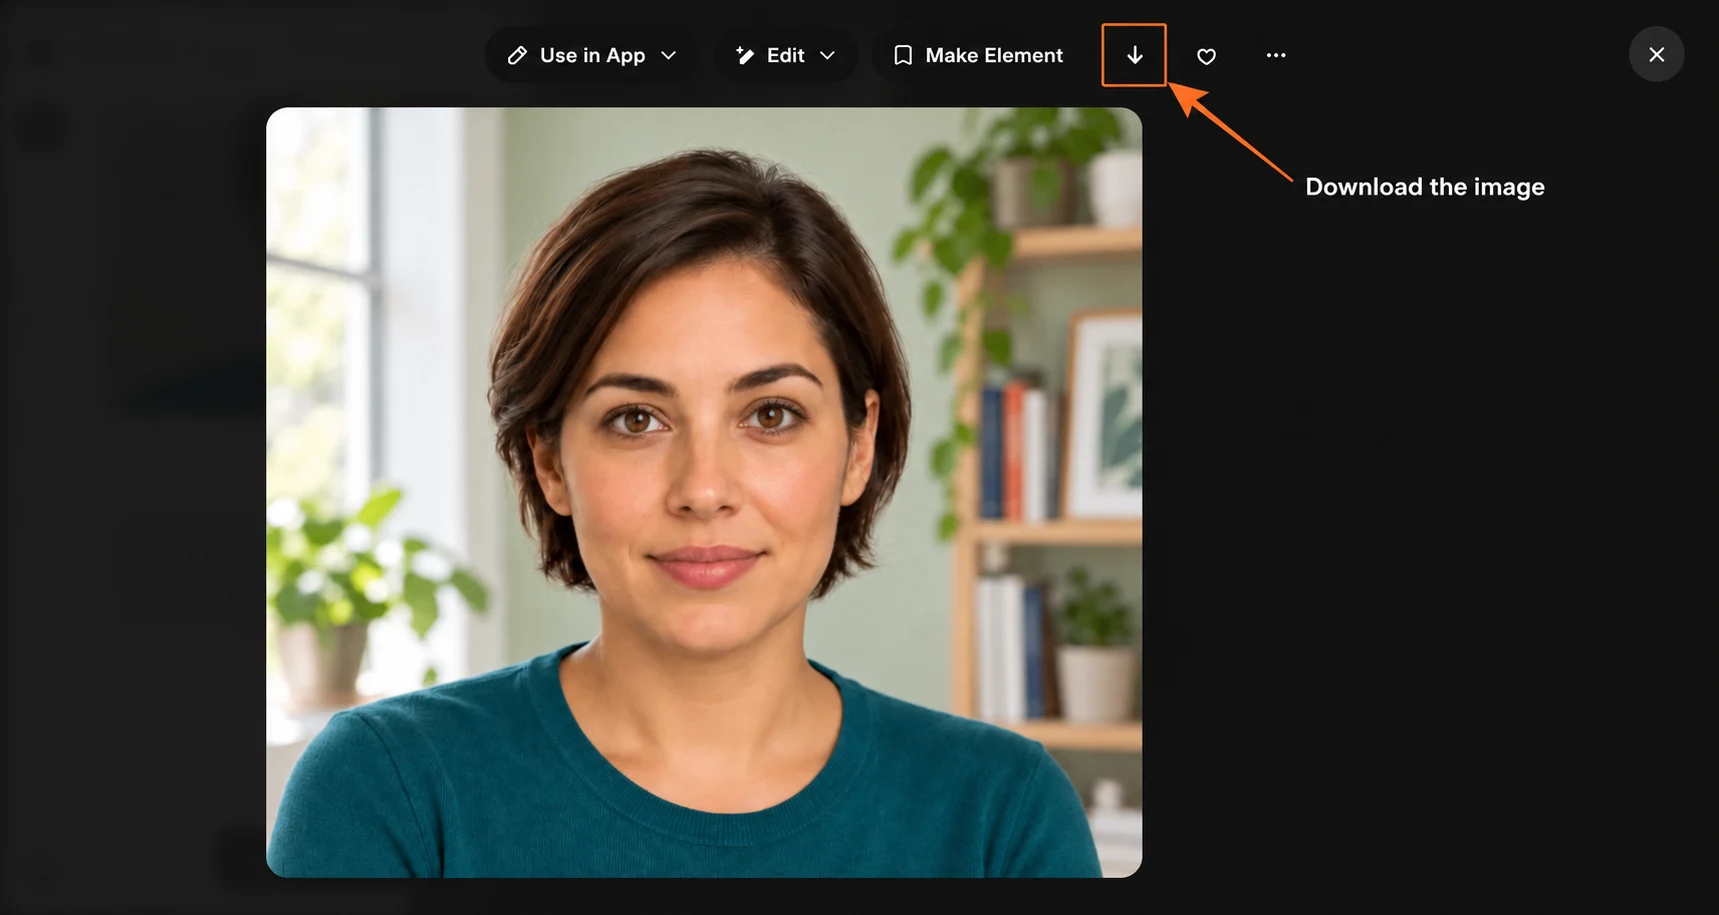
Reprompt brings the setup back for changes. Retry makes another paid take; it is not a free refresh. The project also offers Edit, Animate, Upscale and Expand as follow-up apps. Those actions are separate from the three headshot requests shown here.
I would keep the version that communicates the right tone and still resembles the source. If only one detail needs fixing, start with our Edit Image guide before spending on a completely new portrait.